Small Farm Plowing A Step-by-Step Tractor Guide

Successful plowing on a small farm starts with selecting the right plow for the compact tractor. A farmer must then carefully prepare the equipment and the field before starting. Following a systematic plowing pattern is the key to achieving consistent results. Proper maintenance after the job ensures all gear is ready for the next task. ✅
Step 1: Select the Right Plow
Choosing the correct plow is the foundational step for effective field preparation. A farmer must evaluate the tractor's power, the soil's composition, and the field's size. This careful selection ensures efficient work and protects the equipment from unnecessary strain.
Match Plow to Tractor Horsepower
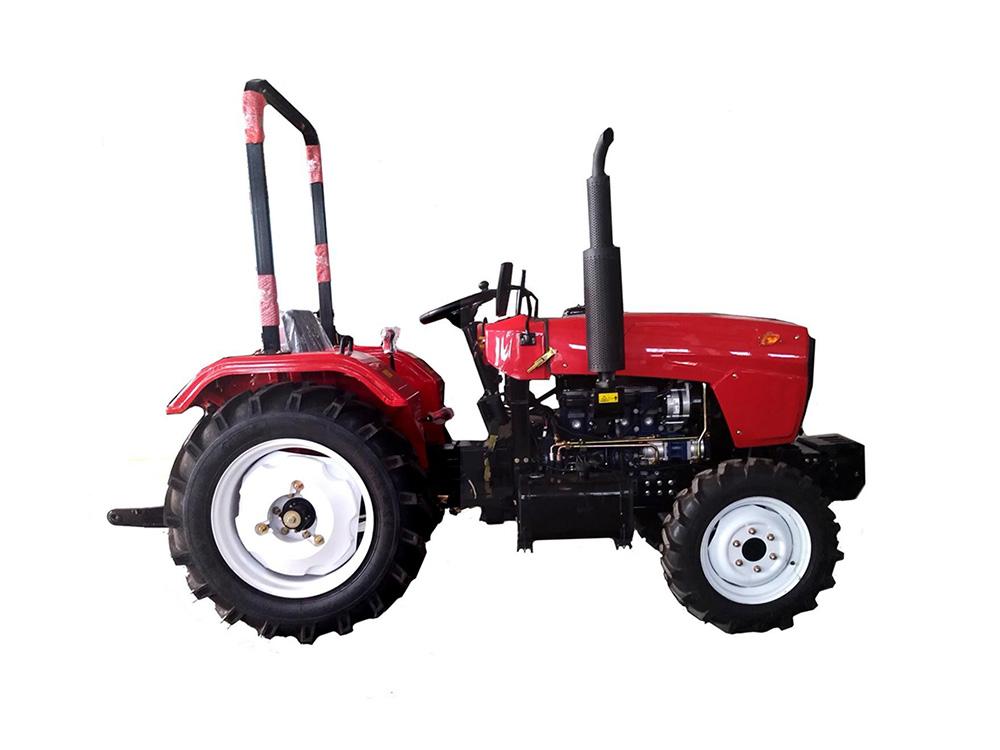
A plow must match the tractor's engine power. An oversized plow will overload the engine and transmission. An undersized plow wastes fuel and time. The Hoosan Machinery Versatile 4WD 25-50HP Compact Tractor series offers a horsepower range ideal for small farms. A 25hp model works well with a single-bottom plow. A 50hp model can handle a larger, two-bottom plow with ease. The tractor's manual provides specific guidance on implement weight and power requirements.
Consider Your Soil Type
Soil conditions directly influence plow choice. Different soils create different levels of resistance. A farmer should identify the primary soil type in the field.
- Sandy Soil: This soil is light and requires less power to turn.
- Loamy Soil: This is ideal for farming and presents moderate resistance.
- Clay Soil: This soil is heavy and dense. It requires a strong plow and more tractor horsepower.
Choose a Plow Size for Your Acreage
The size of the plow should correspond to the acreage of the field. Plows are measured by the number of "bottoms" or blades they have. Each bottom turns one furrow of soil.
Pro Tip: For small plots or gardens under a few acres, a single-bottom plow is very effective and maneuverable. For larger fields of five acres or more, a two or three-bottom plow saves significant time by covering more ground with each pass.
Step 2: Prepare Your Compact Tractor
Proper preparation of the compact tractor and plow is crucial for a successful plowing job. A farmer must correctly attach and adjust the implement. These adjustments ensure the plow performs efficiently and creates a uniform field finish.
How to Attach the Plow
Connecting the plow to the tractor requires precision and a focus on safety. The operator should follow a clear sequence for a secure link.
- The operator first reverses the compact tractor carefully toward the plow.
- He aligns the tractor's three-point hitch arms with the plow's connection pins.
- He attaches the two lower lift arms first, securing them with linchpins.
- Finally, he connects the top link and secures it.
Safety Note: Always turn off the tractor's engine before leaving the seat to attach or adjust any implement. This prevents accidental movement and ensures operator safety.
Set the Correct Plowing Depth
The correct plowing depth depends on the soil type and the crop to be planted. A good starting point is typically 6 to 8 inches. The operator uses the tractor's hydraulic lift control to raise and lower the plow. Many plows also have a gauge wheel. This wheel helps maintain a consistent depth across the field. The farmer adjusts the gauge wheel to prevent the plow from digging too deep in soft soil or riding too high on hard ground.
Adjust the Plow's Angle
A level plow is essential for creating even furrows. The operator must check two angles. First, he adjusts the top link of the three-point hitch. This levels the plow from front to back. The goal is for all plow bottoms to cut at the same depth. Second, he uses the lift arm adjustment cranks. These level the plow from side to side. A properly leveled plow ensures the soil turns over smoothly with each pass.
Step 3: Conduct Safety and Field Checks

A farmer prioritizes safety and preparation before starting any plowing work. He performs a thorough inspection of the equipment and the field. This careful review prevents equipment damage and ensures a smooth, efficient operation.
Essential Tractor Safety Inspection
A pre-operation check is a non-negotiable part of the process. The operator should inspect the Compact Tractor and plow for any potential issues. This routine builds a habit of safety and reliability.
- Check tire pressure for proper inflation.
- Inspect fluid levels, including engine oil, hydraulic fluid, and coolant.
- Confirm all lights and safety signals work correctly.
- Ensure the Power Take-Off (PTO) shield is securely in place.
- Examine the plow for loose bolts or worn parts.
Walk the Field Before You Plow
A farmer must walk the entire field before the first furrow is cut. This simple action identifies hidden dangers that could damage the plow or tractor. He looks for large rocks, tree stumps, deep ruts, or excessively wet areas. These obstacles can stop a tractor in its tracks or break a plowshare.
Field Tip: Use flags or stakes to mark any hazards found during the walk-through. This makes them easy to see and avoid from the tractor seat. 🚩
Plan Your Plowing Pattern
A well-defined plowing pattern saves time, fuel, and effort. The operator should decide on a strategy before starting. A common method involves creating "headlands," which are plowed strips at each end of the field. These headlands provide space to turn the tractor around. After plowing the headlands, the farmer works the main body of the field back and forth. This systematic approach creates a tidy, uniformly plowed field and makes the job much more manageable.
Step 4: The Plowing Process
With all preparations complete, the operator is ready to begin the plowing process. This stage requires focus and a steady hand. Following a consistent method ensures the entire field is turned over uniformly, creating an ideal seedbed for future crops.
Making the Opening Furrow
The first pass, known as the opening furrow, is the most critical. It establishes the line for the rest of the field.
- The operator drives the tractor to the starting point, aligning it with a distant landmark for a straight path.
- He engages the PTO if required by the plow model.
- He lowers the plow smoothly into the soil to the predetermined depth.
- The operator drives forward at a slow, steady speed, creating the first trench.
This initial furrow is often called a "dead furrow" because soil is thrown out to one side, leaving an open trench. A straight and consistent opening furrow makes the entire job easier.
Techniques for Overlapping Passes
Properly overlapping each pass creates a level, evenly plowed field. The key is to use the previous furrow as a guide.
For the second pass, the operator positions the tractor so that the right-side wheels drive inside the furrow just created. This technique accomplishes two things:
- It keeps the tractor driving in a perfectly straight line.
- It automatically positions the plow to overlap the previous pass correctly.
The plow then turns the next slice of soil, partially filling the furrow from the previous pass. The operator repeats this process, moving back and forth across the field.
Plowing Tip: The operator should frequently look back to check the plow's performance. He ensures the soil is turning over completely and the depth remains consistent. Adjustments to the top link or hydraulic lift may be needed as soil conditions change across the field.
How to Manage Turns
Efficient turns at the end of each row protect both the field and the equipment. The operator uses the unplowed headlands as a turning area.
The process for turning is simple and methodical:
- As the tractor approaches the headland, the operator begins to slow down.
- He lifts the plow completely out of the ground using the hydraulic controls before reaching the headland.
- He makes a wide, looping turn on the unplowed ground.
- He aligns the tractor for the next pass, placing the wheel in the last furrow.
- Once straight, he lowers the plow back into the soil and continues plowing.
Safety First: Never attempt to turn with the plow engaged in the soil. This puts immense strain on the plow, the hitch, and the tractor's frame, potentially causing serious damage. ⚠️
Finishing the Field
After plowing the main body of the field, only the headlands remain. The operator finishes the job by plowing these last strips. He drives the Compact Tractor around the perimeter of the field, turning the headland soil inward. This completes the plowing and leaves a clean, finished appearance. The final pass may be an irregular width, which is normal. The goal is to ensure all ground is turned.
Step 5: Post-Plowing Care and Next Steps
The work is not over when the last furrow is turned. Proper post-plowing care ensures the equipment is ready for the next task. A farmer also needs to evaluate the finished field and know how to address common issues for better results next season.
Clean and Maintain Your Equipment
Thorough cleaning and maintenance extend the life of the plow and tractor. Soil and moisture can cause rust and corrosion. The operator should follow a simple post-plowing routine.
- He uses a pressure washer or scraper to remove all soil and debris from the plow.
- He inspects the plowshares, moldboards, and frame for any damage or wear.
- He applies a light coat of oil or grease to bare metal surfaces to prevent rust.
- He stores the implement in a dry, covered location.
Maintenance Tip: This is also a good time to check the Compact Tractor's fluid levels and tire pressure again, ensuring it is ready for its next job.
Assess the Plowed Field
A farmer should walk the field one last time after plowing. He assesses the quality of the work. He looks for consistent furrow depth and an even surface. The soil should be well-turned, with most of the surface residue buried. This inspection helps identify any adjustments needed for future plowing. A well-plowed field provides an excellent seedbed and promotes healthy crop growth.
Troubleshoot Common Plowing Issues
Even experienced operators encounter problems. Knowing how to troubleshoot saves time and frustration. The farmer can identify the cause and apply a quick fix.
| Problem | Possible Cause | Solution |
|---|---|---|
| Uneven Furrows | Plow is not level side-to-side. | Adjust the tractor's lift arm cranks. |
| Plow Won't Penetrate | Soil is too hard or plow is dull. | Wait for moisture or sharpen/replace plowshares. |
| Poor Soil Turnover | Plowing speed is too fast or slow. | Adjust speed to find the optimal turnover rate. |
A farmer now has the essential knowledge for successful small farm plowing. This guide provides a clear path for an effective and safe experience. Consistent practice builds a farmer's skill and confidence, preparing them for the seasons ahead. Every pass through the field improves their mastery of the task.
FAQ
How often should a farmer plow a field?
A farmer typically plows a field once annually. He does this in the fall after harvest or in the spring before planting the next season's crops.
Can a farmer plow wet soil?
A farmer should avoid plowing wet soil. This action creates large, hard clumps. It can damage the soil structure and make future planting very difficult.
See Also
Essential Introduction to Frame Plate Kits for Automotive Structural Reinforcement
Unveiling Five Optimal Applications for Single Stage Rotary Vane Vacuum Pumps
Understanding Plate Heat Exchangers: A Comprehensive Step-by-Step Operational Guide
Navigating Power Transformer Selection: An Introductory Handbook for Beginners
Diverse Nozzle Solutions: Insights for Gardeners, Bioprinters, and Lubrication Professionals