Simple ways to add outdoor wood paneling to your backyard in 2025
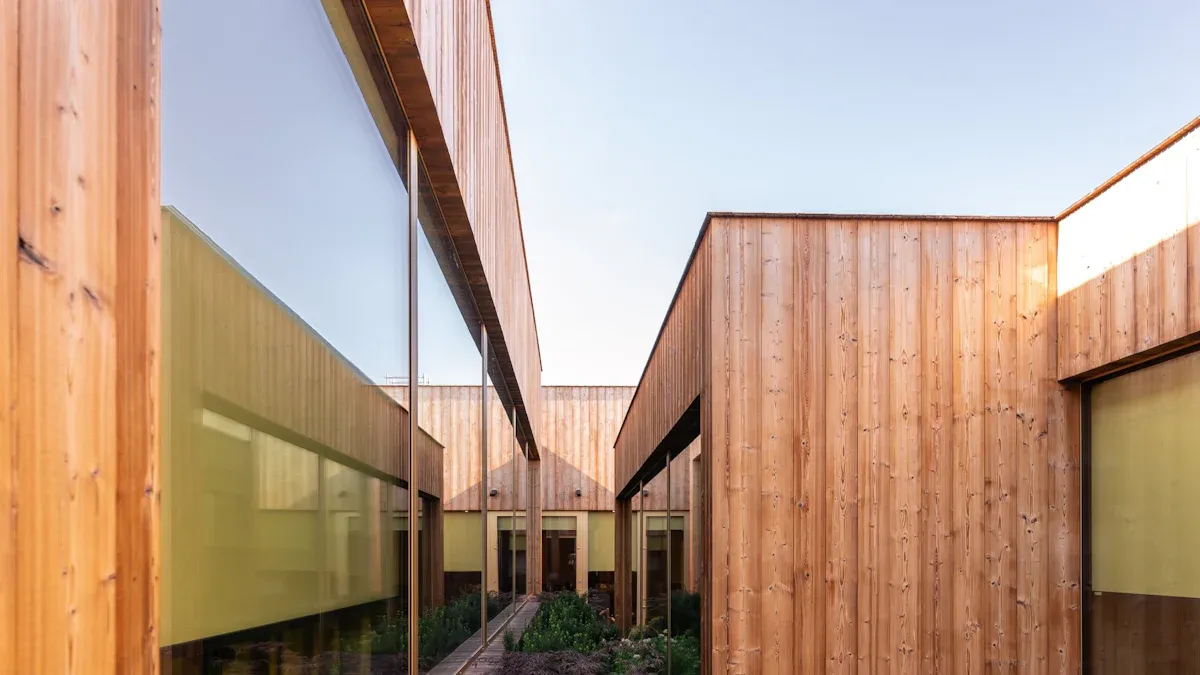
Have you ever looked at your backyard and wished it felt more private and inviting? Outdoor wood paneling offers a quick way to boost both the beauty and value of your space. Many homeowners love how it creates a peaceful atmosphere, adds natural warmth, and fits almost any style. Recent studies even show that adding features like this can make your outdoor area feel like an extension of your home, sometimes doubling your investment in the right climate.
Key Takeaways
- Outdoor wood paneling enhances privacy and beauty in your backyard, making it feel like an extension of your home.
- Choose the right materials for durability and style. Options like fiber cement and composite wood require less maintenance and last longer.
- Proper preparation is key. Measure your space, cut panels accurately, and install a moisture barrier to protect your wood.
- Regular maintenance, including cleaning and sealing, keeps your wood panels looking great and extends their lifespan.
- Follow safety guidelines when working with tools. Always wear protective gear to ensure a safe and successful project.
Outdoor Wood Paneling: What You Need to Get Started
Essential Tools for Outdoor Wood Paneling
Before you start your project, you need the right tools. You don’t want to get halfway through and realize you’re missing something important. Here’s a simple checklist to help you get ready:
- Tape measure
- Level
- Circular saw or miter saw
- Drill and drill bits
- Hammer or nail gun
- Safety goggles and gloves
- Stud finder
- Caulk gun
Tip: Always wear safety gear when cutting or drilling wood. It keeps you safe and helps you focus on the job.
You can find most of these tools at your local hardware store. If you don’t own a saw or nail gun, you can rent them for a weekend. This saves money and space in your garage.
Choosing the Right Materials
Picking the best materials for Outdoor Wood Paneling makes a big difference. You want something that lasts and looks great in your backyard. Let’s compare some popular options:
| Material | Advantages | Suitability for Climates |
|---|---|---|
| Fiber Cement Panels | Extremely durable, low maintenance, fire-resistant, non-combustible | Ideal for wildfire-prone areas, lasts 30-50 years |
| Metal Siding | High durability, requires little maintenance, resistant to rot and pests | Suitable for extreme weather conditions |
| Composite Wood Slat Panels | Mimics wood, superior durability, moisture protection, fire resistance | Withstands harsh weather without warping |
| Natural Wood Panels | Customizable, aesthetic appeal, but requires frequent maintenance | Prone to moisture damage and pests, higher long-term costs |
If you love the look of real wood, cedar and redwood are popular choices. Here’s a quick look at costs:
| Type | Average Cost per Sq. Ft. |
|---|---|
| Cedar | $3–$30 |
| Pine | $1–$5 |
| Redwood | $4–$20 |
| Cypress | $5–$12 |
| Hardwood (Teak, Ipe, Cumaru) | $5–$20 |
Most homeowners spend between $7,000 and $23,000 to install wood siding. The average cost is about $12,500. Material and labor usually run between $3 and $10 per square foot.
You might wonder how long this project takes. If you choose natural wood siding, plan for about two to three weeks. Engineered wood takes a little less time, usually 10 to 12 days.
Note: Composite panels and fiber cement last longer and need less upkeep. They work well in harsh climates and save you time on maintenance.
Outdoor Wood Paneling gives you lots of choices. You can pick what fits your style, budget, and local weather. With the right tools and materials, you’ll be ready to start your backyard transformation.
Selecting Outdoor Wood Paneling Styles and Wood Types
Best Wood Options for Outdoor Use
When you pick wood for your backyard, you want something that stands up to the weather and looks great year after year. You have lots of choices, but some wood types work better outside than others. Here are some favorites for Outdoor Wood Paneling:
- Ipe: This wood is tough. It resists moisture and salt, so it’s perfect if you live near the coast. You don’t have to worry about it warping or rotting.
- Teak: Teak gives your space a warm, sleek look. Many people use it for modern homes. It lasts a long time, but you need to seal it every year.
- Composite Wood Panels: These panels look like real wood but need less work. They help keep your backyard cool by regulating temperature. You don’t have to stain or seal them as often.
- Engineered Wood: This option is strong and resists impacts. You need to add a sealant to protect it from rain and sun.
Natural wood needs regular care. You might have to stain or seal it every year. Composite panels save you time and still look stylish. If you care about the environment, choose wood from forests that are managed responsibly. Wood is renewable and has a lower carbon footprint than vinyl or aluminum siding.
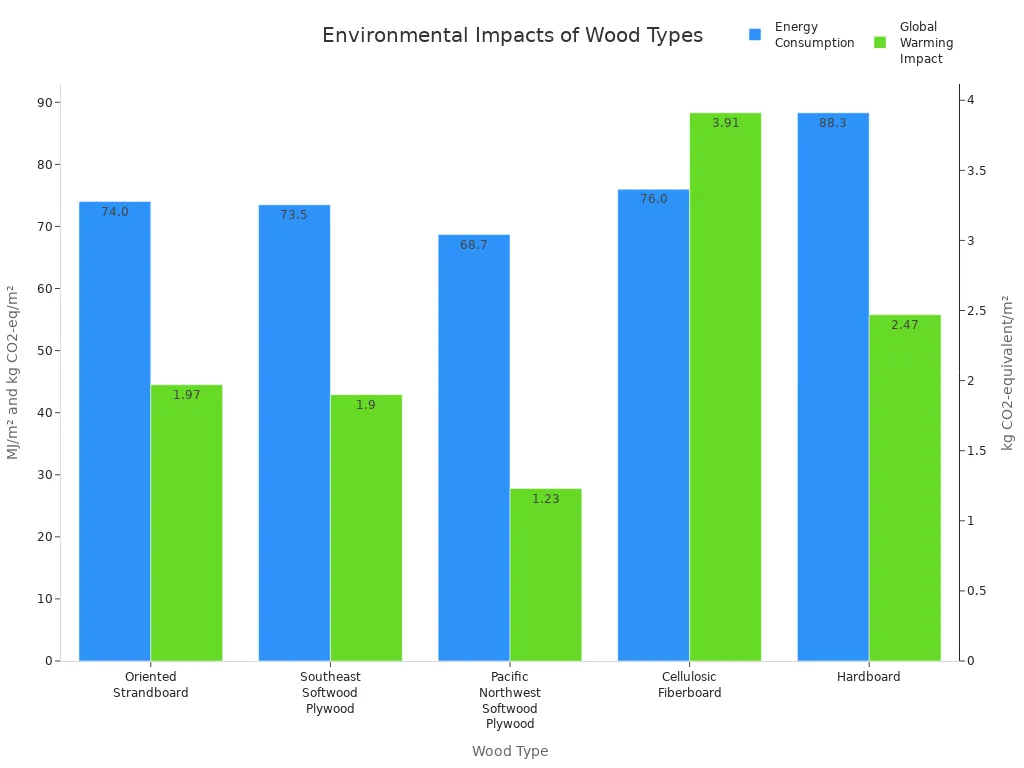
Here’s a quick look at the environmental impact of different wood types:
| Wood Type | Energy Use (MJ/m²) | CO2 Impact (kg/m²) |
|---|---|---|
| Oriented Strandboard | 74.0 | 1.97 |
| Southeast Softwood Plywood | 73.5 | 1.90 |
| Pacific Northwest Softwood Plywood | 68.7 | 1.23 |
| Cellulosic Fiberboard | 76.0 | 3.91 |
| Hardboard | 88.3 | 2.47 |
Tip: Always check if your wood comes from a certified sustainable source. This helps protect forests and keeps your backyard eco-friendly.
Popular Paneling Styles for Backyards
You can make your backyard stand out with the right paneling style. In 2025, people love mixing style with sustainability. Here are some top trends:
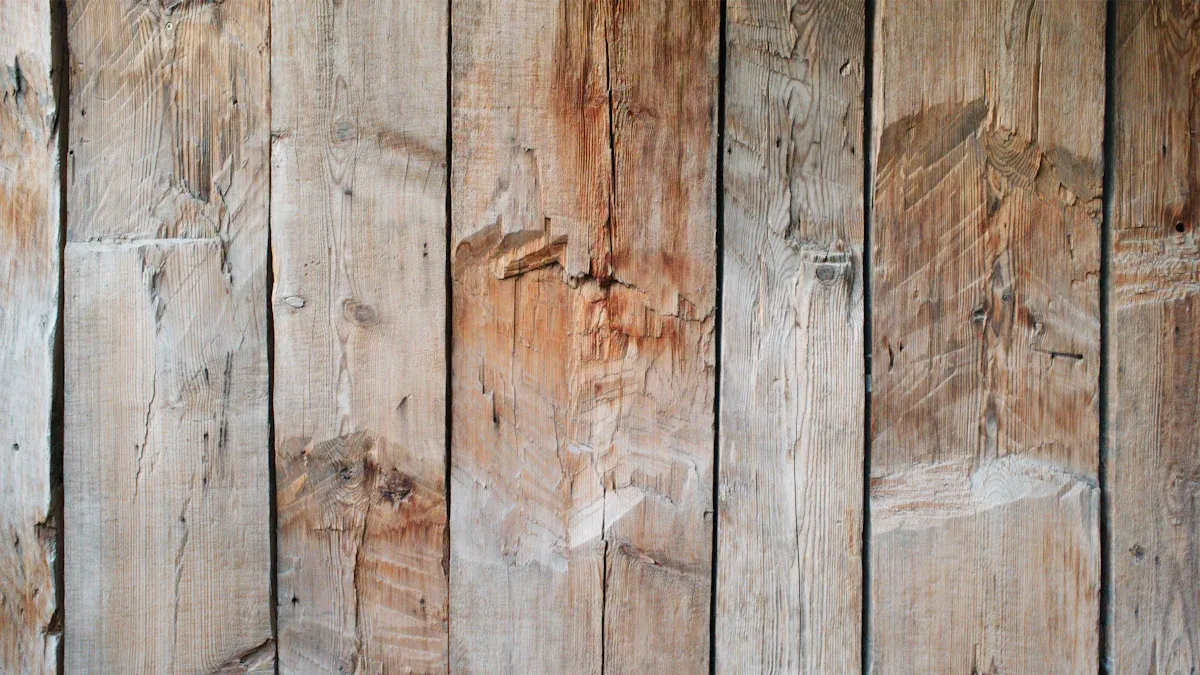
- Reclaimed Wood and Bamboo: These choices are eco-friendly. They give your space a unique look and help the planet.
- Composite Slats: These panels are strong and easy to clean. You don’t have to worry about them fading or cracking.
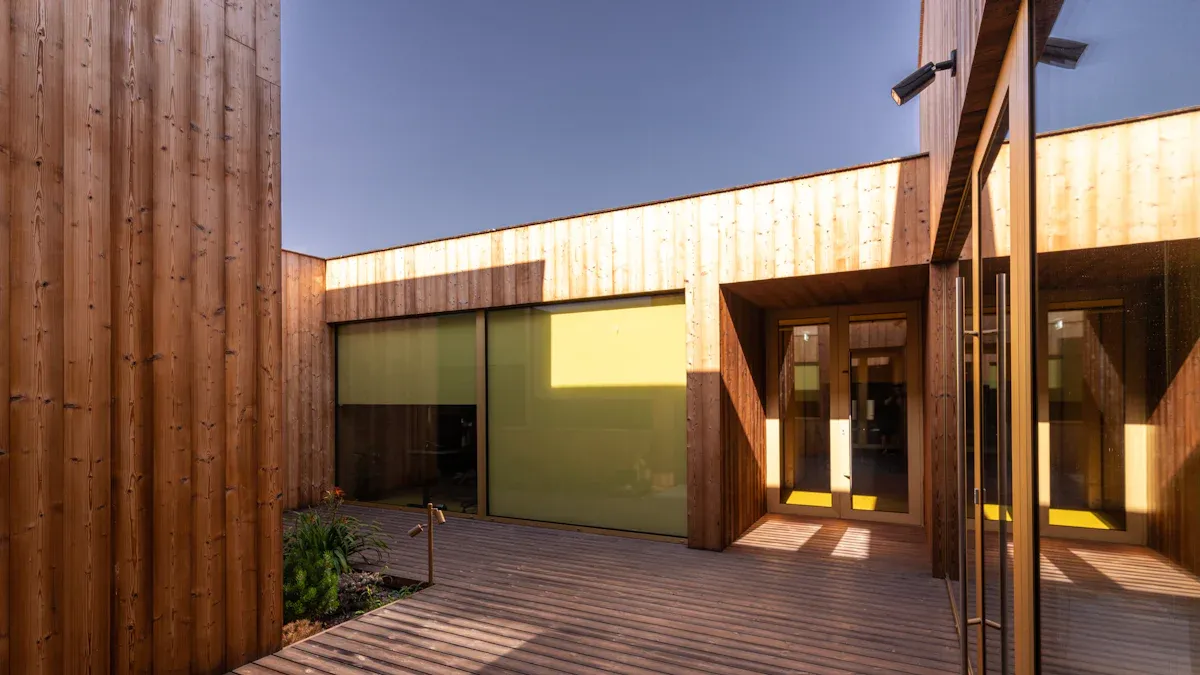
- Textured Panels: Want something stylish? Textured panels add depth and interest to your walls. They work well with modern and classic designs.
You can match your paneling style to your home’s look. Some people go for a sleek, modern vibe with composite slats. Others choose reclaimed wood for a rustic feel. No matter what you pick, Outdoor Wood Paneling can make your backyard more inviting and comfortable.
Preparing Your Space for Outdoor Wood Paneling
Measuring and Planning the Layout
Getting your backyard ready starts with a good plan. You want your Outdoor Wood Paneling to look neat and last a long time. Here’s a simple way to measure and plan your layout:
- Pick a style. Decide if you want your panels to run horizontally or vertically. Think about how much privacy you want and how the design fits your space.
- Cut and sand your boards. Make sure every board is the same length. Sand them so they feel smooth and safe to touch.
- Paint or stain the boards before you put them up. This step makes the job easier and protects the wood from the weather.
- Install the supports. Attach support boards to your fence or wall. Make sure they are strong and level.
- Attach the slats. Use a level to keep your slats straight. Leave even spaces between each one for a clean look.
Tip: Double-check your measurements before you cut. This helps you avoid mistakes and wasted materials.
Prepping the Area and Installing a Moisture Barrier
You want your panels to last, so prepping the area is important. Start by cleaning the surface. Use a pressure washer or scrub with soap and water. Let everything dry. Next, check for cracks or holes. Fill them in so your panels have a smooth base.
Apply a primer to help the wood stick and stay dry. If your wall is uneven, add furring strips. These strips give you a flat surface for your panels. Use construction adhesive for extra hold.
Start at the bottom. Place your first panel and secure it with nails or screws that won’t rust. Overlap each panel a little to keep water out. Seal any gaps with caulk. Finish by adding trim around windows and doors for a polished look.
Note: A moisture barrier keeps water from getting behind your panels. This step helps prevent rot and keeps your backyard looking great for years.
Installing Outdoor Wood Paneling: Step-by-Step Guide
Cutting and Sanding the Wood Panels
You want your panels to fit perfectly and look smooth. Start by measuring each piece of wood. Mark your cut lines with a pencil. Use a circular saw or miter saw to cut the panels to the right size. Always double-check your measurements before you cut. This helps you avoid wasting materials.
Sanding comes next. Smooth the edges and surfaces with sandpaper or a power sander. This step keeps your panels safe to touch and helps paint or stain stick better.
Safety First!
Cutting and sanding wood can create dust and expose you to chemicals, especially if you use treated wood. Follow these steps to stay safe:
- Work outside to keep dust and fumes away from your home.
- Wear long sleeves, long pants, and gloves to protect your skin.
- Use a dust mask to keep harmful particles out of your lungs.
- Clean up and dispose of wood scraps and dust properly.
Taking these steps protects both you and the environment.
Installing Supports and Starter Plank
Strong supports help your Outdoor Wood Paneling last for years. Begin by measuring your wall or fence. Figure out how much space you need for the panels. If you have old cladding, remove it with a crowbar and hammer. Check the wall for damage. Fix any problems before you move on.
Next, install a moisture barrier. This layer keeps water and wind from damaging your wood. Roll out the barrier and secure it tightly to the wall.
Now, cut your starter plank. Make sure the edge is straight and smooth. Use a level to draw a line where the starter plank will go. Attach the plank to the wall, making sure it sits perfectly level. This first plank sets the tone for the rest of your project.
Pro Tip:
Order 10-15% more material than you think you need. This covers mistakes and lets you pick the best-looking boards.
Attaching the Wood Panels Securely
You want your panels to stay put, even in tough weather. Use the right fasteners and adhesives for the job. Type-2 and type-3 yellow glues work well for most wood-to-wood joints. Type-3 glue holds up in outdoor conditions, almost as well as epoxy. Epoxy is very strong and resists weather, so it’s a great choice for tricky spots. Stainless steel or galvanized nails, especially ring shank or spiral siding nails, help prevent rust and keep panels tight.
Start at the bottom and work your way up. Place each panel against the supports. Use a level every few feet to keep your lines straight. Nail or screw the panels into place. If you use a nail gun, pick one that won’t damage the wood. Leave small gaps between panels to let the wood expand and contract. This step stops warping and buckling.
Common Mistakes to Avoid:
- Don’t skip cleaning and drying the wall before you start.
- Pick the right adhesive and fasteners for your climate.
- Always leave expansion gaps between panels.
- Let your wood panels sit outside for a few days before installing. This helps them adjust to the weather.
- Seal your panels after installation to protect them from moisture.
Some people forget to check for level or skip expansion gaps. These mistakes can ruin the look of your Outdoor Wood Paneling. Take your time and check your work as you go.
Expert Tips:
- Use angled furring strips to help water run off.
- Pre-finish all sides of each plank before you put them up.
- Ask a friend or family member to help. The job goes faster with two people.
If you follow these steps, you’ll get a smooth, sturdy finish that makes your backyard look amazing.
Finishing and Maintaining Outdoor Wood Paneling
Sealing and Protecting the Panels
You want your wood panels to look great and last for years. Sealing is the best way to protect them from rain, sun, and mold. When you seal your panels, you help stop water from soaking in and causing rot or mildew. You also keep the wood from fading in the sun.
Here are some top products you can use to seal your panels:
| Product Name | Pros | Cons | Type | Resists | Ratings |
|---|---|---|---|---|---|
| Seal-Once Nano+Poly Penetrating Wood Sealer | Low-VOC, Excellent water and UV protection, Highly durable | Thin formula tricky to apply, Expensive | Water-based | Water, mold, decay, UV, abrasion | Application 3.5/5; Appearance 5/5; Durability 5/5; Value 3.5/5 |
| Rain Guard Water Sealer | Contains UV stabilizers, Concentrated formula | Must be mixed before application | Water-based | Water, mold, decay, UV | Application 3.7/5; Appearance 4/5; Durability 4/5; Value 4.5/5 |
| Eco Advance Exterior Wood Water Repellent | Nontoxic, Easy to apply | Shorter protection period | Water-based | Water, mold, decay, oil, salts, pool chemicals | Application 4/5; Appearance 4/5; Durability 3.5/5; Value 4/5 |
Tip: Sealing your panels helps keep their natural beauty and protects them from weather damage. You should reapply sealant every 2–3 years, or more often if you live in a harsh climate.
Easy Maintenance Tips for Longevity
Keeping your Outdoor Wood Paneling in top shape is simple if you follow a few easy steps. Regular care helps your panels last for decades and saves you money on repairs.
- Inspect your panels twice a year. Look for mold, cracks, or fading.
- Clean your panels once a year with a wood-safe cleaner. This removes dirt and stops mold from growing.
- Reapply sealant or stain as needed to protect against sun and rain.
- Make sure water drains away from your panels. Good drainage stops water from pooling and causing damage.
Common mistakes include skipping regular cleaning, forgetting UV protection, and using the wrong cleaning products. Always use cleaners made for outdoor wood and set a schedule for maintenance.
If you take care of your panels, you get many benefits. Wood cladding can last for decades. It is easy to repair or replace if needed. Wood also helps keep your home cool in summer and warm in winter. Plus, wood is a renewable resource and better for the environment than concrete or steel.
Regular cleaning, sealing, and quick repairs help prevent warping, cracking, or rotting. When you keep up with these tasks, your backyard will look beautiful year after year.
You can transform your backyard with outdoor wood paneling in just a few steps:
- Prepare your space and measure your walls.
- Cut your panels safely and make sure the edges are smooth.
- Start at the bottom and nail each panel into place.
- Finish the edges for a clean look.
Outdoor wood paneling gives you durability, style, and easy care. You get a backyard that feels fresh and welcoming. Why not start your project today? This upgrade is simple and rewarding!
FAQ
How long does outdoor wood paneling last?
If you seal and maintain your panels, they can last 20 years or more. Composite and fiber cement panels last even longer. Regular cleaning and sealing help your wood look great year after year.
Can I install outdoor wood paneling by myself?
Yes, you can! Most people finish the project with basic tools and a little patience. Ask a friend to help with heavy panels. Follow each step, and you’ll get a professional look.
What’s the best way to clean outdoor wood paneling?
Use a soft brush and a wood-safe cleaner. Rinse with water. Avoid harsh chemicals. Clean once a year to keep your panels looking fresh.
Do I need to seal my wood panels every year?
You should check your panels every year. If water doesn’t bead on the surface, it’s time to reseal. In harsh climates, sealing every year helps protect your wood from damage.
Will wood paneling attract bugs or pests?
Wood can attract bugs if you skip maintenance. Seal your panels and check for damage often. Composite panels resist pests better. Keep your backyard tidy to help prevent problems.