Make Your First Project with Instant Peel DTF Film
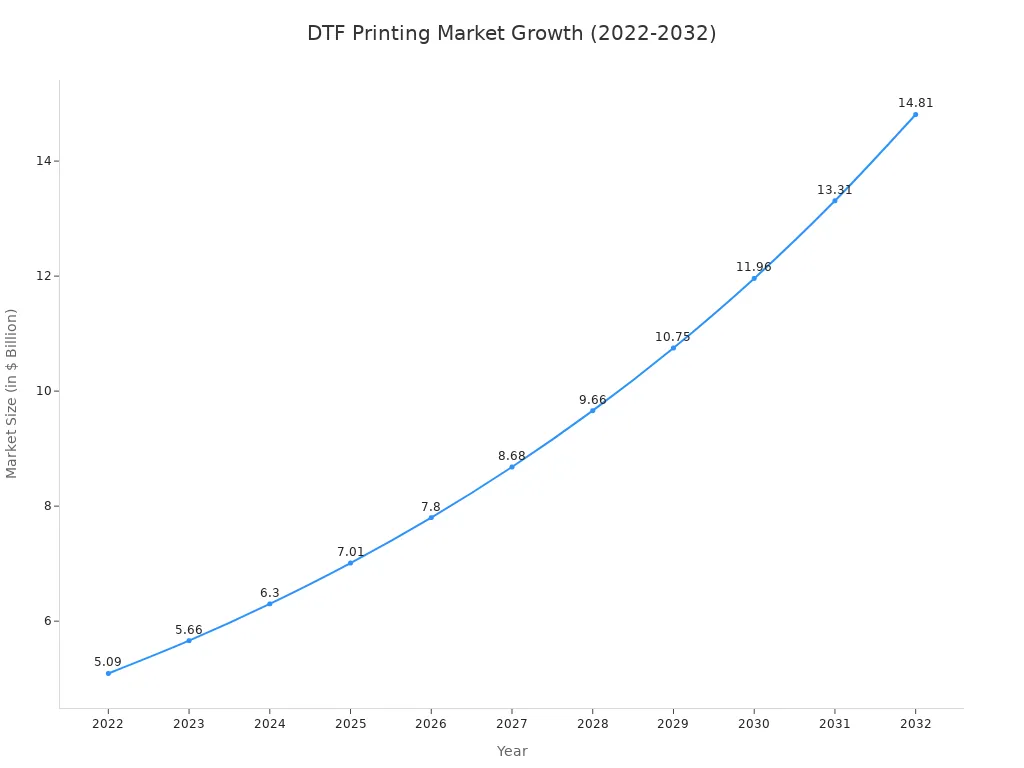
Using instant peel dtf film requires a precise method. The Direct-to-Film market shows significant growth, making this a valuable skill.
A perfect transfer follows five essential steps:
- Prepare Your Supplies and Garment.
- Set Your Heat Press Correctly.
- Position and Press the Transfer.
- Peel the Film Instantly While Hot.
- Perform a Final Press for Durability.
Step 1: Preparation for a Flawless Transfer
Proper preparation is the foundation of a successful DTF project. Gathering the right supplies and correctly prepping the garment prevents common issues and guarantees a professional-quality finish. This initial phase sets the stage for a smooth and efficient workflow.
Your Project Supply Checklist
A well-organized workspace with all necessary tools is essential for an efficient printing process. Before starting, creators should confirm they have the complete set of required materials.
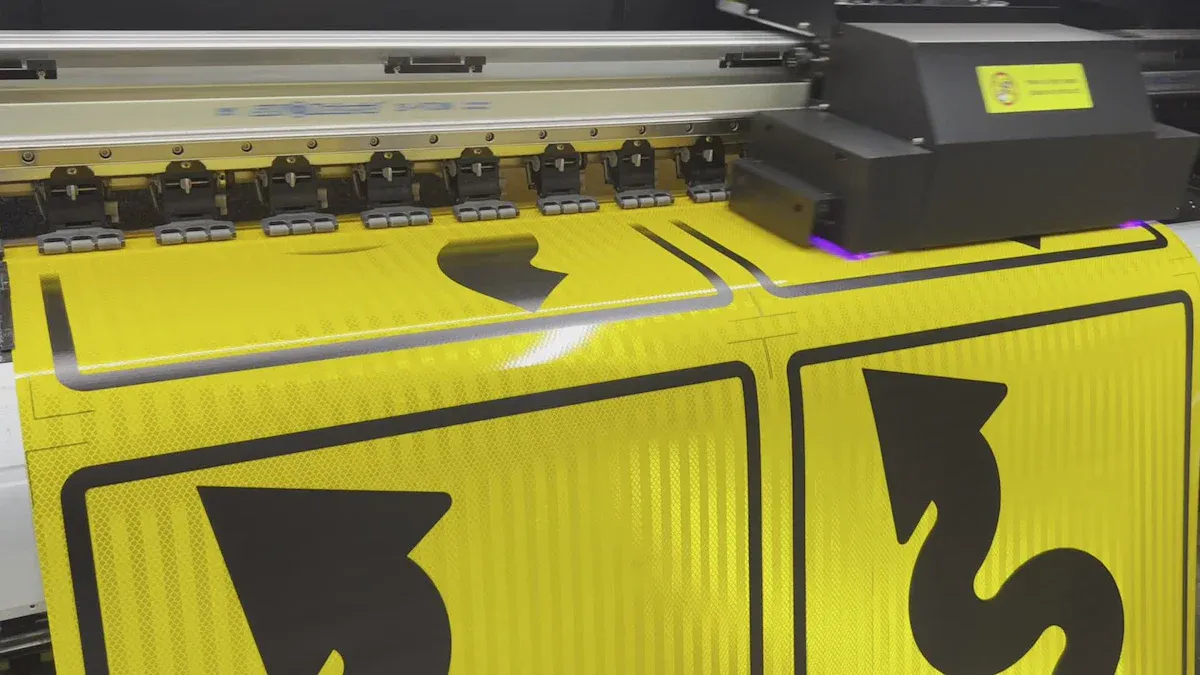
- DTF Printer and RIP Software: The printer creates the design, while the software manages print settings.
- DTF Ink and Adhesive Powder: Specially formulated inks produce vibrant colors, and the powder ensures the design bonds to the fabric.
- Instant Peel DTF Film: This specialized PET film holds the printed design for transfer.
- Shaker/Dryer and Extractor: An automatic shaker applies powder evenly, and a ventilation system safely removes fumes.
- Heat Press: This machine applies the necessary heat and pressure for the transfer.
- Cleaning Supplies: Regular maintenance with proper solutions and wipes keeps the printer in optimal condition.
Pro Tip: Proper storage of your instant peel dtf film is crucial. Keep rolls sealed in their original packaging in a climate-controlled room with 40-60% humidity. Store them vertically to prevent warping and use a first-in, first-out (FIFO) system to ensure older stock is used first.
Prepping the Garment
Moisture is a primary cause of poor transfer adhesion. Any dampness in the fabric can prevent the design from bonding correctly. A simple preparation step eliminates this risk and ensures a perfect application.
Before placing the transfer, one must pre-press the garment. Place the item on the heat press and press it for 5-10 seconds. This action removes hidden moisture and smooths out any wrinkles, creating an ideal, flat surface for the transfer. This quick step is vital for achieving a durable, long-lasting design.
Step 2: The Guide to Using Instant Peel DTF Film
With the garment prepped, the next phase involves dialing in the heat press settings. Correct temperature, time, and pressure are the three pillars that support a successful transfer. Mastering these variables ensures the design adheres properly and achieves maximum vibrancy and durability.
Heat Press Temperature Settings
The heat press temperature is a critical factor for activating the DTF adhesive. The ideal temperature range for applying instant peel dtf film to cotton fabrics is typically between 300°F and 325°F (150°C–160°C). Using a temperature outside the recommended range can compromise the final quality. Even a minor deviation of 10 degrees can negatively affect adhesion.
Creators must ensure their heat press provides accurate and consistent heat across the entire platen. An infrared thermometer or thermal strips can help verify the platen's temperature before pressing.
| Issue with Heat Press Temperature | Effect on DTF Transfer Quality |
|---|---|
| Inaccurate or uneven heat | Dull or faded colors due to incomplete bonding |
| Too little heat | The design will not stick to the garment |
| Too much heat or time | Colors can dull, crack, or scorch the fabric |
Setting Time and Pressure
Proper time and pressure settings work in tandem with temperature to create a permanent bond. The general pressing time for DTF transfers is between 15 to 20 seconds. However, this can vary depending on the material.
| Fabric Type | Temperature | Time | Pressure |
|---|---|---|---|
| Cotton / Blends | 160–170°C (320-338°F) | 15–20 sec | Medium |
| Polyester | 150–160°C (302-320°F) | 10–15 sec | Medium |
| Dark Fabrics | 160–170°C (320-338°F) | 15–20 sec | Medium-High |
Pressure ensures the melted adhesive embeds into the fabric's fibers. For hot peel applications, a light to medium pressure is usually sufficient. Applying the correct pressure is a balancing act.
- Insufficient pressure is a common cause of failure. It prevents the design from embedding into the fabric, leading to peeling edges or complete adhesion failure.
- Excessive pressure can also be problematic. It may flatten the print's texture, damage the fabric, or cause the adhesive to ooze out from the edges of the design.
Avoid Common Mistakes: To prevent errors, operators should always use a heat press with accurate controls. It is wise to use extra transfers to test and confirm settings before pressing the final product. Ensure the garment is positioned evenly on the platen, away from zippers or thick seams that cause uneven pressure.
Positioning Your Transfer
Accurate alignment separates an amateur project from a professional one. Several tools can help achieve consistent placement for every project.
- Alignment Tools: A simple T-ruler, a laser guide system, or even a grid made with heat-resistant tape on the lower platen can provide a reliable reference point.
- Manual Method: A quick technique is to fold the shirt in half vertically to create a center crease. Then, measure down from the collar to find the correct vertical position.
- Securing the Transfer: Once the transfer is in the desired position, use a few pieces of heat-resistant tape to secure it. This prevents the film from shifting when the heat press is closed.
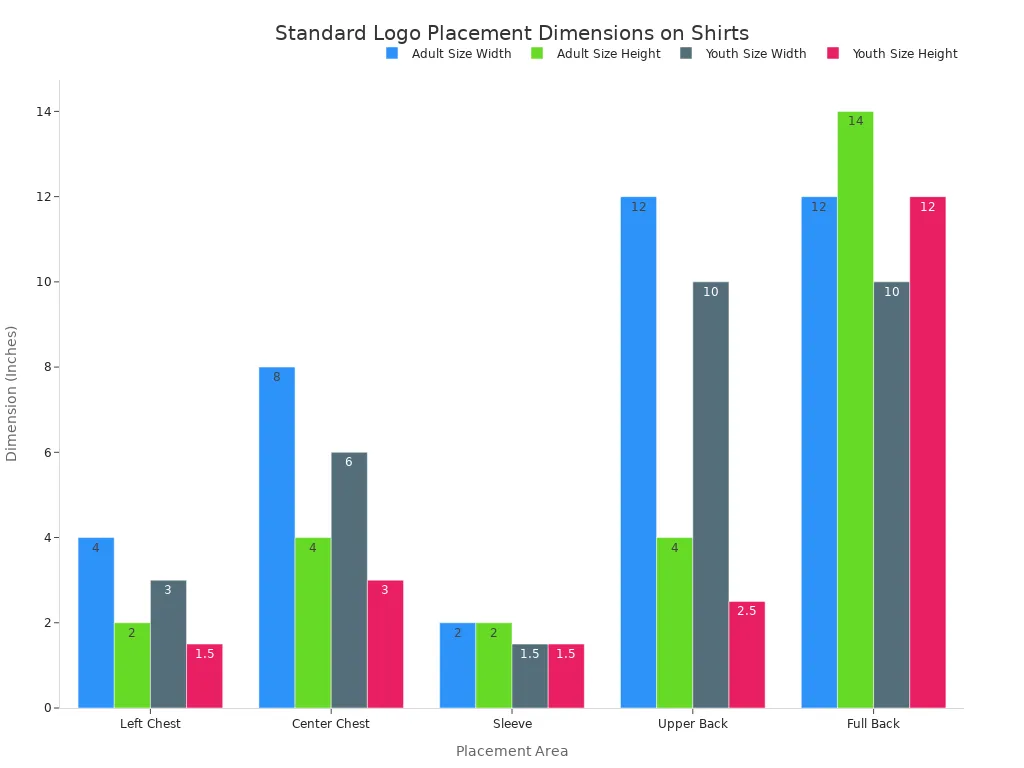
For standard logo placements, creators can refer to established industry guidelines for a consistent and professional look.
Following these guidelines for setting the heat press and positioning the design will build a reliable foundation for the pressing and peeling steps that follow.
Step 3: The Press, Peel, and Finish Method

This phase transforms the prepared elements into a finished product. The operator's actions—pressing, peeling, and finishing—determine the final quality and longevity of the design. Precision is key to success.
Executing the First Press
With the transfer secured, the operator closes the heat press to begin the transfer process. This initial press melts the adhesive powder, bonding the design to the garment's fibers. A successful press shows clear visual cues.
- The fabric's texture becomes slightly visible through the transfer.
- All edges of the design are sealed flat against the garment.
- The colors appear vibrant and true to the source file.
Incorrect settings can cause significant issues. Insufficient heat or pressure leads to weak adhesion, causing the design to peel after washing. Too much heat can scorch the fabric or make the transfer feel stiff and brittle.
The Instant Peel Technique
The defining feature of instant peel dtf film is the removal process. Operators must peel the film immediately after the press opens, while the transfer is still hot. The technique requires confidence and precision. One should peel the film back at a 45° angle using a single, smooth, and continuous motion. Hesitation can cause smudging or an incomplete release.
Troubleshooting Tip: If the design does not release cleanly, the issue often lies with the settings. Operators should verify that the adhesive powder was fully cured before pressing. Insufficient heat, pressure, or time during the press are common culprits for poor adhesion.
The Essential Final Press
A final press is not optional; it is essential for durability. This step melts the design further into the fabric, improving wash resistance and creating a softer feel. For this press, the operator places a protective sheet, like parchment paper or a cotton sheet, over the design. A quick press for 5-7 seconds at a slightly lower temperature, around 280–290°F, is sufficient. This action fully anneals the adhesive, locking the design into the fibers and ensuring a professional, long-lasting finish. Avoiding this step can lead to premature cracking and peeling.
Creators have now successfully completed their first project. Success hinges on correct settings, a confident hot peel, and the essential final press. This method produces durable designs rated for over 50 wash cycles. Applying these steps with instant peel dtf film ensures consistent, professional results for future projects, including custom hats and bags.
FAQ
Why is the DTF transfer not peeling off the film?
Poor release often results from incorrect settings. Operators should verify the heat press has adequate temperature, pressure, and time. Insufficient heat is the most common cause of adhesion failure.
What is the difference between instant peel and cold peel DTF?
Instant peel film allows immediate removal after pressing. Cold peel film requires the transfer to cool completely before peeling. Each type has a specific workflow for optimal results.
Can instant peel film be used on polyester or blends?
Yes, it is compatible with polyester and blends. Creators must adjust settings, typically using a lower temperature and shorter press time to prevent scorching or melting the synthetic fibers.
See Also
Essential Frame Plate Kits: A Beginner's Guide to Auto Reinforcement
Discovering the Best Precoating Materials for Advanced Filtration Systems in 2025
Automatic UV Coating Machines: Indispensable for Achieving High-Speed Printing Efficiency
Silicone Sealant: The Unsung Hero for Modern Home Construction and Decoration
Understanding 2 5-Furandicarboxylic Acid: Industrial Applications and Dissolution Methods