How to Use an At-Home Infectious Disease Test Kit Accurately
You get accurate results from your Infectious Diease Test Kit when you prepare correctly. Following every step with precision is vital, especially for an Infectious Diease Test Kit for HIV Test Kit.
Your careful actions ensure the test works as intended. This applies to every kit, including an Infectious Diease Test Kit for HIV Test Kit, Dengue Test Kit, Tuberculosis Test Kit, preventing incorrect results.
Key Takeaways
- Always read all instructions carefully before you start the test. This helps you understand each step.
- Collect your sample exactly as the instructions say. A good sample is key for correct results.
- Start a timer right after applying the sample. Reading the test too early or too late can give a wrong result.
Phase 1: Before You Test - Preparing for an Accurate Result
Your journey to an accurate test result begins long before you open the box. Proper preparation is the first and most critical step. You can prevent common errors and ensure the test performs reliably by taking a few moments to get ready.
Check the Expiration Date and Storage Conditions
First, find the expiration date on the test kit's packaging. An expired test may not work correctly. You should also confirm the kit was stored properly. Extreme temperatures or high humidity can damage the sensitive chemical reagents inside.
Storage Best Practices 📝
- Temperature: Keep your test kit between 2°C to 30°C (36°F to 86°F).
- Humidity: Store it in an environment with humidity below 60%.
Studies show that storing tests outside these ranges, even for short periods, can sometimes reduce their accuracy.
Read All Instructions Thoroughly Before Unpacking
User errors often happen when people skip the instructions. Each test kit is different. An Infectious Diease Test Kit for HIV Test Kit may have unique steps compared to other tests. You must read the entire instruction manual from start to finish before you even open the sealed components. This helps you understand the full process, from sample collection to the waiting time.
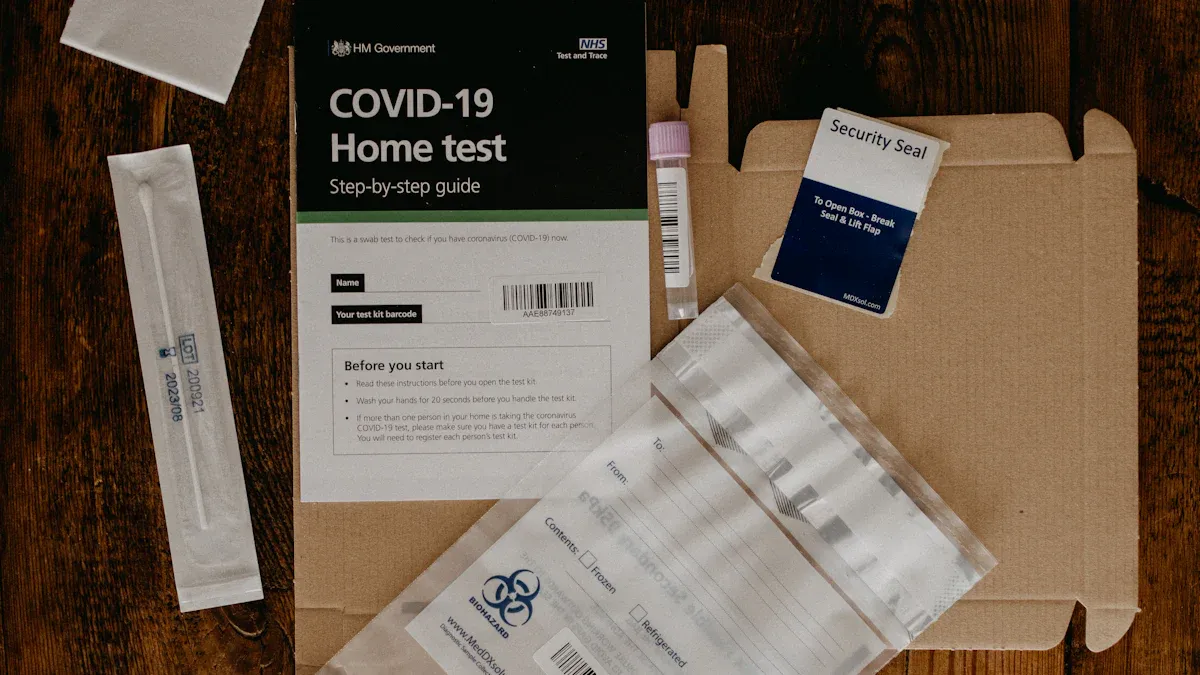
Gather All Materials in the Box and What You Need
Open the outer box. Carefully lay out all the items included with your kit on a clean surface. Check them against the contents list in the instructions. You may also need items not included in the box, such as a timer (your phone works well), tissues, or a pen. Having everything ready prevents rushing later.
Prepare Your Test Area and Yourself
Choose a clean, flat, and well-lit surface for your test. Contaminants like dust can interfere with the test and cause a wrong result. Next, you must wash your hands thoroughly to avoid contaminating the sample.
The CDC recommends these five steps for proper handwashing:
- Wet your hands with clean, running water and apply soap.
- Lather your hands, scrubbing the backs, between your fingers, and under your nails.
- Scrub for at least 20 seconds.
- Rinse your hands well under clean water.
- Dry your hands with a clean towel or let them air dry.
Phase 2: Step-by-Step Guide to Performing the Test
You have prepared your space and yourself. Now you are ready for the main event. This phase requires your full attention. Following these steps precisely ensures the test chemistry works exactly as designed, giving you a result you can trust.
Collecting the Sample Correctly
The accuracy of your entire test depends on a good sample. This is the most important hands-on step. Your test kit instructions will show you exactly how to collect your sample, whether it is from a finger prick for blood, a swab for saliva, or a nasal swab. A test like an Infectious Diease Test Kit for HIV Test Kit may use a blood or saliva sample, while respiratory tests often use a nasal swab.
For nasal swabs, your test instructions may describe one of these common collection methods:
- Anterior Nares Swab: You will insert the swab just inside the front of your nostrils. This is the least uncomfortable method and you can easily do it yourself.
- Nasal Mid-Turbinate (NMT) Swab: You will guide the swab a bit deeper into your nostril until it reaches the middle part of your nasal passage.
- Nasopharyngeal (NP) Swab: A healthcare provider must perform this method. They insert a special long swab deep into the nostril to reach the upper part of the throat.
Always follow the specific directions for how deep to insert the swab and how many times to rotate it. If you are doing a finger prick, make sure you get a full drop of blood as shown in the manual.
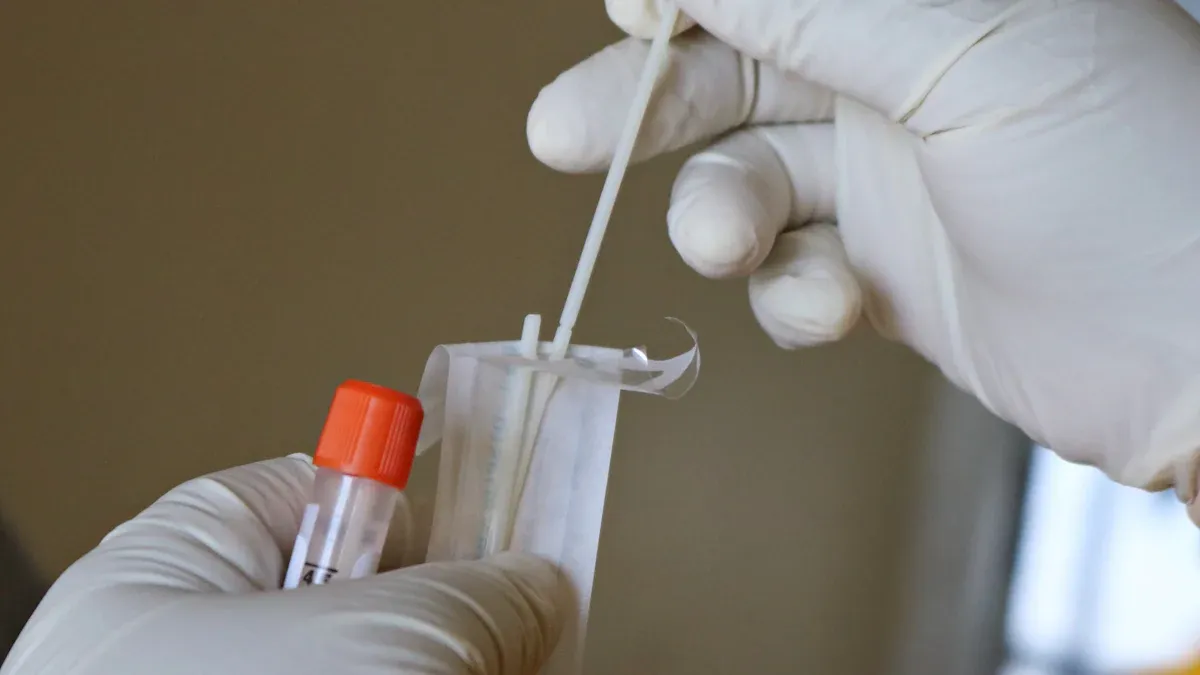
Applying the Sample to the Test Device
After you collect the sample, you must transfer it to the test device correctly. This step moves the sample to where the chemical reaction will happen.
For many tests, you will place the swab into a small tube of liquid. You might need to swirl the swab in the liquid for a set amount of time. Then, you will squeeze the tube as you pull the swab out. This action wrings all of the sample material from the swab into the liquid. For other tests, you will use a dropper to place a specific number of blood or saliva drops into a small circle or square on the test cassette.
Pro Tip: Count Every Drop! 💧 If your instructions say to add three drops, add exactly three drops. Adding too few or too many can cause the test to fail or show an incorrect result.
Adding the Reagent or Buffer Solution
The small tube of liquid included in your kit is often called a buffer or reagent. This solution is not just water; it is a critical chemical component. The buffer solution creates the perfect chemical environment for the test to work. It stabilizes the pH level, which is essential for the test's reaction to happen correctly. Without this buffer, other substances could interfere with the test and damage the sensitive test materials, potentially causing a wrong result.
You will typically add your sample to this buffer or add the buffer to your sample on the test device. This step starts the chemical process that will reveal your result.
Starting the Timer Immediately
Once you apply the sample and buffer solution to the test device, the clock starts. You must start your timer immediately. Do not guess the time. Use a watch or the timer on your phone for accuracy.
This waiting period is not passive. During this time, the liquid mixture travels across the test strip inside the cassette. This controlled flow gives the test materials enough time to find and capture the particles they are designed to detect. A specific waiting time allows the chemical reaction to become strong enough to see. This process enhances the signal, making the result line clear and preventing a false-negative result where a line is too faint to see. Reading the result before the specified time is up, or waiting too long after, can lead to an inaccurate conclusion.
Using an Infectious Disease Test Kit for HIV Test Kit and Others
Different infectious disease tests have unique features. A test for a respiratory illness works differently than a test for a sexually transmitted infection (STI). You must pay close attention to the specific instructions for your kit.
Understanding Test-Specific Instructions
You cannot assume all tests work the same way. Each kit is designed to detect a specific pathogen. For example, an Infectious Diease Test Kit for HIV Test Kit looks for HIV antibodies. A typhoid test looks for antibodies against S. typhi bacteria. These differences mean the steps for sample collection, processing, and timing will vary. Always treat each new test kit as a unique process and read its manual carefully.
Differences in Sample Collection Methods
The sample you collect depends entirely on the test you are using. An Infectious Diease Test Kit for HIV Test Kit may use a blood prick or an oral swab. Many people find the oral swab method more convenient and less painful.
| Feature | Saliva Sample (Oral Swab) | Blood Prick Sample |
|---|---|---|
| Pain Level | Less painful | More painful |
| Ease of Use | Easier to use | More difficult to use |
| Privacy | Offers more privacy | Offers less privacy |
Other tests, like those for STIs, may require different samples. Your options might include:
- Self-collected vaginal samples
- Self-collected urine samples
- Self-collected oropharyngeal (throat) samples
- Self-collected rectal samples
Variations in Reading Times and Results
The waiting time for your result is specific to your test. A flu test might give you a result in 15 minutes. In contrast, an at-home Infectious Diease Test Kit for HIV Test Kit often requires a longer window, typically between 20 and 40 minutes. Setting a timer is essential because reading the result too early or too late can lead to an incorrect conclusion. The result format can also differ. Some tests show one line for negative and two for positive, while others may have separate windows for control and test lines.
Phase 3: Reading Your Results and Taking the Next Steps
The waiting is over. Now you must correctly read the test and know what to do next. This final phase is just as important as the preparation and testing steps.
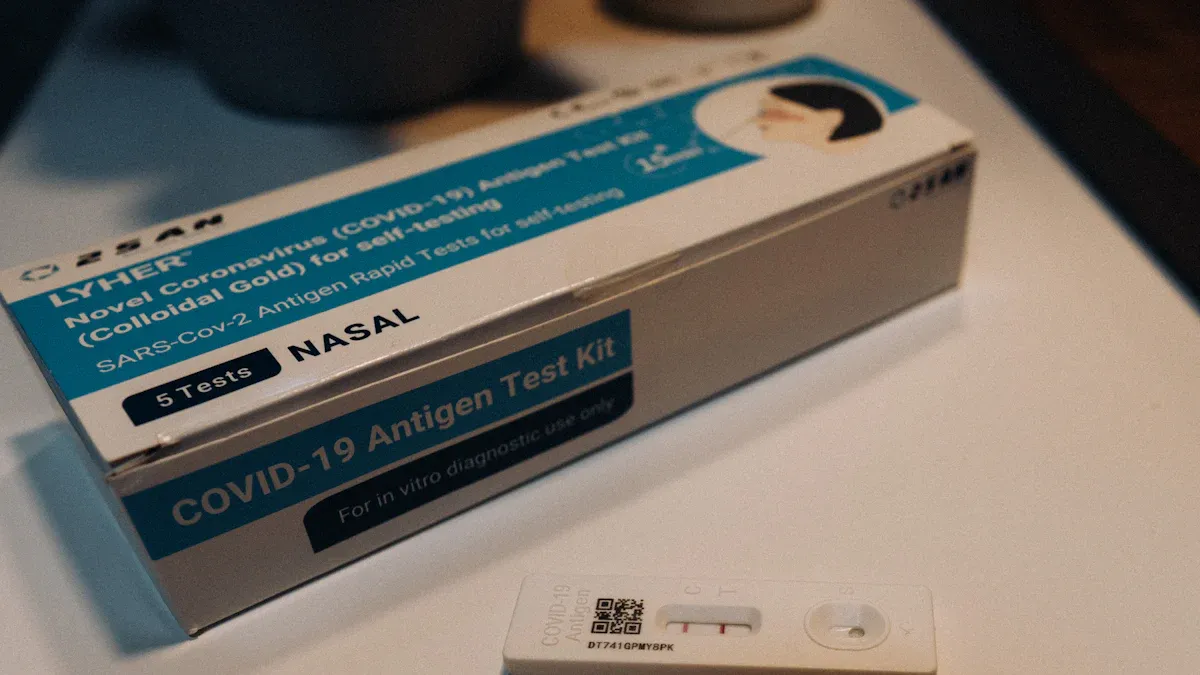
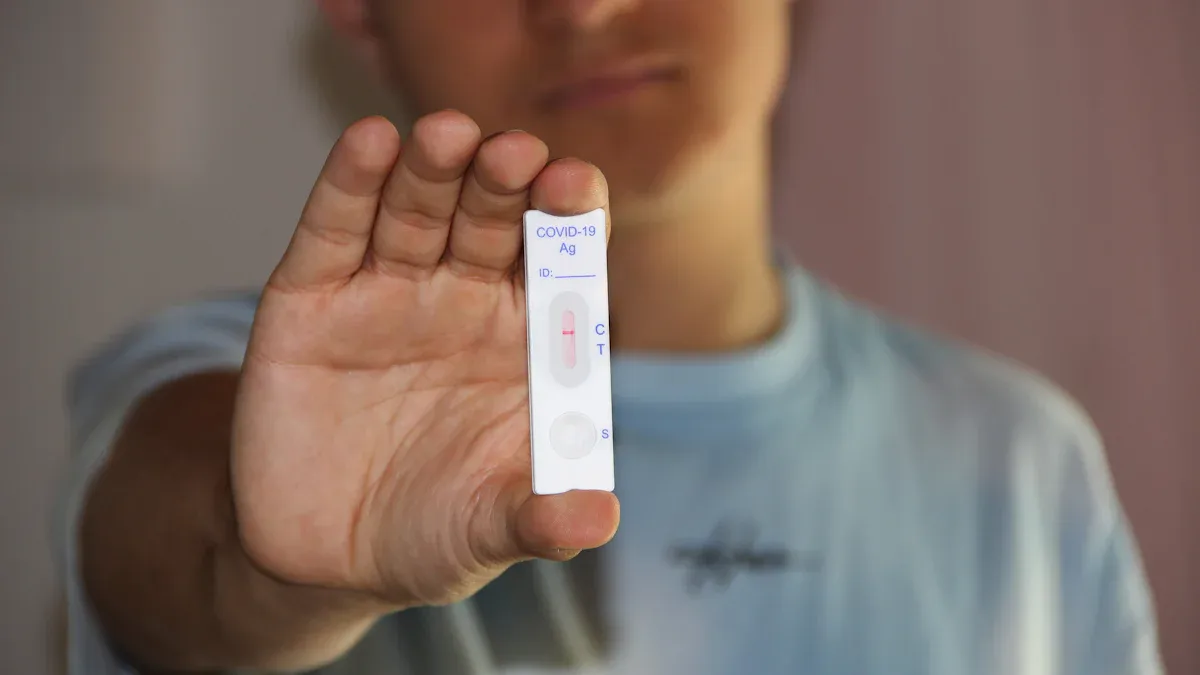
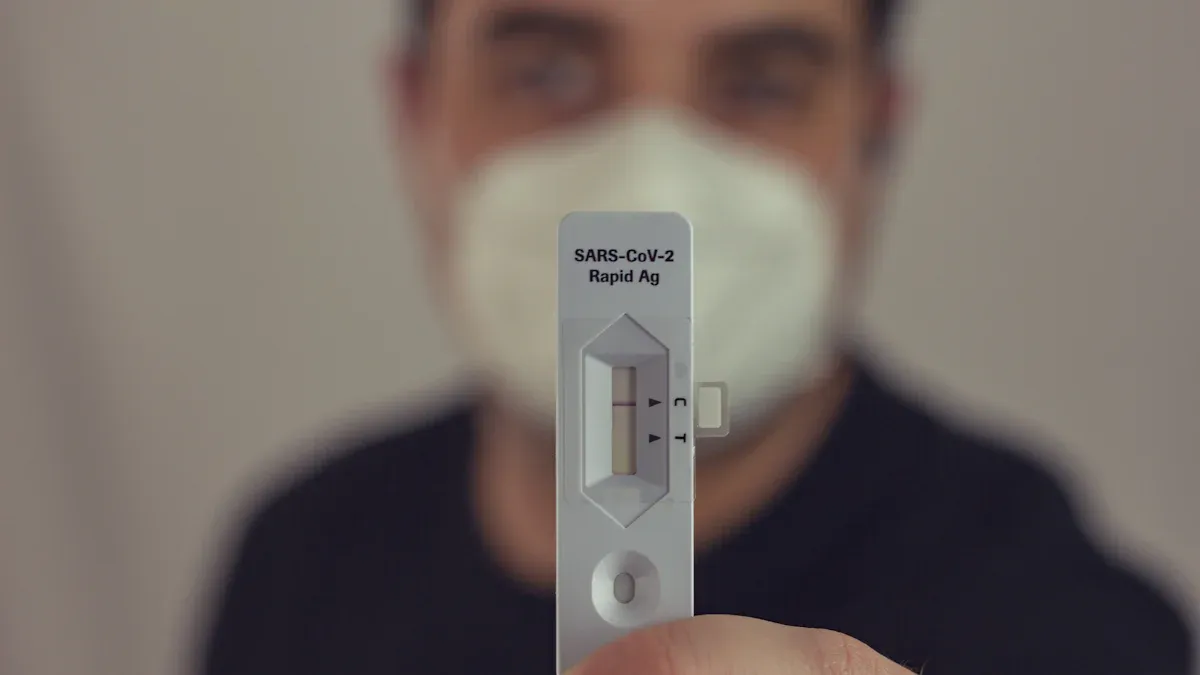
How to Interpret the Lines: Positive, Negative, and Invalid
Your test cassette has a result window with at least two letters: 'C' for the Control line and 'T' for the Test line.
- Positive Result: You will see two lines, one at 'C' and one at 'T'. Even a very faint test line counts as a positive result. A faint line can appear if you are at the very beginning or end of an infection.
- Negative Result: You will see one line only at 'C'. The absence of a line at 'T' means the test did not detect the pathogen.
- Invalid Result: You will see no line at 'C'. The control line must appear for the test to be valid. It confirms the test components worked correctly. If the 'C' line is missing, the result is unreliable.
What to Do for an Invalid Result
An invalid result means the test failed. This often happens due to an incorrect procedure, such as adding too little sample or buffer solution. You cannot trust an invalid result. You must throw the test away and perform a new test. Follow every instruction in the manual with extra care on your second attempt.
Next Steps for a Positive or Negative Result
Important Note 📝 Always consult a healthcare professional for guidance. At-home tests are for screening, not a final diagnosis.
For a positive result, you should contact your healthcare provider. They can confirm the result and guide you on treatment and isolation. The CDC encourages you to report positive results to your doctor.
For a negative result, continue to be cautious if you have symptoms. A test can sometimes miss an early infection. Contact your doctor if you feel unwell.
Safely Disposing of the Used Test Kit
After you read your result, you must dispose of the kit safely. Most at-home test kit instructions advise you to place all used items, like the swab and test cassette, into a bag and put them in your regular household trash. You do not need a special biohazard bag. State guidelines may vary, but following the kit's instructions is generally the best practice.
Your test's accuracy depends on careful preparation, precise execution, and correct interpretation. Never read the result outside the time window in the instructions. You should always talk to a healthcare professional for guidance.
Why See a Doctor? 🩺
- At-home tests are not a final diagnosis.
- A doctor can confirm results and prescribe treatment.
- They can also explain any confusing results or instructions.
FAQ
Can I use one test kit to check for different diseases?
No, you cannot. Each test kit detects a specific pathogen, like Syphilis or Typhoid. You must use the correct kit for the disease you want to check for.
What does a faint line in the test (T) area mean?
A faint line in the test (T) area still means your result is positive. You should contact your healthcare provider for confirmation and to discuss the next steps.
Why is the waiting time so important?
The waiting time allows the test's chemical reaction to complete fully. Reading the result too early or too late can lead to an inaccurate or invalid result.
See Also
Selecting the Optimal A1 A2 Milk Test Kit for Dairy Operations
Unveiling Truth: Canine Influenza Virus Antigen Test Accuracy Revealed
Tablet Sampling Machines: A Comprehensive Guide for Laboratory Selection
Considering Automated Virus Sampling Tube Assembly Lines: A Smart Investment?
Key Steps for Attaining PED 2014/68/EU Certification Successfully