Getting Started with DTF Film A Simple How-To Guide
Direct-to-film printing involves printing a design onto a special dtf film's matte side. An operator then applies an adhesive powder, cures it with heat, and presses the final transfer onto fabric. This method's adoption is rapidly increasing, reflecting a significant market shift.
| Technology | 2022 Adoption (%) | 2024 Adoption (%) |
|---|---|---|
| DTF | 24 | 42 |
| DTG | 15 | N/A |
| Manual Screen Presses | N/A | 77 |
| Automatic Screen Presses | N/A | 71 |
Essential Tools and Materials for DTF Film
Assembling the right equipment is the first step toward professional results. A complete setup ensures every stage of the process, from printing to pressing, is handled correctly.
DTF-Compatible Printer
Operators can use dedicated DTF printers or modified inkjet printers. While a converted printer can produce high-quality prints, it often requires more maintenance and careful setup to match the consistency of a dedicated machine. The ideal model depends on business scale and budget.
| Model | Key Features | Ideal For |
|---|---|---|
| InkSonic XP600 U13 | XP600 printheads, fast speeds | Scaling businesses, high-volume orders |
| InkSonic L1800 E13A | Compact A3-format, vivid color | Home-based businesses, side hustles |
| InkSonic R1390 | Cost-effective, excellent quality | Budget-conscious creators, small runs |
DTF Inks
Specialized DTF inks contain key components for performance.
- Pigments provide the color.
- Binders help the ink adhere to the film and fabric.
- Additives improve ink flow and washfastness.
DTF Transfer Film
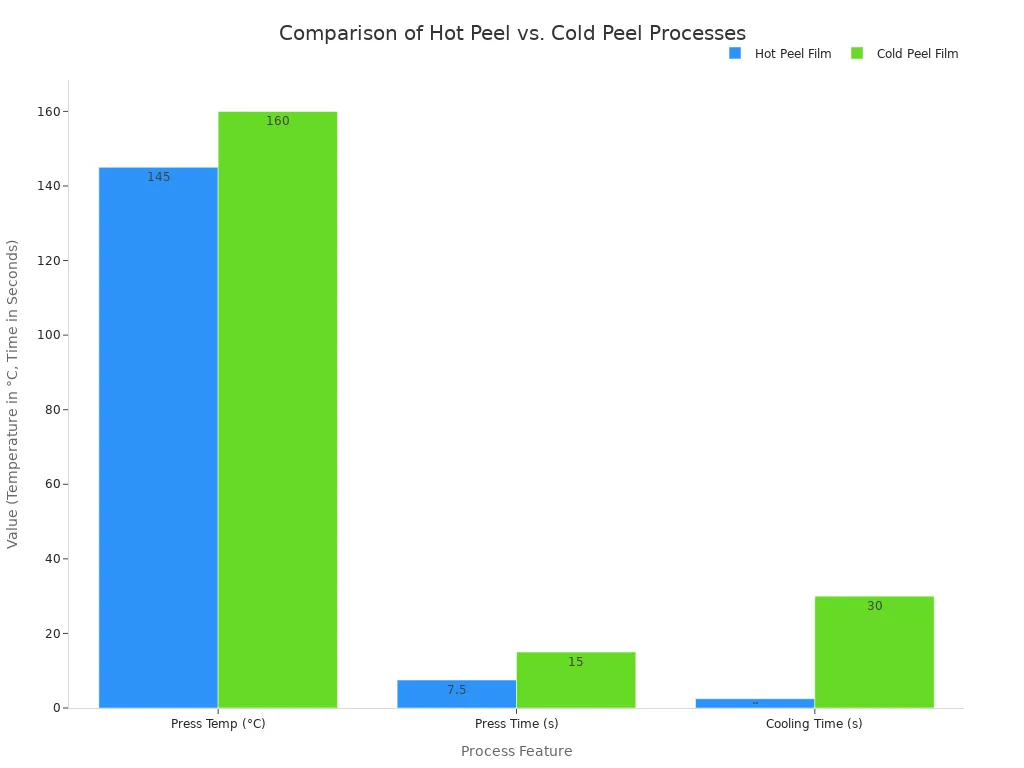
The dtf film itself comes in two main types: hot peel and cold peel. Hot peel film allows for immediate peeling after pressing, increasing efficiency for high-volume jobs. Cold peel film requires a cooling period before peeling, which often yields sharper, more detailed prints.
Note: Proper storage is crucial for any dtf film. Operators should keep rolls in a cool, dry environment with 40-60% humidity, away from direct sunlight, to prevent degradation.
Hot Melt Adhesive Powder
This powder, typically made of Thermoplastic Polyurethane (TPU), acts as the glue. It comes in different grades. Fine powder works best for detailed designs, while medium or coarse grades are suitable for larger, bolder prints where adhesion strength is a priority.
Heat Press
A quality heat press must have even heat distribution and adjustable pressure to handle various fabrics. User-friendly digital controls for time and temperature ensure consistent and repeatable transfers.
Curing Source
The adhesive powder must be melted before pressing. A heat press can perform this task for small batches. For high-volume production, a dedicated curing oven provides more consistent and uniform heat distribution across multiple sheets at once.
RIP Software
Raster Image Processor (RIP) software is essential for professional DTF printing. It gives the operator precise control over white ink layers, which is critical for creating a vibrant, opaque base on dark-colored garments.
The 6-Step DTF Transfer Process
Mastering the DTF process involves a sequence of precise steps. Each stage builds upon the last, from printing the design to the final peel. Following this workflow ensures consistent, high-quality results.
Step 1: Print on the Film
The process begins with printing the design onto the matte side of the dtf film. Operators must use RIP software to manage ink layers, especially the white underbase that makes colors appear vibrant on dark fabrics. Achieving the right balance in printer settings is critical for a sharp, durable print.
| Setting | Recommended Value | Purpose |
|---|---|---|
| Resolution (DPI) | 600–1440 | Balances sharp edges with ink efficiency. |
| White Underbase | 80–100% opacity | Ensures colors pop on dark fabric. |
| Ink Density | Medium–High | Avoids over-inking and smudging. |
| Droplet Size | Medium–Small | Maintains smooth gradients and detail. |
Pro Tip: Operators should perform a small test print before a full production run. This simple check helps catch layout, color, or ink density issues early, preventing material waste.
Step 2: Apply the Powder
While the ink is still wet, the operator applies the hot melt adhesive powder. The powder sticks only to the printed areas, creating the bonding layer for the transfer. The application method can be manual for small jobs or automated for high-volume production.
| Feature | Manual Powdering | Automated Powdering |
|---|---|---|
| Application | Sprinkle powder over wet ink in a tray. | Film passes through a shaker that dispenses powder. |
| Excess Removal | Gently flick or tap the film. | Machine vibration removes excess powder. |
| Best For | Hobbyists, small businesses, custom orders. | Commercial operations, large-scale production. |
Proper safety measures are essential when handling the powder. Although not inherently toxic, the fine particles can become airborne.
- Work in a well-ventilated area.
- Wear a dust mask or respirator to protect your lungs.
- Use gloves to avoid skin contact.
- Wash hands thoroughly after handling the powder.
Step 3: Cure the Adhesive
Next, the operator melts the powder to create a smooth, even adhesive layer. This can be done with a heat press hovering over the film or, for better consistency, in a dedicated curing oven. The goal is to achieve a glossy, slightly bumpy finish often called an "orange peel" texture. Proper curing is vital for the transfer's adhesion and durability.
- Oven Curing: Set the temperature to approximately 215°F (100°C) for around 120 seconds.
- Heat Press Curing: Hover the top platen over the film at 275°F to 350°F for 1 to 5 minutes.
Operators should watch for signs of incorrect curing to avoid failed transfers.
| Curing Issue | Visual Signs |
|---|---|
| Under-Cured | The powder still looks granular or feels tacky; white ink areas appear spotty. |
| Over-Cured | The film turns yellow; ink colors look burnt or brownish; the transfer becomes brittle. |
Step 4: Pre-Press the Fabric
Before applying the transfer, the operator must prepare the garment. Pre-pressing the fabric with a heat press for a few seconds accomplishes two key things. First, it removes any ambient moisture that could turn to steam and interfere with adhesion. Second, it smooths out wrinkles, creating a flat surface for an even transfer.
For most common fabrics, a short pre-press is sufficient.
- Cotton & Blends: Pre-press for 3-5 seconds at 325-340°F.
- 100% Polyester: Pre-press for 2-5 seconds at 270-290°F.
Step 5: Transfer the Design
With the garment prepared, it is time to transfer the design. The operator places the cured film onto the shirt, covers it with a Teflon or parchment sheet, and closes the heat press. The correct combination of temperature, time, and pressure fuses the ink and adhesive into the fabric fibers. For cotton, the following settings are a reliable starting point.
| Setting | Value |
|---|---|
| Temperature | 315°F (157°C) |
| Time | 12–15 seconds |
| Pressure | Medium to firm |
Step 6: Peel the Film
The final step is to remove the carrier film, leaving the design on the garment. The peeling technique depends on the type of film used: hot peel or cold peel. Hot peel films allow for immediate removal, which speeds up production. Cold peel films require the transfer to cool completely, which often produces a sharper, more detailed result.
If the design does not fully transfer, an operator should check their settings.
- Cause: Insufficient heat or pressure.
- Solution: Calibrate the heat press to the recommended temperature (310-330°F) and apply medium-to-firm pressure.
- Cause: Incorrect peel time.
- Solution: Ensure the peeling method matches the film type (hot vs. cold).
After a successful peel, many operators perform a final 5-second press with a parchment sheet on top to enhance washfastness and give the print a matte finish.
Following these steps allows operators to create vibrant custom apparel. The resulting transfers offer excellent durability, often lasting longer than screen prints. The versatility of dtf film extends beyond clothing to accessories and home decor. With practice, creators will see their technique and final quality improve. 🚀
FAQ
Can operators use a standard home printer for DTF?
No, a standard printer requires significant modification. Operators must convert it to handle specialized DTF inks and film, which is a complex process for beginners.
How durable are DTF prints?
DTF transfers offer excellent longevity.
- They often outlast the garment itself.
- Properly applied designs can endure 50+ wash cycles without cracking or fading.
What fabrics are compatible with DTF transfers?
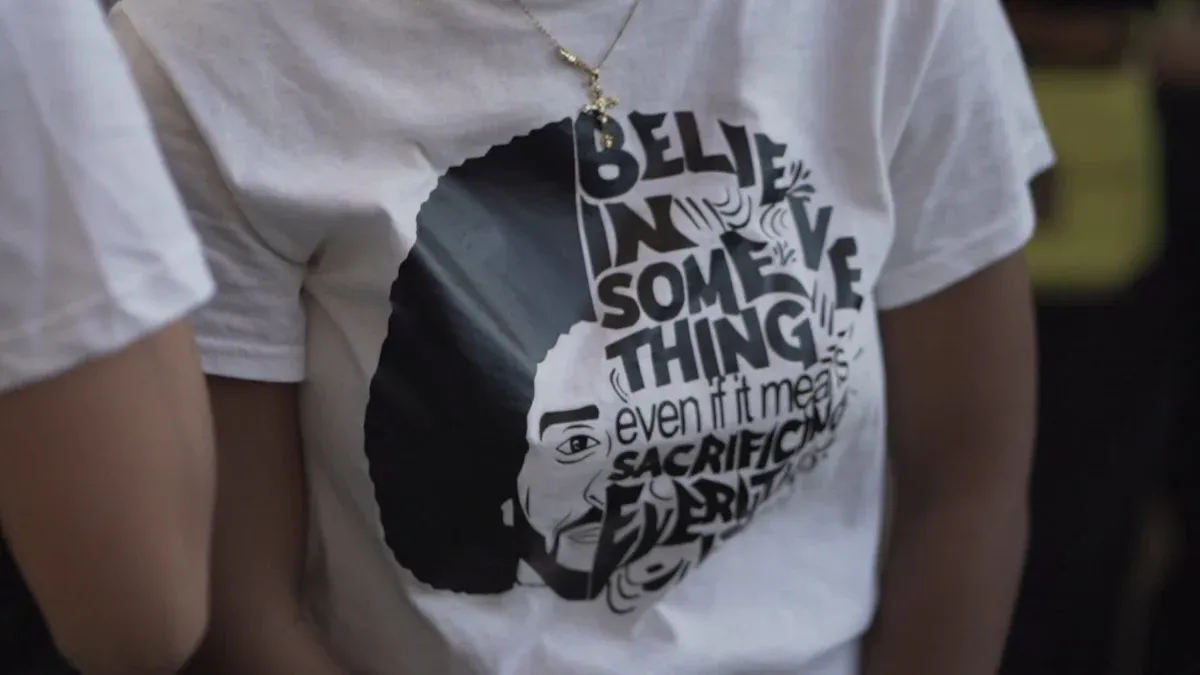
DTF is highly versatile. It works on many materials, including cotton, polyester, nylon, leather, and blends, making it suitable for a wide range of apparel and accessories. T-shirt
See Also
Essential Beginner's Guide: Frame Plate Kits for Automotive Reinforcement Explained
Discovering the Best Precoating Materials for Advanced Filtration Systems in 2025
Understanding Plate Heat Exchangers: A Comprehensive Step-by-Step Operational Guide
Tablet Sampling Machines Demystified: The Ultimate Laboratory Selection Handbook
Expert Guide Bar Advice: Simplifying Your Cutting Tasks with Ease