Your DIY Guide to Installing a Carbonated Water Dispenser
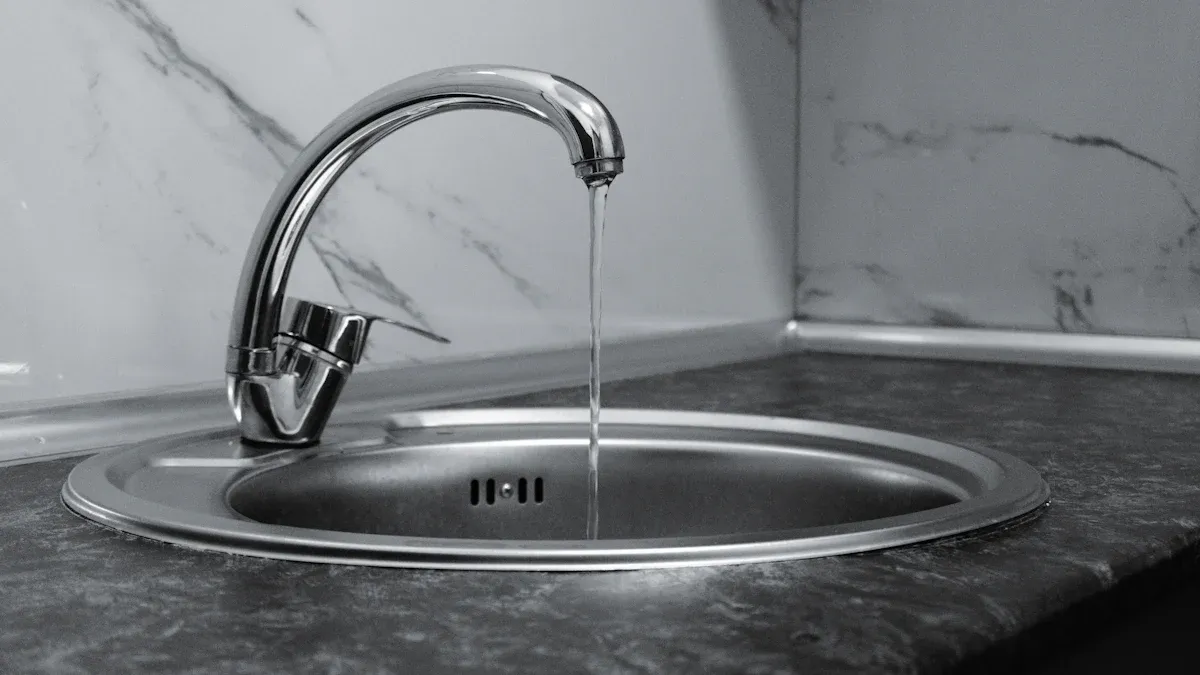
You can enjoy fresh, bubbly water directly from your tap. Installing a home carbonated water dispenser is a satisfying and manageable project for any DIY enthusiast.
Did You Know? Switching from canned seltzer to a home system can save you up to $450 annually, making it a smart investment for your wallet.
Key Takeaways
- Installing a carbonated water dispenser at home saves money and provides fresh, bubbly water.
- Follow the step-by-step guide carefully for a safe and successful installation.
- Regular cleaning and maintenance keep your dispenser working well and your water tasting great.
How to Install Your Carbonated Water Dispenser
Now you are ready for the main event. Follow these steps carefully to install your new carbonated water dispenser. This guide will walk you through each part of the process, from preparing your sink to enjoying your first glass of bubbly water.
Pre-Installation Checklist
Before you begin, a little preparation goes a long way. Unpack all the components of your kit. Lay them out on a towel to prevent scratches and ensure nothing is missing.
| Component | Check if Included |
|---|---|
| Dispenser Faucet | ✅ |
| Carbonator/Chiller Unit | ✅ |
| CO2 Tank & Regulator | ✅ |
| Water Filter & Housing | ✅ |
| Water Line & T-Fitting | ✅ |
| Tubing (Water and CO2) | ✅ |
| Mounting Hardware | ✅ |
Pro Tip: Read the manufacturer's manual that came with your specific model. It will have details and diagrams unique to your system.
Step 1: Prepare Your Workspace
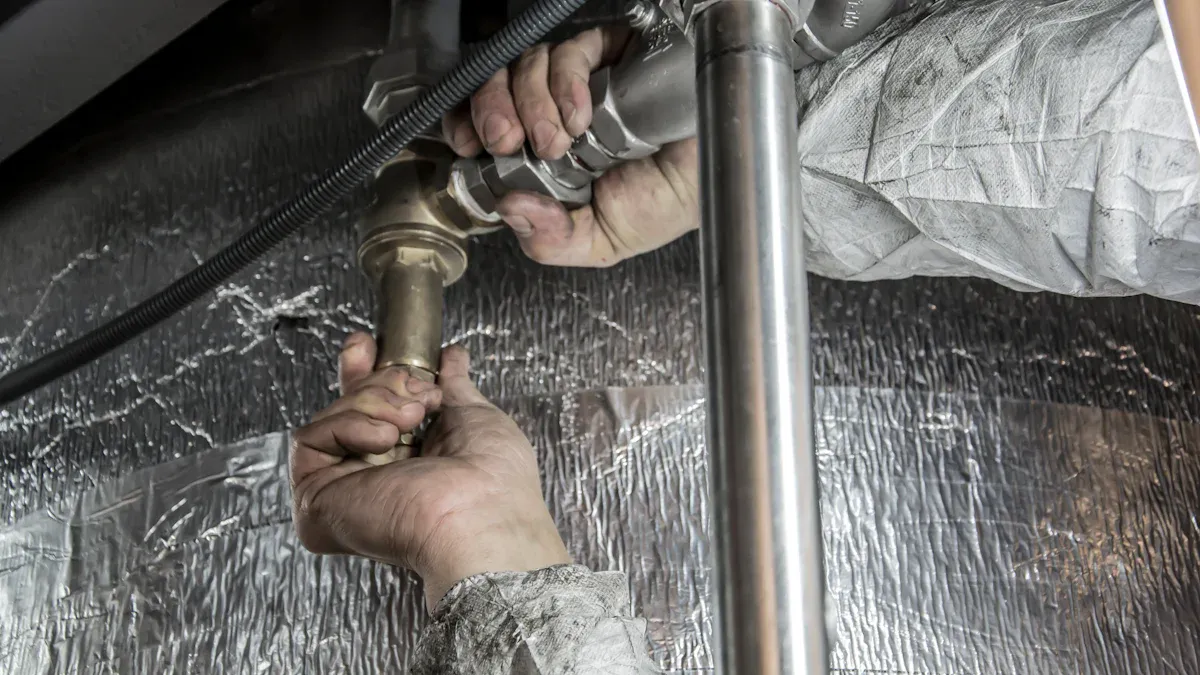
First, clear everything from under your sink. You need ample room to work. Then, you must shut off the water to your sink to prevent any flooding.
- Locate the Main Shut-off Valve: You can often find this in your basement, a crawl space, or near your water heater.
- Identify the Valve Type: It will have either a round wheel handle (gate valve) or a lever handle (ball valve).
- Turn Off the Water:
- For a gate valve, turn the round handle clockwise several times until it stops.
- For a ball valve, turn the lever handle clockwise one-quarter turn. The handle will now be perpendicular to the pipe.
- Relieve Pressure: Turn on your kitchen faucet to drain any remaining water from the line.
Step 2: Install the Water Line
Your dispenser needs a dedicated water source. You will tap into your cold water line using the provided T-fitting or saddle valve.
Using a Saddle Valve:
- Choose a Spot: Pick a straight section of the 1/2-inch or 3/4-inch cold water pipe.
- Clean the Pipe: Wipe the pipe surface clean to ensure a tight seal.
- Attach the Valve: Place the valve around the pipe. Tighten the bolts evenly so the rubber gasket sits snugly against the pipe.
- Puncture the Pipe: Turn the T-handle clockwise until you feel it puncture the pipe. Then, turn it counter-clockwise all the way to open the valve.
- Connect the Water Line: Attach the 1/4-inch water line from your dispenser kit to the valve.
Step 3: Mount the Faucet
Your sink or countertop needs a hole for the new faucet. Many sinks have a pre-drilled hole with a cap, often used for a soap dispenser or sprayer.
- Hole Size: Most dispenser faucets require a standard 1 1/4-inch hole.
- Drilling: If you need to drill a new hole, use a step drill bit for stainless steel. For granite or quartz, we strongly recommend hiring a professional to avoid cracking your countertop.
To mount the faucet:
- Apply Sealant: Roll a small snake of plumber's putty and wrap it around the base of the faucet. You can also use a thin bead of silicone caulk.
- Position the Faucet: Feed the faucet's lines through the hole and press it firmly onto the sink or countertop.
- Secure from Below: From under the sink, slide the washer and mounting nut over the faucet shank. Hand-tighten the nut, then use a wrench to give it a final quarter-turn.
- Clean Up: Wipe away any excess putty or caulk with a damp cloth.
Step 4: Connect the CO2 Tank and Regulator
Safety is your top priority when handling a CO2 tank. Always keep the tank upright and secured so it cannot fall over.
⚠️ Safety First!
- Always connect the regulator to the tank. Never connect a CO2 tank directly to your system.
- Keep the tank away from heat sources like ovens or dishwashers.
- If you smell gas or feel dizzy, shut off the main valve on the tank and ventilate the room immediately.
To connect the regulator:
- Prepare the Tank: Remove the dust cap from the new CO2 tank. Briefly open and close the valve to blow out any dust.
- Attach the Regulator: Make sure the CO2 washer is inside the regulator nut. Screw the regulator onto the tank valve and tighten it with a wrench.
- Open the Valve: Turn the tank's main valve handle counter-clockwise all the way until it stops. This seals the valve in both the open and closed positions.
- Set Initial Pressure: Turn the regulator's adjustment screw until the output pressure gauge reads 35 PSI. This is a great starting point for good carbonation.
Step 5: Connect All Components
Now you will connect everything under the sink. The goal is to create a clean setup that prevents kinks and damage.
- Route Tubing Smartly: Run the water and CO2 lines snugly against the cabinet walls. This protects them from getting bumped and frees up storage space.
- Avoid Sharp Bends: Do not create sharp 90-degree bends in the tubing, as this can restrict flow and cause kinks over time. Create gentle curves instead.
- Make Connections: Following your manual's diagram, connect the tubing from the water line to the filter, from the filter to the carbonator unit, and from the carbonator to the faucet. Then, connect the CO2 line from the regulator to the carbonator unit. Most systems use simple push-to-connect fittings.
Step 6: Power On and Test for Leaks
With everything connected, it is time for the most important check. You will test every connection for both water and CO2 leaks.
- Turn On Water: Slowly turn your main water supply back on.
- Check for Water Leaks: Visually inspect every connection point from the saddle valve to the faucet. Feel for drips with a dry paper towel.
- Test for CO2 Leaks:
- Mix a few drops of dish soap with water in a spray bottle.
- Spray the solution on the CO2 tank valve, the regulator connections, and where the CO2 tube connects to the carbonator.
- Watch closely for bubbles. If you see bubbles forming, it means gas is escaping. Shut off the CO2 tank and tighten the leaking connection, then test again.
Once you confirm there are no leaks, plug in the carbonator/chiller unit.
Step 7: Carbonate and Adjust
You are at the final step! It is time to carbonate your water. Most systems need to chill the water first for best results.
- Run the Water: Dispense water from your new faucet for 2-3 minutes to flush the filter and fill the system.
- Let it Chill: Allow the unit 30-60 minutes to chill the water inside its reservoir. Colder water absorbs CO2 much better.
- Adjust Carbonation: Pour a glass of water. Is it bubbly enough? The level of carbonation in your carbonated water dispenser is controlled by the CO2 pressure.
- For More Fizz: Slowly turn the regulator's adjustment screw clockwise to increase the PSI. A range of 30-35 PSI is ideal for highly carbonated water.
- For Less Fizz: Turn the screw counter-clockwise to lower the PSI.
Make small adjustments and wait a few minutes between changes to allow the system to stabilize. Find the perfect level of fizz for your taste.
Maintenance and Troubleshooting Guide
Your installation is complete. Now you can keep your system running perfectly with simple maintenance and quick troubleshooting. This guide helps you solve common issues.
How to Clean Your Dispenser System
You should clean your water lines regularly. Biofilm can start to grow on surfaces in less than a week.
Cleaning Tip 🧼 A good practice is to clean the lines once per week. This prevents buildup and keeps your water tasting fresh.
How to Replace the CO2 Tank
Your regulator gauges show pressure, not the amount of gas left. You need to weigh the tank to know when it is empty.
- Find the Tare Weight (TW) number on the tank. This is the weight of the empty tank.
- Weigh your tank on a scale.
- Subtract the TW from the current weight. The result is the amount of CO2 you have left.
How to Change the Water Filter
Clean water is essential for a great-tasting drink. Most manufacturers suggest you replace your water filter every six months. This ensures you always have the best quality water.
Troubleshooting Flat Water
If your water is not bubbly, check a few things.
- Your CO2 tank might be empty.
- The carbonator unit may not be plugged in.
- The water might not be cold enough. Colder water carbonates better.
Fixing Leaks and Drips
A leak in your carbonated water dispenser usually has a simple cause. First, check if the drip tray is full and needs to be emptied. Next, inspect the main water valve connection for any drips. A loose connection is often the problem.
What to Do About Unusual Noises
You might hear some noises from your system. A soft hissing sound is often normal as the system cools. However, a loud or constant buzzing could mean the unit is not connected to the water supply correctly.
You have successfully installed your new carbonated water dispenser! Remember, a secure connection for both water and CO2 is the foundation of your system. Regular maintenance is the key to long-term enjoyment. It helps you:
- Extend your dispenser's life.
- Prevent expensive future repairs.
- Ensure your water is always safe and clean.
FAQ
Here are answers to some common questions about your new dispenser.
How long does a CO2 tank last?
A standard 5 lb CO2 tank makes about 60-80 gallons of sparkling water. Your personal usage determines how often you need a refill, which could be every few months.
Can I use any type of CO2 tank?
You must use a food-grade CO2 tank for safety. Ensure the tank's valve thread matches your regulator. This guarantees a secure connection and prevents dangerous leaks.
Why does my sparkling water taste strange?
A strange taste usually points to an old water filter or unclean lines. You should replace the filter every six months. Regular line cleaning also keeps your water tasting fresh.
Quick Tip 💡 Always keep a spare CO2 washer on hand. This small part is crucial for a tight seal and is easy to lose when changing tanks.