My Journey Installing a Built-in Water Dispenser at Home
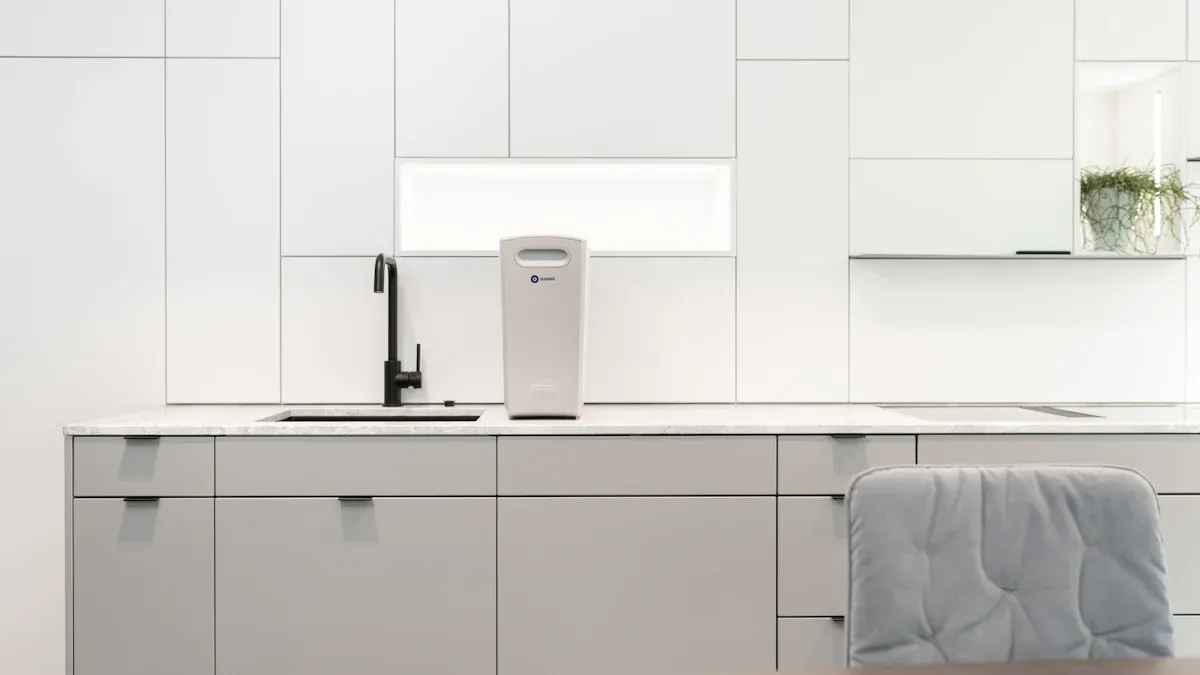
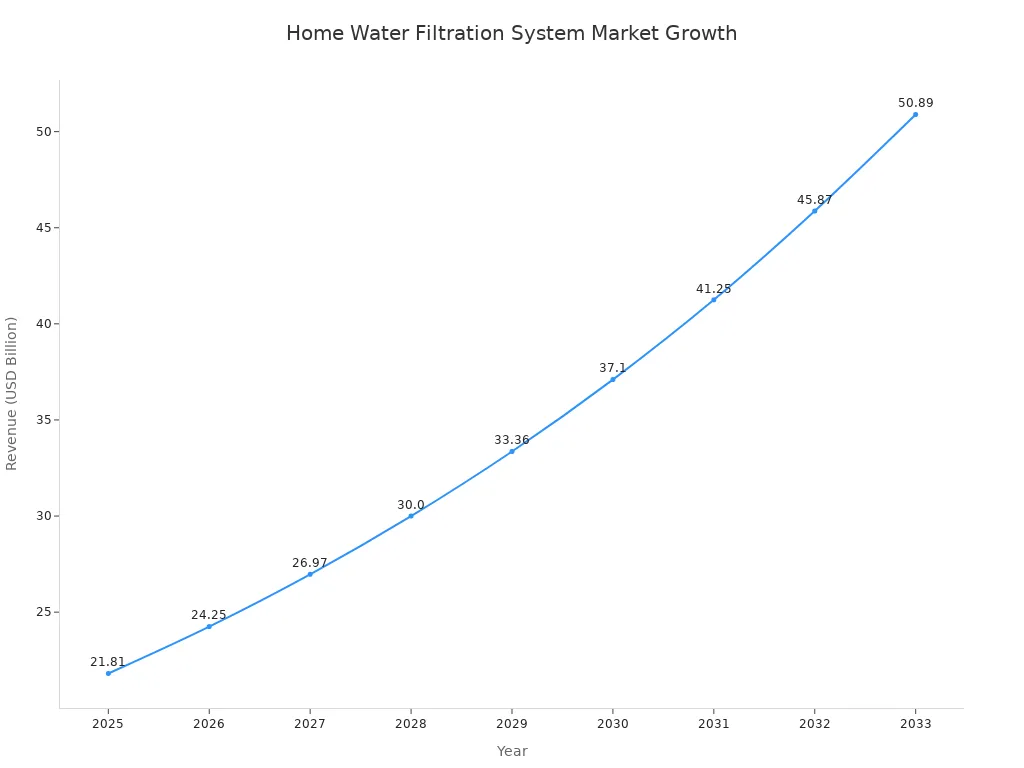
An increasing number of households are choosing to install a built in water dispenser. This trend reflects a growing demand for convenient and clean drinking water directly from the tap. The market for home water filtration is projected to expand significantly, as shown by the following growth forecast.
A successful installation requires careful attention to a few key areas. You must securely tap the cold water line and ensure all connections are tight to prevent leaks. You will need basic tools like a wrench and a drill. For a first-timer, you can expect this project to take about 2 to 3 hours.
Key Takeaways
- Prepare well before you start. Gather all your tools and check all parts. This helps you avoid problems and finish the job faster.
- Drilling a hole in your counter needs care. Use the right drill bit and drill slowly. This prevents damage to your countertop.
- Connect the water lines carefully. Use a tee fitting for a strong connection. Check for leaks after turning the water back on.
Pre-Installation: My Prep and Parts Checklist
Good preparation is the secret to a smooth project. Before you touch a single pipe, you should gather your tools and inspect your new kit. This simple first step helps you avoid surprises and finish the job faster.
The Essential Toolkit I Used
You do not need a professional-grade workshop for this installation. You will need a few key items to get the job done correctly. I found that having everything ready on a towel next to me saved a lot of time. Here is the toolkit I gathered for the project:
- Adjustable wrench
- Drill/driver with a 5/8-inch spade bit
- Pliers
- A dedicated tubing cutter for a clean edge
Unboxing and Checking the Parts
Your new built in water dispenser kit should include several key components. You should open the box right away. Do not wait until installation day. Lay all the parts out on a clear surface. Compare every item in the box to the parts list in the instruction manual. This ensures the manufacturer included everything you need.
Pro Tip: 📝 Carefully inspect the faucet and fittings for any cracks or defects that may have occurred during shipping. Finding a problem now is much easier than discovering a faulty part after you have already drilled a hole in your counter.
This simple check prevents major headaches later. It confirms you have all the necessary pieces and that nothing is damaged before you begin the installation.
Getting Started: Preparing the Under-Sink Area
With your tools and parts ready, you can now prepare the installation site. Your under-sink cabinet is about to become your workshop. A clean and organized space makes the entire process much smoother and safer.
Clearing Out the Cabinet
First, you need a clean workspace. You should remove everything from the cabinet under your kitchen sink. This includes cleaning supplies, trash cans, and any other stored items. You will need plenty of room to lie on your back and work comfortably. After clearing the space, wipe down the cabinet floor with a cloth. A dry, clean surface prevents your tools and the new dispenser parts from getting dirty or wet. I placed an old towel on the cabinet floor. This gave me a comfortable spot to work and helped absorb any stray water drips.
Shutting Off the Water Supply
This next step is the most important one for preventing a flood. You must turn off the water before you disconnect any pipes. You can usually find a shutoff valve for just the cold water line directly under the sink. However, shutting off the main water supply to the entire house is the safest method.
Here is how you can shut off the main water supply:
- Locate the Water Shutoff Valve You will find the main valve where the water supply enters your home. Check utility rooms, basements, or garages. The valve should be clear of any obstructions.
- Turn Off the Water Turn the valve's wheel or lever clockwise until it stops. This action closes the valve and stops water from flowing into your home's pipes.
- Drain the Pipes Open the faucets in your house, starting from the top floor. This drains the remaining water from the pipes.
Safety First! 💧 After turning the main valve off, open your kitchen faucet. Let any remaining water trickle out. The flow should stop completely. This confirms the water is off before you proceed.
The Hardest Part: Drilling the Countertop
This step can feel scary. You are about to drill a permanent hole in your kitchen counter. Proper technique is essential to avoid damage. Taking your time here ensures a clean, professional result that preserves your countertop's beauty.
Choosing the Perfect Spot
You need to pick the right location for your new faucet. Consider the look and function. The dispenser should have a balanced look next to your main faucet. Many sinks have an extra pre-drilled hole, often covered or used for a soap dispenser. Using this existing hole is the easiest option. If you must drill a new hole, check under the sink first. Make sure there is enough clear space for the faucet's mounting hardware.
How to Drill a Clean Hole
Drilling through a hard surface like granite or quartz requires the right tools. You cannot use a standard drill bit.
- Diamond Drill Bits: These are the top choice for granite. Diamond-tipped hole saws or core bits cut clean holes in very hard materials.
- Carbide Drill Bits: These are another good option. They have a strong tip that resists wear and provides a precise cut.
Drilling Tip: 💡 As you get about 80% through the counter, you must reduce your drill speed. Let the bit barely touch the surface to finish the cut. This is the most important step to prevent chipping the underside of your countertop.
Properly drilling the hole is a slow and steady process. You must keep the drill bit cool to prevent cracking.
- Use a Guide: Place a drilling template or a piece of plywood with a pre-drilled hole over your mark. This stops the drill bit from slipping.
- Drill Slowly: Run your drill at a low speed. Do not apply heavy pressure.
- Add Water: You need to keep the bit lubricated and cool. You can build a small dam out of clay around the hole and fill it with water.
- Take Breaks: Pause often to let the drill bit cool down. This prevents overheating and damage.
Installing the Built in Water Dispenser Faucet
You have successfully drilled the hole. Now you will install the faucet itself. This part gives your project its finished look. You will mount the faucet from above the counter. Then you will secure it from below the sink. Careful work here ensures your new faucet is stable and straight.
Mounting the Faucet Assembly
This step connects the faucet to your countertop. You should handle the faucet carefully to avoid scratches. Most kits come with a base plate and a rubber gasket. These parts create a seal and protect your counter.
- Prepare the Faucet: Your new built in water dispenser faucet has tubes attached to its base. You should identify these tubes. They will carry water to the spout.
- Insert the Faucet: Gently feed the faucet's water lines and threaded stem through the hole in your countertop.
- Position the Base: From above the sink, place the decorative base plate (escutcheon) and rubber gasket over the hole. Then, set the faucet down through the plate and gasket.
- Check the Alignment: Look at the faucet from the front. Make sure the spout is straight and centered. You can ask someone to hold it in place for the next step.
Quick Tip: 💡 Before you insert the faucet, clean the countertop area around the hole. Any dust or debris can prevent a good seal. A clean surface helps avoid leaks later.
Tightening from Under the Sink
Now you will work under the sink. This part can be awkward. You will be in a tight space. Having a flashlight or headlamp makes seeing much easier. This step secures your built in water dispenser, so it does not wobble during use.
You will find a hardware packet for mounting. It usually contains a rubber washer, a metal washer, and a locking nut.
- Step 1: Add the Washers From under the sink, slide the large rubber washer onto the faucet's threaded stem. Push it up until it touches the bottom of the countertop. Next, slide the metal washer on after the rubber one.
- Step 2: Thread the Nut Screw the locking nut onto the threaded stem. Hand-tighten it first. This holds the faucet in place while you make final adjustments.
- Step 3: Final Alignment and Tightening Ask your helper to check the faucet's position one last time from above. Once it is perfectly straight, you can tighten the locking nut. Use your adjustable wrench to turn the nut another half-turn.
Caution! ⚠️ You must make the connection snug but do not overtighten it. Too much force can crack the countertop or damage the faucet's mounting threads. The faucet should feel solid with no movement.
Making the Water Connection
Your faucet is now securely in place. The next phase involves connecting it to your home's water supply. This is the most technical part of the installation. You will tap into the cold water pipe, run a thin tube to your new faucet, and secure all the connections to prevent leaks.
Tapping into the Cold Water Line
You need to create a new connection point on your cold water pipe. Your kit likely came with a valve for this purpose. You will find two common types of valves: a saddle valve and a tee fitting.
A saddle valve clamps onto the outside of the pipe. It has a small pin that pierces the pipe to create a water channel. While they are easy to install, plumbers often advise against them for several reasons.
- Saddle valves frequently leak over time as their rubber gaskets wear out.
- The small hole they create can easily get clogged with mineral deposits.
- Overtightening the clamp can damage or warp soft copper pipes.
Important Note: 📝 The International Plumbing Code (IPC) actually prohibits the use of saddle-type fittings for water connections. For a reliable, long-term solution, you should use a tee fitting.
A tee fitting is a much more secure option. It becomes a permanent part of your plumbing. This fitting creates a dedicated, full-port valve for your new built in water dispenser. Plumbers recommend permanent connections like PEX or soldered copper because they are highly reliable and have fewer points of failure. Installing a tee fitting gives you a professional-grade connection that will last.
Running and Cutting the Tubing
Now you will run the plastic water line from the tee fitting to the faucet. This tubing is usually 1/4-inch polyethylene.
First, measure the path. Run the tubing from the cold water line connection up to the faucet's stem under the sink. You want to create a smooth route with gentle curves.
Pro Tip: 📏 Leave some extra slack in the tubing. This creates a service loop. The extra length makes it easier to pull out the filter for future changes. However, do not leave so much slack that the tube kinks or sags. Use smooth, gradual bends to prevent any blockage.
Once you have the right length, you need to cut the tubing. A clean, square cut is essential for a leak-proof seal. Do not use scissors or a knife, as they can crush the tube and create an uneven edge. You should use a dedicated tubing cutter. Tools like the REED Quick Release™ tube cutters are designed specifically for this job. They ensure a perfectly flat cut every time.
Securing the Connections
The final step is to connect the tubing. Most kits use push-to-connect fittings, which are simple and effective.
- Connect to the Tee Fitting: Take one end of the tubing. Push it firmly into the valve on your tee fitting. You should feel it "click" or pop into place. Give the tube a gentle tug to confirm it is locked in.
- Connect to the Faucet: Take the other end of the tubing. Push it into the connection port on the bottom of the faucet. Again, push until you feel it seat completely.
Connection Trick: ✨ Sometimes the tubing can be hard to push into the fitting. You can make it easier by applying a small amount of water or spit to the end of the tube. This acts as a temporary lubricant. Do not use oils or soaps, as they can damage the fitting's O-ring over time.
After connecting both ends, check your work. The tubing should look straight going into each fitting. There should be no sharp bends or kinks along its entire length.
The Final Check: Turning the Water On
This is the moment of truth. You have installed the faucet and connected the tubing. Now you will carefully turn the water back on. A slow and methodical approach here is key. It prevents damage and helps you spot any potential issues before they become big problems.
How to Slowly Restore Water Pressure
You should not turn the main water valve on all at once. A sudden rush of water can create a "water hammer" effect. This shockwave can damage your pipes and the new connections you just made. You need to reintroduce water into your pipes gradually.
Go back to your main water shutoff valve. Turn the handle counter-clockwise just a quarter of the way. You will hear water begin to flow through the pipes. Let the system fill for about a minute. This allows the air in the pipes to escape slowly through your open faucets. Then, you can open the valve the rest of the way.
Final Step: 💧 Go back to your kitchen sink. Turn the handle on your new built in water dispenser. Let the water run for a few minutes. This flushes out any air and debris from the new line.
My Leak-Checking Process
With the water pressure restored, you must perform a thorough leak check. A tiny drip can cause significant water damage over time. You should inspect every connection point you worked on. I used a multi-step process to ensure everything was perfectly sealed.
For a truly systematic check, you can use methods similar to what plumbers use. Here are some simple but effective techniques:
- Visual and Touch Inspection: Look closely at the tee fitting and the faucet connection. Run your fingers over every joint. You can often feel a drip before you see it.
- The Paper Towel Test: This is a great way to find slow leaks. Dab a dry paper towel on each connection point. The paper will instantly show any moisture.
- Bubble Leak Detector: You can apply a soap and water solution to each fitting. If you see new bubbles forming, it means air or water is escaping. This confirms a leak that needs tightening.
Check these spots again after 30 minutes and then a few hours later. This final diligence gives you peace of mind.
Troubleshooting Common Problems
Even with a careful installation, you might run into a couple of common issues. A small drip or weak water flow can be frustrating. Luckily, you can usually fix these problems with a few simple checks.
Fixing a Drip or Leak
Discovering a leak after your hard work is disappointing, but the fix is often straightforward. Leaks from push-to-connect fittings usually happen for a few reasons. The tubing might not be pushed in far enough, or the internal O-ring could be damaged. Over time, rubber washers can also harden and fail to create a good seal.
To fix a dripping push-to-connect fitting, you can follow these steps:
- Check the Tubing: First, turn the water off again. Release the tubing from the fitting. Make sure the end has a clean, square cut.
- Inspect the Parts: Look inside the fitting for a damaged O-ring. Also, check the end of the tube for any scratches or erosion that could prevent a seal.
- Re-insert Correctly: Push the tube firmly back into the fitting until it clicks and will not go any further. A good trick is to wet the end of the tube with water to help it slide in smoothly. Gently tug it to confirm it is secure.
What to Do for Low Water Flow
If your new dispenser produces only a trickle of water, the problem is likely simple. You should investigate a few potential causes to restore normal flow.
Troubleshooting Tip: 🕵️ A clogged water filter is the most frequent cause of low water flow. If your dispenser uses a filter, this is the first place you should look.
You can also check for these issues:
- Kinked Water Line: Look under the sink. Ensure the water supply tube has smooth, gentle bends. A sharp kink can block water flow. Straighten any kinks you find.
- Incorrectly Installed Filter: A filter that is not seated properly can restrict water. You can try removing and reinstalling the filter to make sure it is snug and locked in place.
You achieved a secure, leak-free water connection. This was the most critical step. Your careful drilling and mounting create a professional, finished look. Now, you can enjoy your new built in water dispenser for years to come.
Future Care Tip: 🧼 For home use, you should plan to clean the system every 15–20 days to ensure the water stays fresh and the dispenser runs smoothly.
Enjoy the convenience of having filtered water right at your fingertips!
FAQ
Can I connect the dispenser to the hot water line?
No. You must connect it only to the cold water line. Hot water will damage the filter. It can also harm the dispenser's internal plastic components.
How often should I change the water filter?
You should replace the filter about every six months. Your filter's instruction manual provides the exact replacement schedule. This ensures your water stays clean and fresh.
What if my sink does not have an extra hole?
You will need to drill a new hole in your countertop. The blog section "The Hardest Part: Drilling the Countertop" shows you how to do this.