Stop struggling with how to get dtf film to go through printer
The Direct-to-Film market is projected to reach nearly USD 4 billion by 2030, yet many users face feeding issues. The solution for how to get dtf film to go through printer involves a few key steps. Users must print on the correct matte side. The film needs to be completely flat and aligned against the printer's right-side guide. For difficult printers, taping the film's leading edge to copy paper can force the rollers to grip.
First, Identify the Correct Printable Side of the Film
A successful print job begins before the film even enters the printer. Users must print on the correct side of the DTF film. Printing on the wrong side results in ink pooling, smearing, and a failed transfer. Two simple tests can help anyone identify the printable surface with 100% accuracy.
The Touch Test: Matte vs. Glossy
The most immediate method is a simple touch test. One side of the film feels slightly rough and non-reflective (matte), while the other is perfectly smooth and shiny (glossy). The matte side is the printable surface. This texture comes from a sophisticated chemical coating designed for optimal ink reception. This coating often includes:
- An ink-absorbing layer containing Polyacrylic acid (PAA).
- Silicone dioxide (silica) and Polydimethylsiloxane (PDMS) to manage ink spread.
This specialized surface ensures excellent ink absorption, preventing colors from bleeding and allowing for crisp, fine lines. The difference in function is clear:
| Film Side | Surface Characteristics | Ink Interaction |
|---|---|---|
| Matte | Non-reflective, slightly rough | Ink adheres and absorbs smoothly |
| Glossy | Shiny, reflective, slick | Ink sits on top and beads up |
The Water Test: Smear vs. Bead
For absolute certainty, the water test provides definitive proof. Users can place a tiny drop of water on a corner of the film.
Pro Tip 💧: If the water drop smears or soaks in when touched, that is the printable matte side. If the water drop beads up and rolls off like water on a waxed car, that is the non-printable glossy side.
The scientific principle behind this is surface tension. The glossy side has high surface tension and hydrophobic properties, causing liquids to bead up. The coated matte side is hydrophilic, designed to break that tension and allow the water-based DTF ink to spread and absorb correctly.
Next, Prepare Your Film and Printer for a Perfect Feed
Proper preparation of both the film and the printer hardware is essential for a smooth workflow. Physical factors like film curl and roller condition directly impact whether the printer can grip and guide the sheet correctly. Addressing these elements proactively prevents most feeding failures.
Flattening Curled Film Edges
DTF film often curls due to environmental factors, especially humidity. Experts advise storing film in a controlled environment with relative humidity between 40% and 65% to prevent deformation. If the edges are already curled, users can gently bend the film in the opposite direction. Placing the film under a flat, heavy object like a book for a few minutes also effectively flattens it, ensuring the printer's rollers make even contact.
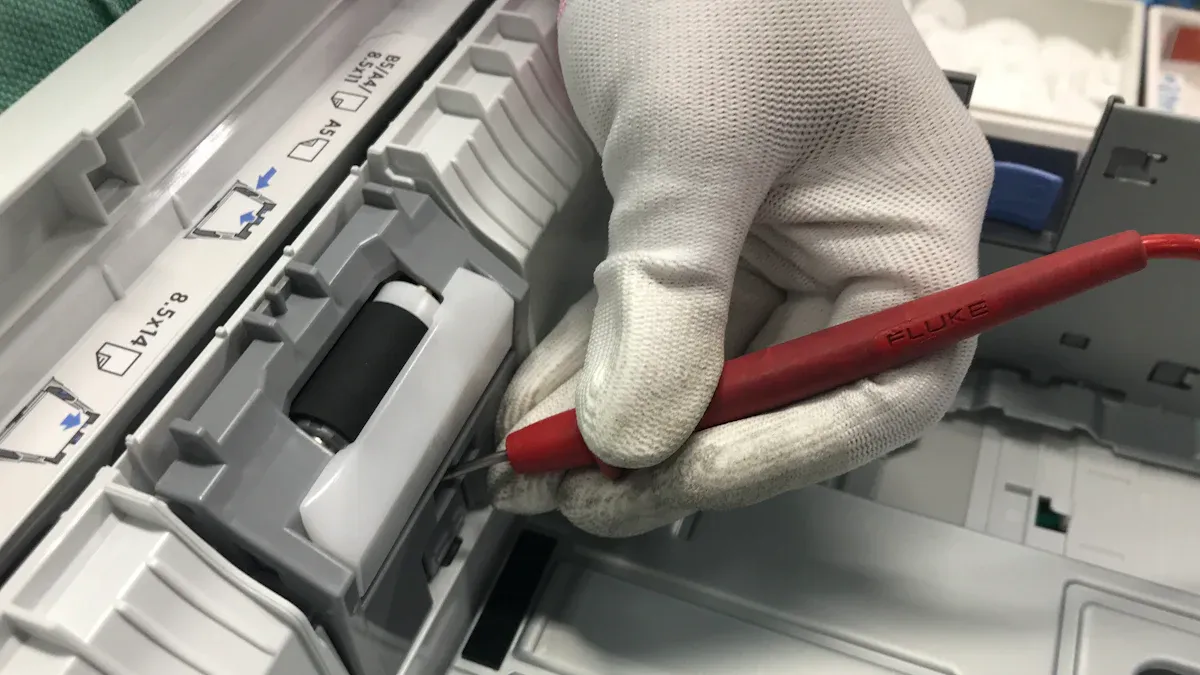
Cleaning Your Printer's Rollers
Over time, printer rollers accumulate dust and microscopic debris, reducing their ability to grip the slick film. This loss of traction is a primary cause of feeding issues. A consistent maintenance schedule is the solution.
- Monthly Roller Maintenance: Users should clean all transport rollers with isopropyl alcohol.
- Inspection: During cleaning, one should check for any visible wear or damage that could impede the film path.
- Prevention: Regular cleaning of all film path components prevents buildup and ensures reliable feeding.
Using the Carrier Sheet Taping Method
For printers that consistently refuse to grab the film, the carrier sheet method offers a nearly foolproof solution. This involves taping the leading edge of the DTF film to a standard piece of copy paper. The printer's rollers easily grip the paper, pulling the attached film in along with it. Users should use a tape designed for clean removal.
| Tape Material | Key Features | Best For |
|---|---|---|
| Polyamide | High heat resistance, no residue | High-temperature applications |
| Silicone-Based | Flexible, easy to remove, residue-free | General use, apparel |
Heat-resistant tape with a silicone-based adhesive is ideal because it peels off cleanly without leaving sticky residue.
Many online tutorials demonstrate the entire DTF transfer process. These visual guides often show taping techniques that can be adapted for creating a carrier sheet.
The Real Secret to How to Get DTF Film to Go Through Printer
The most critical moment in the DTF printing process happens right at the printer. Proper film handling, precise alignment, and careful verification are the core components of a successful feed. Even with perfectly flat film and clean rollers, a slight error during loading can cause jams, skewed prints, and wasted materials. Understanding the nuances of this final stage is the real secret to how to get dtf film to go through printer without constant issues.
Positioning the Film in the Tray
Correct film placement begins with using the right input tray. For most converted desktop printers, such as popular Epson models, the rear feed tray is the designated path for specialty media like DTF film. This path is often straighter, minimizing the chance of the stiff film jamming.
Users should load a single sheet of DTF film into the rear feed tray. It is essential to ensure the film size is appropriate for the intended design. The next step involves adjusting the paper guides.
- Slide the guides so they are snug against both sides of the film.
- The guides should be tight enough to prevent lateral movement but not so tight that they buckle or bend the film.
- This secure positioning is the first defense against the film feeding at an angle.
Note 📝: Some consumer printers, like the ET-8550, use optical sensors to detect media. Since DTF film is semi-transparent, these sensors can fail to recognize it. This is a primary reason why the carrier sheet taping method is so effective for these specific models.
Guiding the Film into the Rollers
Manually guiding the film ensures the printer's mechanism engages it correctly. This hands-on step is vital for printers that are prone to misfeeds. The goal is to present the film to the rollers so they can grip it squarely and pull it in straight.
The technique requires careful alignment. For many printers, a small white tab or marker inside the feed path serves as a crucial alignment point.
- Gently feed the film into the slot until its leading edge touches the internal rollers.
- Align the edge of the film precisely with the designated alignment marker.
- Once the film is against the rollers, press the appropriate button on the printer's control panel (often labeled 'load,' 'paper feed,' or an icon) to initiate the feed.
- Keep a light, steady hand on the film as it feeds in, ensuring it does not shift left or right.
Pro Tip 🧤: Always wear gloves when handling DTF film to avoid leaving fingerprints on the printable surface. Oils from skin can interfere with ink adhesion. If a print gets on the film, it is best to trim that section and restart the loading process.
Verifying Straight Alignment Before Printing
Before committing to a full print job, a final verification step can save significant time and resources. This involves using the printer's software or a test print to confirm that the film path is perfectly straight. Misalignment can cause a host of problems, including ghosting, smearing, or incomplete transfers.
A quick test print is the most reliable method. Most RIP (Raster Image Processor) software and even standard printer drivers have functions for this.
- Print a Test Pattern: Use the software to print a simple nozzle check or a head alignment pattern. This uses very little ink and provides immediate feedback.
- Examine the Output: Inspect the test pattern on the film. Look for any skewed lines, gaps, or offsets. The pattern should be perfectly straight and crisp.
- Calibrate if Needed: If the test print reveals misalignment, use the printer's alignment calibration utility, often found within the RIP software or printer maintenance menu.
After calibration, running one final test pattern confirms that the issue is resolved. This methodical check ensures that the film is moving smoothly and is perfectly aligned, providing the confidence to proceed with the final print. This verification is a key part of learning how to get dtf film to go through printer reliably.
How to Fix Common DTF Film Feeding Failures
Even with careful preparation, users can encounter feeding problems. Troubleshooting these issues involves identifying the specific failure and applying a targeted solution. Understanding these common problems is the final step in mastering how to get dtf film to go through printer consistently.
Problem: Printer Won't Grab the Film
The most frequent issue is the printer failing to grip the film. The slick, non-porous nature of the film's back side offers little traction for standard rollers. If the film is not perfectly flat or the rollers are dirty, the printer cannot initiate the feed.
Solution ✅: The carrier sheet taping method is the most reliable fix. Taping the film to a piece of copy paper gives the rollers a familiar texture to grab, pulling the film in successfully. Regular roller cleaning with isopropyl alcohol also restores grip.
Problem: Film Feeds at an Angle or Skews
A skewed feed ruins a print by causing misregistration and smearing. This often happens when rollers have hardened or lost their elasticity. Worn paper pickup rollers cause the film to feed at a skewed angle because they cannot grip it evenly. To correct this, users should:
- Adjust and properly seat the film, ensuring it is straight and secure between the tray guides.
- Clean feed rollers regularly with isopropyl alcohol to ensure a good, even grip.
- Run printer alignment calibrations through the RIP software to correct any minor path deviations.
Problem: Film Jams During the Print Job
A film jam midway through a print is frustrating and wasteful. These jams almost always stem from a handful of preventable setup errors. The top reasons for mid-print jams include:
- Improper film alignment or loading at the start.
- Dust buildup on printer rollers, which causes the film to slip and misalign during transport.
- Using low-quality DTF film or film that is incompatible with the printer's specifications.
Users now possess the complete method for flawless DTF film feeding. Mastering how to get dtf film to go through printer is achievable by following a core checklist. Consistent, jam-free results are now within reach for any operator.
Checklist for Success: Printable Side Up, Film Flat, Align Right, Tape if Needed, and Keep Rollers Clean.
FAQ
Why do some printers need the taping method?
Certain printers use optical sensors to detect media. The film's transparency can prevent detection. Taping the film to paper ensures the sensor recognizes the media and initiates the feed.
Can any tape be used for the carrier sheet method?
Operators should use heat-resistant tape with a silicone-based adhesive. This type of tape removes cleanly after printing. It prevents sticky residue from contaminating the printer or the final transfer.
How should users store DTF film to prevent curling?
Users must store film in a controlled environment. A space with 40% to 65% relative humidity is ideal. Storing film flat and in its original packaging prevents edge curling.
See Also
Automatic UV Coaters: Indispensable for Modern High-Speed Printing Operations
Leading Precoating Materials for Advanced Filtration Systems in the Coming Year
Understanding Nozzle Solutions: A Guide for Diverse Industrial and Home Applications
Innovative Folder Gluer Features Revolutionizing Carton Production Lines by 2025
Unexpected Strategies for Effective Troubleshooting of Sulfur Recovery Catalysts