A Step-by-Step Guide to Water Dispenser Cleaning
Your drinking water dispenser for home needs regular cleaning. You must clean it to keep your water tasting fresh and pure. Neglecting this task allows bacteria and biofilm to grow, which causes unpleasant flavors. Studies show just how common contamination can be.
| Compliance Status | Percentage of Water Samples |
|---|---|
| Compliant | 21.62% |
| Non-compliant (HPC at 22 °C) | 2.7% |
| Non-compliant (HPC at 37 °C) | 27.03% |
| Non-compliant (Both) | 48.65% |
Let's start with the supplies you'll need to get the job done right.
Key Takeaways
- Clean your water dispenser every 3 to 6 months. This stops germs and mineral buildup. Regular cleaning keeps your water fresh and safe to drink.
- Gather cleaning supplies first. You will need white vinegar or bleach. Also, get a bucket, gloves, and a soft brush. This makes cleaning easy.
- Follow the cleaning steps carefully. Unplug the dispenser first. Drain all water. Clean removable parts. Sanitize the inside. Rinse it well. Then, clean the outside and put it back together.
Gather Your Cleaning Supplies
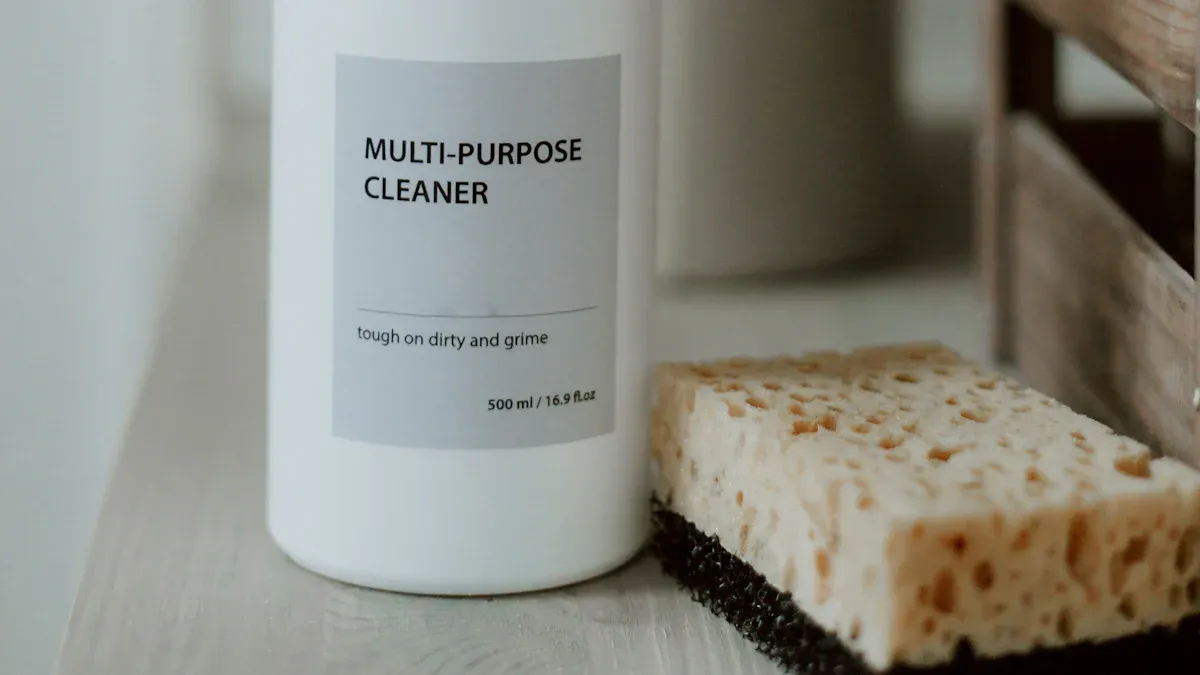
You need the right tools before you start cleaning your drinking water dispenser for home. Having everything ready makes the process quick and simple. You likely have most of these items in your kitchen already.
What You'll Need
You can gather a few basic household items for a successful cleaning. White vinegar is a great choice. It effectively cleans away bacteria and mineral buildup.
- Clean rubber gloves
- A bucket
- White vinegar
- Baking soda (optional)
- Clean, fresh water
Pro-Tip: You can make a thick paste with baking soda and water. This paste helps scrub away any stubborn buildup you might find inside the dispenser.
Different parts of the dispenser require different tools. A soft cloth is good for large surfaces. A small brush helps you clean tight spots. The table below shows the best tool for each job.
| Component Area | Recommended Tool | Specific Use |
|---|---|---|
| Exterior Surfaces | Clean, lint-free cloth or sponge | Wiping away dirt and stains from the dispenser's outer parts. |
| Hard-to-reach areas | Soft-bristle brush or toothbrush | Cleaning small components and areas that are difficult to access. |
| Removable Parts | Soft-bristle brush or toothbrush | Gently scrubbing parts after they have soaked in soapy water. |
With these supplies in hand, you are ready to move on to the first step of the cleaning process.
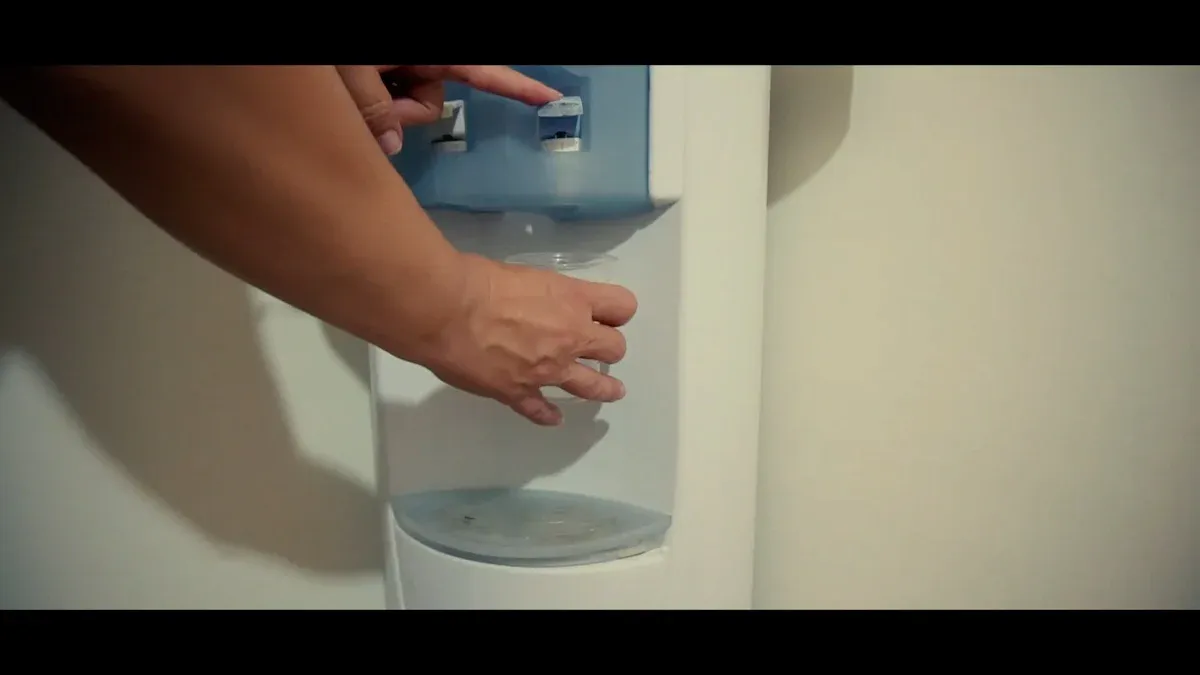
Step 1: Prepare Your Dispenser
With your supplies ready, you can now prepare your water dispenser for a deep clean. This first step is crucial for both your safety and for ensuring the cleaning process is effective. You will need to disconnect the power and remove all the existing water from the unit.
Unplug for Safety
Your safety is the top priority. Before you do anything else, you must disconnect your drinking water dispenser for home from the power source. This simple action prevents any risk of electrical shock while you work with water and cleaning solutions.
- First, remove the empty water bottle from the top of the unit.
- Next, carefully unplug the power cord from the wall outlet.
Safety First! ⚠️ Some modern dispensers have built-in electrical safety features like circuit breakers. Even with these protections, you should always unplug the unit completely before cleaning to guarantee your safety.
Drain the Water
Now you need to empty all the water from the dispenser's reservoirs. Draining the system completely ensures your cleaning solution can reach every internal surface without being diluted.
- Place a bucket under the spigots to catch the water.
- Drain all the water from the cold water faucet until it stops flowing.
- Next, hold the hot water handle or button open to empty the hot tank. Be careful, as this water may still be warm.
- Many units have a small drain plug on the back. Carefully remove this plug over your bucket to drain any remaining water from the system.
- Once all the water is out, you can replace the drain plug.
Step 2: Clean the Removable Parts
Now that your dispenser is empty, you can focus on the smaller components. These parts often trap moisture and are prime spots for buildup. Giving them a thorough wash is a key step for a truly clean machine.
Disassemble the Components
You need to take apart the removable pieces of your dispenser. Most models have several parts you can easily detach for cleaning.
- Water Guard/Baffle: This is the piece inside the top opening where the bottle sits. You can usually lift or twist it to remove it.
- Spigots/Faucets: Some dispensers have spigots that you can unscrew. Check your user manual if you are unsure.
- Drip Tray: The tray at the bottom simply lifts out. The cover on top of it often separates for easier cleaning.
Check Your Manual! 📖 Every drinking water dispenser for home is slightly different. Your user manual is the best guide. It shows you exactly which parts are removable and how to take them off safely without causing damage.
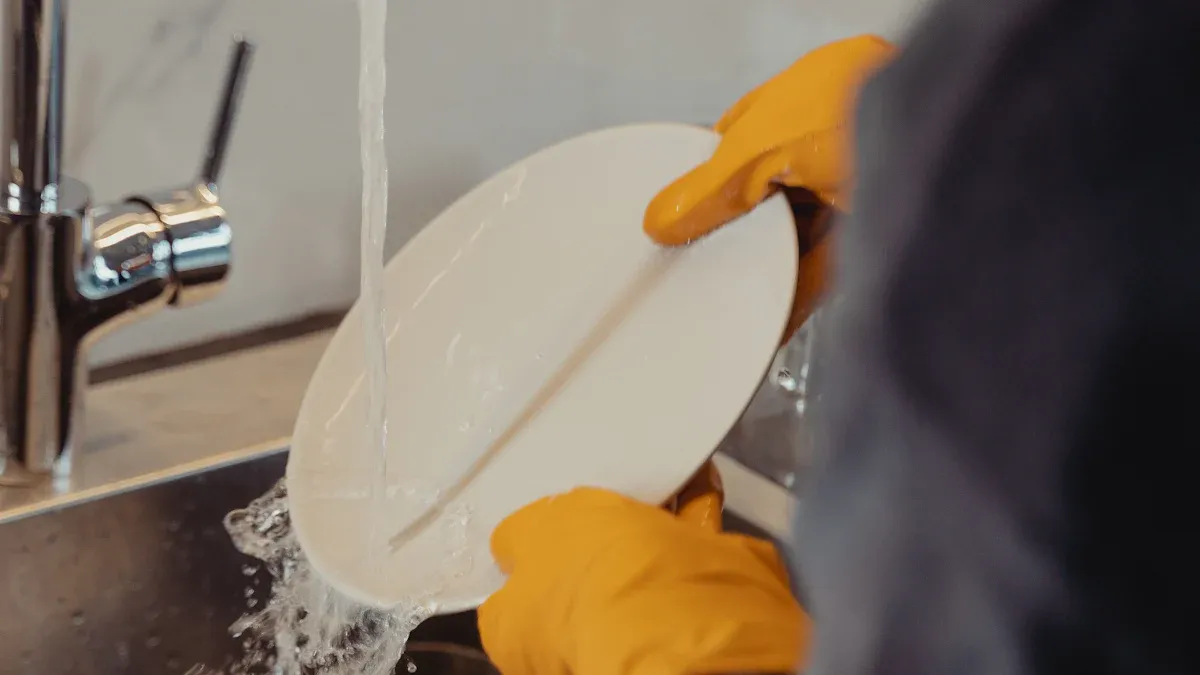
Wash with Soap and Water
You will now wash these components in your sink. A simple soap and water solution works perfectly for this task.
- Fill a basin or your sink with warm water.
- Add a few drops of mild dish soap to create a sudsy mixture.
- Place all the disassembled parts into the soapy water.
- Let them soak for about five minutes to loosen any grime.
- Use a soft cloth or brush to scrub each part. Pay special attention to corners and spouts where buildup can hide.
- Rinse every piece thoroughly under clean, running water. You must remove all soap residue to prevent a soapy taste later.
Step 3: Sanitize the Internal Reservoir
With the removable parts clean, your next task is to sanitize the inside of the dispenser. This step eliminates any lingering bacteria or biofilm from the internal reservoir and water lines. You want to ensure the water you drink is truly pure.
Choose Your Cleaning Solution
You have a few options for sanitizing your dispenser. The most common household choices are vinegar and unscented bleach. Each has its own benefits and drawbacks. You can also find commercial cleaning kits or hire a professional service for a more rigorous cleaning.
The table below compares the two main DIY solutions.
| Feature/Agent | Bleach | Vinegar |
|---|---|---|
| Pros | • Effective against bacteria and viruses. • Fully disinfects nonporous systems. | • Kills mold spores. • Helps remove mineral buildup (scale). |
| Cons | • Less effective on porous surfaces. • May not kill mold spores effectively. | • Not an EPA-registered disinfectant. • Does not kill germs like STAPH. |
Some people prefer ready-to-use commercial kits. These often contain a premixed hydrogen peroxide solution and are very easy to use. For the highest level of cleaning, especially in an office, you might consider a professional service. Technicians use special tools and professional-grade sanitizers to clean every internal component.
The Vinegar Method: Mix 1 Part Vinegar to 3 Parts Water
Vinegar is a popular, natural choice for cleaning. It is especially good at breaking down mineral deposits, also known as scale.
- Create your cleaning solution. Mix one part distilled white vinegar with three parts warm water.
- Pour this mixture directly into the top of the dispenser's reservoir. Fill it completely.
Use the Right Vinegar! 💡 You should always use distilled white vinegar. Other types, like apple cider vinegar, can sometimes cause bad odors or be neutralized by the pH of your water, allowing microbes to grow. White vinegar is best for cleaning your drinking water dispenser for home.
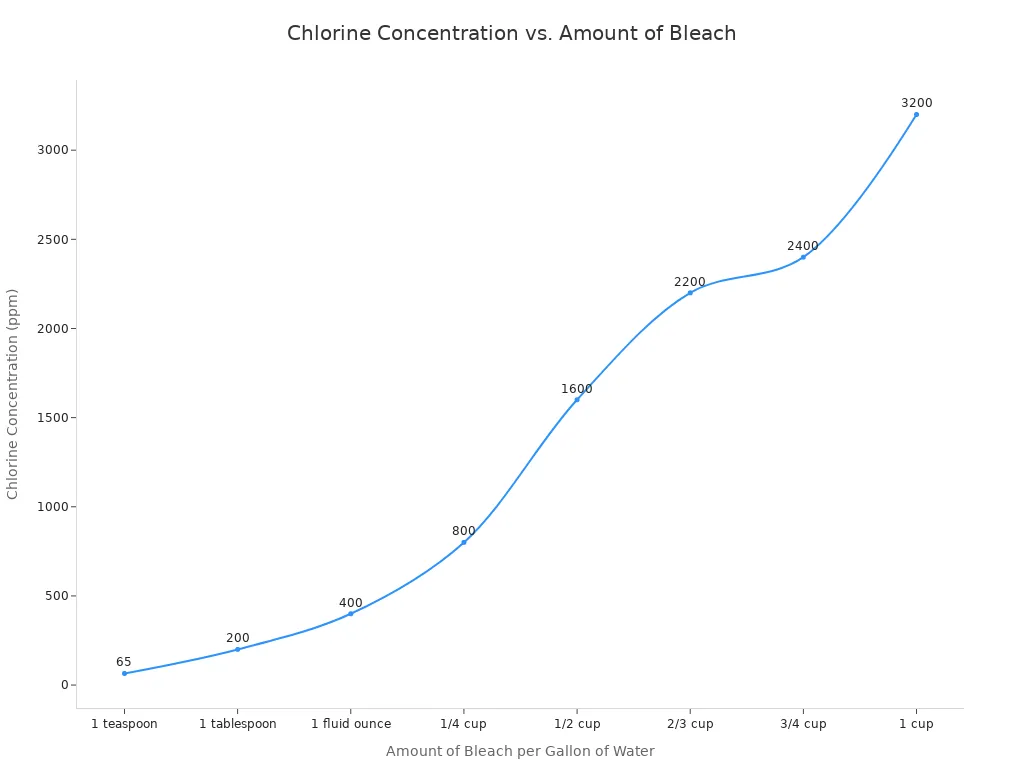
The Bleach Method: Mix 1/2 Teaspoon Unscented Bleach per Gallon of Water
Bleach is a powerful disinfectant recognized by federal regulations for sanitizing food-contact surfaces. You must use it correctly and safely.
- Use the right bleach. Choose regular, unscented household bleach (5-9% sodium hypochlorite). Do not use splash-less, scented, or gel varieties.
- Mix the solution carefully. Add about 1/2 teaspoon of bleach for every gallon of water. This creates a solution that is safe and effective. Federal rules state that sanitizing solutions for food equipment should not exceed 200 parts per million (ppm) of chlorine.
- Pour the diluted bleach solution into the reservoir until it is full.
Safety Warning! ☣️ You must handle bleach with care. Never mix bleach with other cleaners like ammonia or vinegar, as this creates dangerous toxic gas. Always work in a well-ventilated area and wear gloves to protect your skin.
Let the Solution Sit
Now you need to let your chosen cleaning solution do its job. This contact time is essential for killing germs.
- Allow the vinegar or bleach solution to sit inside the reservoir for at least five minutes. Do not let it sit for more than ten minutes.
- Place a bucket under the spigots.
- Drain about a cup of the solution through both the cold and hot spigots. This sanitizes the dispenser's internal lines and faucets.
- Let the remaining solution sit in the reservoir for the rest of the contact time.
Step 4: Rinse the System Thoroughly
You have successfully sanitized the inside of your dispenser. Now, you must rinse the system completely. This step is vital to remove every trace of the cleaning solution. A thorough rinse ensures your drinking water will taste fresh and clean, with no aftertaste of vinegar or bleach.
Flush with Fresh Water
Your first flush will remove the bulk of the cleaning solution. You will need plenty of clean, fresh water for this process.
- Make sure the back drain plug is securely in place.
- Pour about two gallons of fresh water into the reservoir. Fill it completely.
- Place a bucket under the spigots.
- Drain the water through both the cold and hot spigots until the reservoir is empty. This action flushes the solution from the internal water lines.
Rinse Tip! 💧 You can discard the rinse water down the drain. It is heavily diluted and safe to dispose of in your sink.
Drain and Repeat
One rinse is often not enough to eliminate the cleaning smell or taste. You will need to repeat the process until the water is pure.
- First, fill the reservoir again with another gallon of fresh water.
- Dispense a small amount and taste it. You are checking for any lingering vinegar or bleach flavor.
- If you still taste or smell the cleaning solution, you must repeat the rinse.
- Pour another two gallons of clean water into the reservoir. Drain it completely through the spigots.
- Retest the water. You should continue this flushing cycle until the water tastes and smells perfectly clean.
Step 5: Clean the Exterior of Your Drinking Water Dispenser for Home
You have sanitized the inside of your dispenser. Now it is time to clean the outside. A clean exterior makes your drinking water dispenser for home look great in your kitchen or office. It also removes fingerprints, dust, and any water splashes that can leave marks.
Wipe Down All Surfaces
You can easily wipe down the outer shell of the unit. Use a soft, lint-free cloth dampened with a mild soap and water solution. Gently clean all the exterior surfaces, including the sides and the area around the spigots. For stubborn hard water stains, you can use a more effective mixture.
- Remove the dispenser water grille if it has one.
- Create a cleaning solution with mild dish detergent, baking soda, and water.
- Dampen a soft cloth with this solution and clean the stained areas.
- Rinse the spots with a clean, damp cloth and dry everything completely.
If your dispenser has stainless steel parts, you should follow specific cleaning procedures for stainless steel to avoid scratches.
Empty and Scrub the Drip Tray
The drip tray catches spills and overflows. This collected water makes it a perfect breeding ground for mold and bacteria. You must clean it regularly.
Pro-Tip: 🧼 You should wipe the drip tray daily to keep it dry. A thorough cleaning every week or two prevents grime from building up and keeps your dispenser hygienic.
First, lift the drip tray out of the dispenser. Most trays have a cover that you can also remove. Wash both parts in your sink with warm, soapy water. Use a soft brush to scrub away any slime or buildup. Rinse the tray and cover thoroughly with clean water. Make sure they are completely dry before you put them back in place.
Step 6: Reassemble and Refill
You are on the final step of the cleaning process. Your drinking water dispenser for home is now sanitized and ready for use. You just need to put everything back together and install a fresh bottle of water. This last stage ensures your hard work pays off with pure, refreshing water.
Dry All Parts Completely
You must dry every component before reassembly. Any remaining moisture can encourage new mold or bacteria growth. This step is critical for maintaining a hygienic machine.
- Use a clean, lint-free cloth to wipe down the baffle, spigots, and drip tray.
- Pay close attention to small crevices and corners.
- You can let the parts air-dry on a clean towel for a few minutes. This ensures no moisture is trapped inside.
Put Everything Back Together
Now you can reassemble your water dispenser. You will put all the clean, dry parts back in their proper places.
- Start by reattaching the spigots if you unscrewed them.
- Next, place the water guard or baffle back into the top opening of the dispenser.
- Finally, slide the clean drip tray and its cover back into position at the base of the unit.
Need a Reminder? 📖 If you are unsure how a piece fits, check your user manual. Following the manufacturer's instructions helps you avoid damaging any parts.
Install a New Water Bottle
Your dispenser is now ready for a fresh supply of water. You can safely plug the unit back in and load a new bottle.
- Take a new water bottle. Wipe the neck and cap with a damp cloth to remove any dust.
- Remove the protective seal from the bottle cap.
- Carefully lift the bottle and place it onto the top of the dispenser.
- Wait for the reservoir to fill. You will hear gurgling sounds and see bubbles rise.
- Plug the power cord back into the wall outlet.
- Dispense a cup of water from both the hot and cold taps to ensure everything works correctly. Enjoy your clean water! ✨
How Often Should You Clean Your Dispenser?
You have finished cleaning your dispenser. Now you might wonder how often you need to repeat this process. Regular cleaning is essential for maintaining water quality. The ideal frequency depends on how much you use your dispenser and where it is located.
The 3-6 Month Rule
You should perform a deep clean of your drinking water dispenser for home every three to six months. This comprehensive cleaning is vital for hygiene. A full system service every six months is a great standard for home users. However, dispensers in busy offices see more use and need more frequent attention.
The table below shows how usage affects the cleaning schedule.
| Factor | Corporate/Office Use | Residential/Home Use |
|---|---|---|
| Cleaning Frequency | Every 3 months | Every 6 months |
| Usage Level | Higher consumption | Lower usage |
| Reason for Frequency | Gets dirtier faster | Standard maintenance |
Expert Advice 🧑🔧 A deep and thorough cleaning every six months is highly recommended. For the most comprehensive service, you might consider hiring a qualified technician who can properly inspect and sanitize all internal parts.
Tips for Daily Maintenance
You can take small steps every day to keep your dispenser clean between deep cleanings. These simple habits prevent buildup and maintain hygiene.
- Wipe the spigots and the area around them with a clean cloth.
- Check the drip tray for any standing water.
- Empty and wipe the drip tray to keep it dry and prevent slime.
- Clean up any spills on the exterior of the unit immediately.
These quick tasks take only a minute. They make a big difference in the overall cleanliness of your machine and the freshness of your water. ✨
Regular cleaning is a simple task. You ensure every glass of water is hygienic and refreshing. A quick clean every few months removes harmful bacteria and mineral buildup. You can enjoy the peace of mind that comes with drinking truly pure and great-tasting water from your home dispenser. ✨
FAQ
Why does my water taste funny?
Your water may taste bad due to bacteria or mineral buildup inside the dispenser. Regular cleaning removes this buildup and restores the fresh taste of your water.
Can I use dish soap to clean the inside reservoir?
You should not use dish soap inside the reservoir. Soap residue is difficult to rinse out completely. It can leave a soapy taste in your drinking water.
Remember: 💡 Always use vinegar or a proper bleach solution for sanitizing the internal parts. These solutions rinse away cleanly and effectively kill germs.
Is cleaning a bottom-loading dispenser different?
Yes, the process is slightly different. You will need to disconnect the water line from the bottle. You then pump the cleaning solution through the system from a separate container.