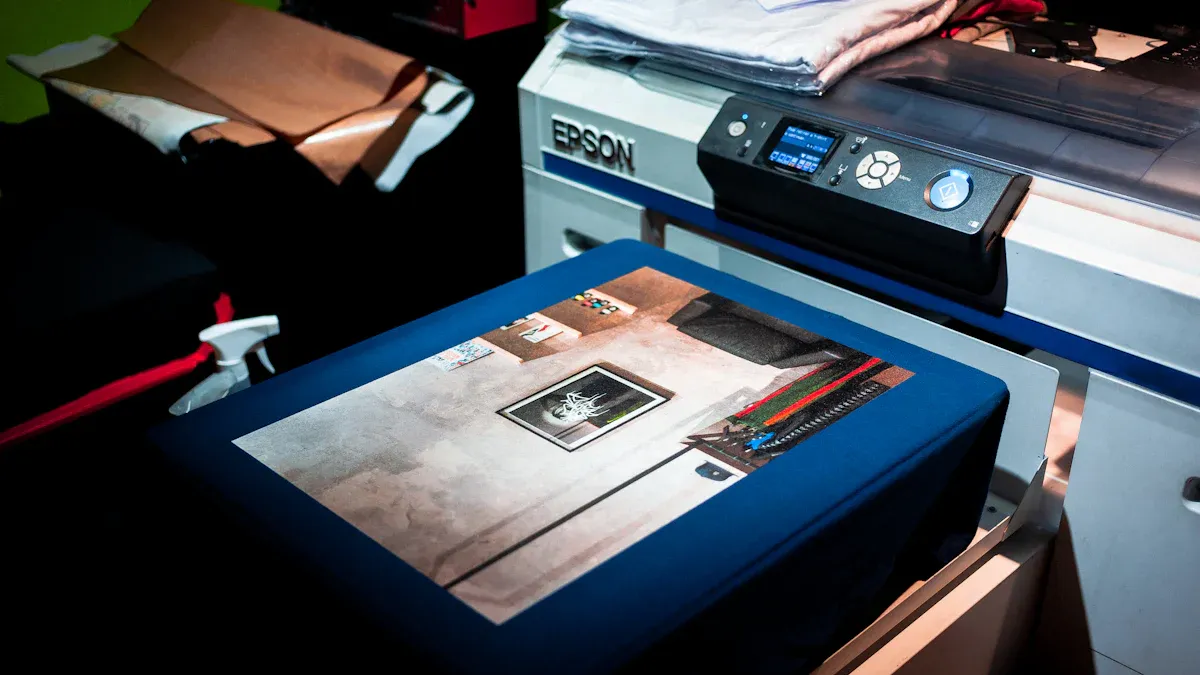
Applying DTF Clear Film is Easier Than You Think
The UV DTF market is experiencing significant growth. Projections show the market size increasing from US$ 215 million in 2024 to US$ 442 million by 2031. This surge highlights the technology's value for crafters and businesses. Applying a dtf clear film is a straightforward process that yields durable, high-quality results. The fundamental technique involves four simple steps.
- Clean the surface thoroughly.
- Peel the white backing from the transfer.
- Press the transfer firmly onto the surface.
- Peel off the clear top film slowly.
Key Takeaways
- Clean the surface well before you start. Use alcohol and a cloth. This helps the film stick.
- Gather your tools first. You will need the film, a squeegee, and scissors. This makes the job easier.
- Peel the white backing slowly. Then, place the film carefully. You cannot move it once it touches the surface.
- Press the film firmly with a squeegee. This removes air bubbles. It helps the film stick strong.
- Peel off the clear top film slowly. If parts lift, press them down again. Let the film dry for 24 hours for best results.
Essential Tools and Surface Prep

A successful application hinges on proper preparation and the right equipment. Before beginning, users should gather all necessary items. This preparation prevents interruptions and ensures a smooth, efficient workflow from start to finish. A well-organized workspace contributes significantly to a professional outcome.
Gathering Your Application Tools
Having the correct tools on hand makes the application process seamless. Most items are common crafting supplies. A complete toolkit ensures the user can handle the project with precision and confidence. The essential components for a flawless application include:
- The UV DTF transfer or permanent sticker itself.
- A squeegee or a firm plastic card, like a credit card.
- A soft, lint-free cloth.
- Isopropyl alcohol for cleaning.
- Scissors or a precision cutter, especially for separating designs from a gang sheet.
How to Prepare Any Surface
Proper surface preparation is the most critical factor for achieving a permanent bond. The adhesive on a dtf clear film requires a perfectly clean substrate to function correctly. Any dust, oil, or fingerprint residue will interfere with adhesion and can cause the transfer to fail.
The cleaning process is simple yet vital. First, apply a small amount of isopropyl alcohol to a lint-free cloth. Next, wipe the entire surface of the item being customized. This action removes invisible contaminants and creates an ideal surface for the transfer.
Pro Tip: 🧪 Patience is key after cleaning. The user must allow the surface to air dry completely. Applying a transfer to a damp surface will compromise the adhesive and lead to peeling or bubbling.
The Core Application Process for Your DTF Clear Film

With the surface prepared and tools at the ready, the user can proceed to the main application. This multi-step process ensures the dtf clear film adheres correctly, creating a vibrant and permanent design. Each stage, from peeling to burnishing, plays a specific role in achieving a professional-grade finish.
Step 1: Peel the Backing
The first action is to separate the design from its protective white paper backing. The user should place the transfer face down on a clean, flat surface. This position prevents the adhesive from collecting dust or debris. Gently lift a corner of the white backing and peel it away from the clear film. A smooth, steady motion is essential.
For larger or more intricate designs, specific techniques can prevent damage and ensure a clean separation.
- A "cold peel" approach offers greater control. It involves letting the transfer rest before peeling, which reduces the risk of smudging or accidentally lifting delicate parts of the design.
- Waiting for the transfer to cool slightly can also improve the initial tackiness of the adhesive for certain designs.
- Applicators should always use a consistent and even peeling motion to avoid any issues.
If the film resists removal, it may indicate an incomplete transfer from the printer. In this case, it is best to pause and ensure the transfer has cooled enough to peel effectively without tearing.
Step 2: Align and Place the Transfer
Precision is paramount during placement. Once the transfer is on the item, repositioning it is not possible. A common professional technique is the "hinge method." The user can place a small piece of painter's tape over the top edge of the transfer, securing it to the object. This creates a flap, allowing the user to lift the transfer, peel the backing, and then lay the design down perfectly in place.
Static electricity can sometimes interfere with placement, causing the transfer to cling incorrectly. This static can also affect print quality by scattering ink. Users can mitigate this issue in several ways.
- Maintain a stable environment with 40–70% humidity.
- Install a static discharge rope or ground wire on the printer.
- Add aluminum foil to the printer's heater platform to help disperse static.
- Store unused PET film in a moisture-controlled environment.
Note: 🎯 Take time to align the design carefully. Measure from the edges of the object to ensure the transfer is centered and straight before the adhesive makes contact.
Step 3: Burnish for Strong Adhesion
Burnishing is the process of applying firm pressure across the entire transfer. This action activates the pressure-sensitive adhesive and forces out any trapped air bubbles. The goal is to create a complete and permanent bond between the design and the substrate.
The user should take a squeegee or a firm plastic card and rub it vigorously over the clear top film. It is best to work from the center of the design outwards. This technique pushes air bubbles toward the edges instead of trapping them. Pay special attention to the edges and any small, detailed parts of the design.
The choice of burnishing tool can affect the outcome, especially on different surfaces.
| Feature | Felt-Edged Squeegee | Hard Plastic Squeegee |
|---|---|---|
| Material | Dense felt or felt-wrapped plastic | Rigid Teflon or Nylon |
| Scratch Prevention | Soft felt edge prevents scratching | Can scratch surfaces without a protective sleeve |
| Flexibility | Adapts well to irregular or curved surfaces | Rigid, ideal for flat surfaces and removing wrinkles |
| Best Use Case | Vehicle wraps, delicate surfaces, curved items | Standard graphics, applying maximum pressure |
A felt-edged squeegee is an excellent choice. It treats the material carefully and adapts well to irregular surfaces, reducing the risk of damage. The soft edge glides smoothly and is ideal for ensuring every part of the design makes contact without scratching the film.
Step 4: Remove the Top Film
This final step reveals the finished design. Patience is the most valuable tool at this stage. The user should wait a few moments after burnishing before attempting to remove the top carrier sheet. This brief pause allows the adhesive to set, which helps ensure a clean release.
The removal process itself requires a slow and deliberate technique. The user should start at one corner of the transfer. They must peel the clear film back on itself at a low, sharp angle, similar to a 45-degree angle. A steady, smooth motion prevents parts of the design from lifting prematurely. The user should avoid pulling the film straight up, as this puts unnecessary stress on the adhesive bond.
Important: ⚠️ If any part of the design begins to lift with the top film, the user must stop peeling immediately. They should carefully lay the film back down over the lifting area. The user can then use their finger or the squeegee to press the specific part of the design back onto the surface. After re-burnishing the spot, they can resume peeling the top film slowly.
Once the carrier sheet is completely removed, the vibrant, permanent design is fully applied. The dtf clear film process is complete. For maximum durability, it is best to let the item cure.
- Curing Time: Allow the applied transfer to sit for at least 24 hours before use or washing.
- Purpose: This curing period allows the adhesive to form its strongest possible bond with the substrate, ensuring long-lasting results.
Following this careful removal and curing process guarantees a professional-quality finish that is both visually stunning and durable.
How to Apply Transfers on Different Surfaces
The versatility of UV DTF transfers allows for customization on a wide array of items. However, the application technique may require slight adjustments depending on the substrate's shape and texture. Mastering these nuances ensures a flawless finish on any product.
Hard, Smooth Surfaces (Glass, Metal)
Hard, non-porous surfaces like glass, metal, and acrylic are ideal for UV DTF applications. Their smooth, uniform nature provides the perfect canvas for the adhesive to create a strong, even bond. The standard application process—clean, peel, place, burnish, and remove—works perfectly here. Users will find that the transfer adheres quickly and securely.
A primary advantage of applying transfers to these materials is their exceptional durability. When applied correctly, high-quality UV DTF designs on glass are remarkably resilient.
- The cured UV inks form a hard, shell-like layer that can withstand dishwasher temperatures, which typically range from 70–90°C.
- Protective film layers create a sealed coating around the ink, shielding it from water and harsh detergents.
- Industrial-grade adhesives are specifically formulated to bond to glass and resist failure under high heat and moisture.
Note: 🛡️ For maximum longevity in a dishwasher, users should place the customized item on the top rack and avoid abrasive detergents. The quality of the materials is also crucial; premium UV inks and films deliver superior performance.
Curved Surfaces (Tumblers, Mugs)
Applying a dtf clear film to a curved surface like a tumbler or mug requires a more strategic approach. The main challenge is to lay the design flat without creating wrinkles or bubbles. The key is to control the application from the center outwards.
A recommended technique is to start by pressing down the middle of the transfer first. The user should align the design and secure the vertical centerline with their finger or a squeegee. From there, they can work their way outwards, smoothing the transfer around the curve. This method pushes air away from the center and prevents it from getting trapped. For a full wrap design, it is important to ensure the edges meet perfectly without overlapping.
For very complex curves or tapered objects, applicators can make small cuts into the clear carrier film around the design. These relief cuts allow the film to flex and conform to the shape without wrinkling the transfer itself.
Textured Surfaces (Treated Wood)
Textured surfaces, such as sealed or painted wood, present the most significant challenge. The adhesive needs to make full contact with the substrate, which is difficult when the surface has peaks and valleys. Success on these materials hinges on two factors: surface preparation and thorough burnishing.
First, the surface must be non-porous. Raw, untreated wood will absorb the adhesive, causing the application to fail. The wood must be sealed with paint, lacquer, or a clear coat before application. After cleaning the sealed surface, the user can apply the transfer.
Pro Tip: 🔥 Burnishing is the most critical step for textured items. The user must apply intense, repeated pressure with a squeegee to force the adhesive into every crevice of the texture. Some professionals use a heat gun on a low setting to gently warm the transfer after the initial burnishing. This heat softens the adhesive slightly, allowing it to conform better to the texture. The user should then burnish the design again while it is warm to secure the bond.
Troubleshooting Common Application Issues
Even with a straightforward process, users can sometimes encounter minor issues. Most problems are easily corrected with a few simple adjustments to the application technique or environment. Understanding the cause of these issues helps users achieve a perfect result every time.
The Transfer Isn't Sticking
Adhesion failure is often the most frustrating issue, but it is almost always preventable. If a transfer fails to stick, the user should review their process. The most common culprits are related to the surface, materials, or environment.
- Improper Surface Preparation: The surface must be completely clean and dry. Any residue, even from fingerprints, will prevent a strong bond.
- Poor Quality of Adhesive Materials: Substandard or expired transfers can have weak adhesive properties, leading to peeling or edge lifting.
- Environmental Factors: The ambient environment significantly affects adhesion. Inconsistent temperature or high humidity can impact how the adhesive cures, leading to failure. A controlled, stable workspace is crucial for success.
Air Bubbles Appear Under the Design
Air bubbles become trapped when the transfer is not applied with even pressure. The best way to prevent them is by using the correct squeegee technique during the burnishing step.
Technique: ✍️ The "center-out" method is a professional technique for bubble-free application. The user should start applying pressure in the middle of the design and work outwards with firm, overlapping strokes. This process pushes any trapped air toward the edges.
If a small bubble appears after removing the top film, the user can often fix it. They can pierce the bubble with a fine pin or the tip of a craft knife and then press the air out with their finger.
Parts of the Design Lift Off
Sometimes, small or intricate parts of a design may try to lift off with the clear carrier film. This issue often points to insufficient burnishing or environmental moisture. DTF transfers can absorb humidity from the air. This moisture compromises the adhesive bond, especially on fine details.
If a section begins to lift during peeling, the user should stop immediately.
- Carefully lay the carrier film back down over the design.
- Use a squeegee or finger to re-burnish the lifting area with firm pressure.
- Resume peeling the film slowly, sometimes starting from the opposite corner can help.
This extra attention ensures every part of the design remains securely on the substrate.
Mastering UV DTF application hinges on a few core principles. A perfectly clean and dry surface is non-negotiable for success. Users must apply firm, even pressure to create a permanent bond and should always peel the top film slowly at a sharp angle. With practice, anyone can achieve professional, durable results on projects from tumblers to tech gear.
Final Tip: ⏳ For maximum longevity, which can range from 2-5 years, users should allow the transfer to cure for at least 24 hours before washing or use.
FAQ
Can I reposition a UV DTF transfer after placing it?
No, repositioning is not possible. The adhesive creates an instant, permanent bond upon contact. Users must align the design carefully before it touches the surface.
Technique: 📏 The "hinge method" using painter's tape offers excellent control for precise, one-time placement.
Are the finished designs waterproof and dishwasher safe?
Yes, the transfers are waterproof after a 24-hour cure time. For items like glassware, they are generally top-rack dishwasher safe. However, hand washing is the recommended method to ensure the longest possible lifespan for the design.
What should I do if the design lifts while peeling the top film?
The user should stop peeling immediately. They can lay the film back down and re-burnish the lifting area with a squeegee. Afterward, they should resume peeling slowly from a different corner to help secure the design.
Why is the transfer not sticking to the surface?
Adhesion failure usually points to improper surface preparation. The surface must be completely clean, free of oils, and fully dry. Using isopropyl alcohol and allowing it to air dry completely is a non-negotiable step for a successful application.
See Also
Leading Precoat Solutions for Advanced Filtration Systems: A 2025 Outlook
Silicone Sealant: The Indispensable Adhesive for Contemporary Building and Decor
Essential Starter Guide: Frame Plate Kits for Automotive Structural Enhancement
Innovative Folder Gluer Advancements Shaping 2025 Carton Production Lines
Industrial Applications and Dissolution Methods of 2 5-Furandicarboxylic Acid