Commercial Dual Gun Charger Installation Made Simple
Your business can lead in the growing EV charging market. Fleets are rapidly electrifying to meet new demands.
A recent survey shows 87% of fleet owners plan to add electric vehicles within five years.
You can meet this need with a B6 OCPP 1.6 Commercial Dual Guns AC Charger. The process involves a site assessment, hardware selection, and professional installation.
Key Takeaways
- Plan your EV charger installation carefully. Check your site, electrical power, and local rules first.
- Choose the right charger and software. A B6 OCPP 1.6 dual-gun AC charger offers good features and flexibility.
- Hire certified electricians for installation. They ensure your charger is safe and works correctly.
Step 1: Site Assessment and Planning
A successful installation begins with careful planning. You must evaluate your property before buying any hardware. This first step ensures your charging station is convenient, compliant, and cost-effective.
Choosing the Optimal Location
You should select a location that maximizes visibility and usage. Place your chargers near major driving routes or close to amenities like shops and restaurants. This makes them more appealing to drivers. Also, consider your typical customer's dwell time. A Level 2 AC charger is perfect for locations where people stay for an hour or more.
Your charger location must also be accessible. Following the Americans with Disabilities Act (ADA) ensures everyone can use your station.
You need to provide enough space for vehicles and users. The table below shows the minimum dimensions for an ADA-compliant charging space.
| Feature | Minimum Dimension |
|---|---|
| Vehicle Charging Space Width | 132 inches (11 feet) |
| Access Aisle Width | 60 inches (5 feet) |
| Clear Floor/Ground Space at Charger | 30 inches x 48 inches |
| Surface | Firm, stable, slip-resistant |
Assessing Electrical Capacity
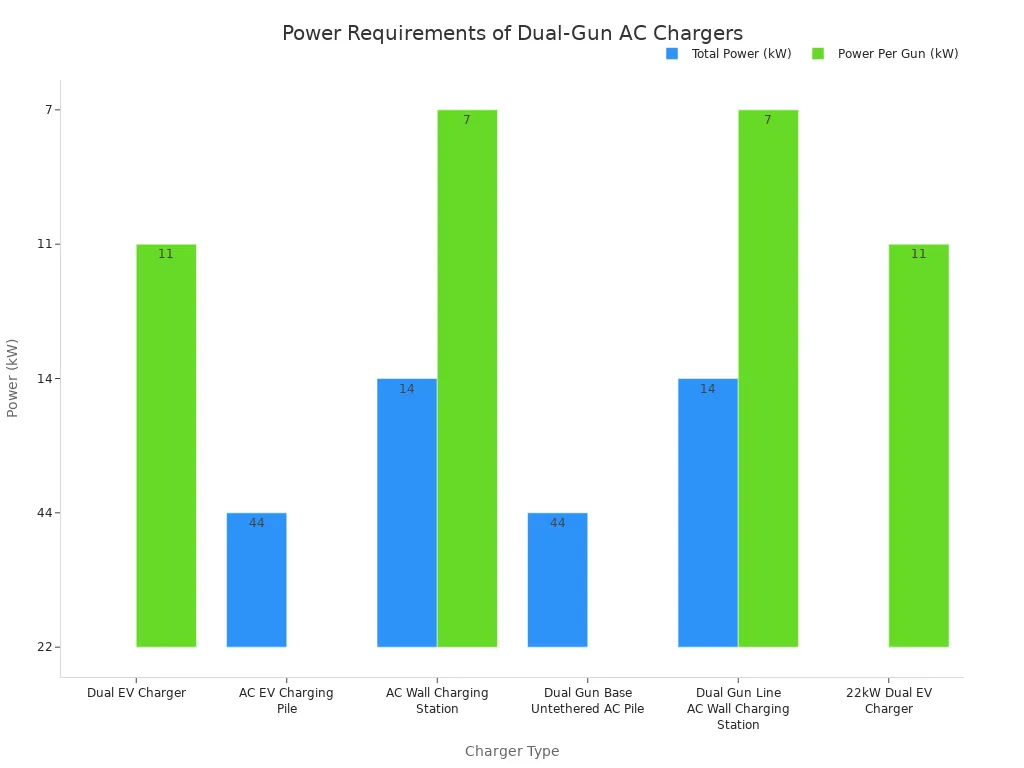
Next, you must confirm your building has enough electrical power. A qualified electrician can calculate your property's total electrical load. This step helps you avoid expensive and unexpected panel upgrades. Your dual-gun AC charger will add a significant new load to your system. Power needs vary by model, but many require between 14 kW and 44 kW.
Navigating Permits and Regulations
Finally, you must follow all local rules and codes for your installation. Compliance ensures your station is safe and legal. You will likely need to secure several permits before work can begin. Common requirements include:
- An electrical permit
- Zoning and site plan approvals
- Compliance with the National Electrical Code (NEC)
Your station must also meet all ADA standards. This includes providing a clear path to the charger and ensuring controls are within reach for all users.
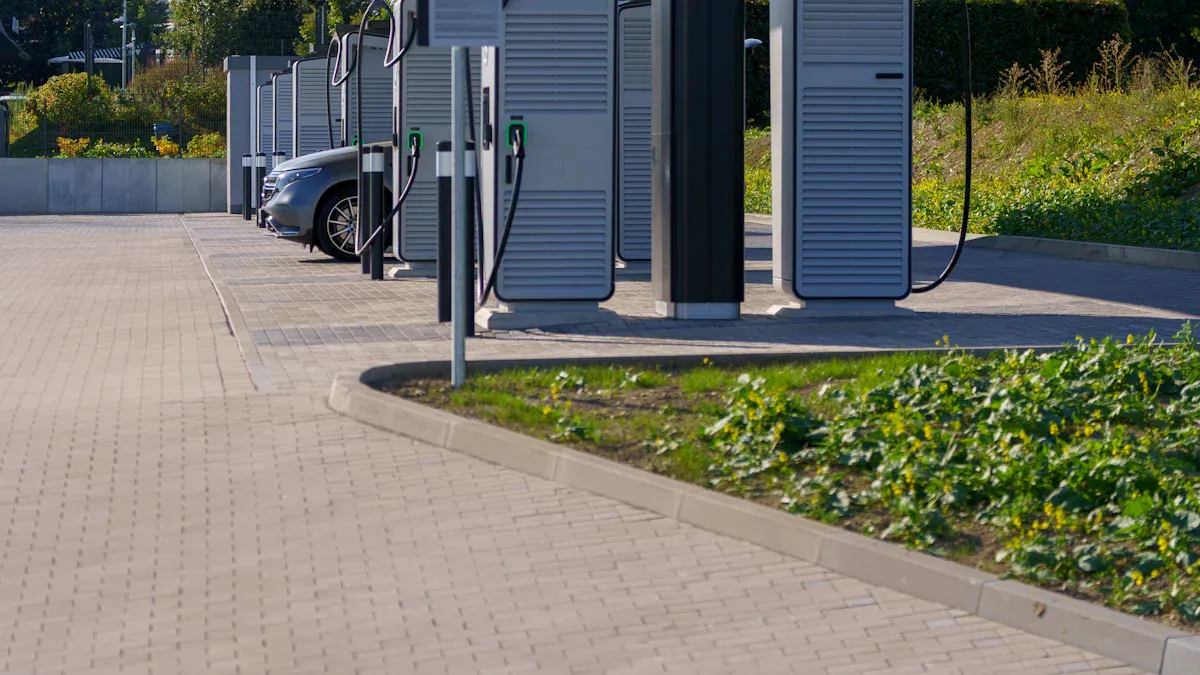
Step 2: Selecting Your Dual-Gun AC Charger
After planning your site, you must choose the right charging hardware and software. This decision impacts user experience, durability, and your ability to manage the station effectively.
Key Hardware Features to Compare
You first need to select the right charging level for your location. Level 2 AC chargers are the standard for commercial properties. They are perfect for places where drivers park for an hour or more, like offices, retail centers, and hotels.
| Feature | Level 2 AC Chargers | DC Fast Chargers (DCFC) |
|---|---|---|
| Power Source | 240-volt AC | High-voltage DC |
| Charging Speed | Adds 12-80 miles of range per hour | Charges to 80% in 20-60 minutes |
| Best For | Workplaces, retail, hospitality | Highway corridors, quick stops |
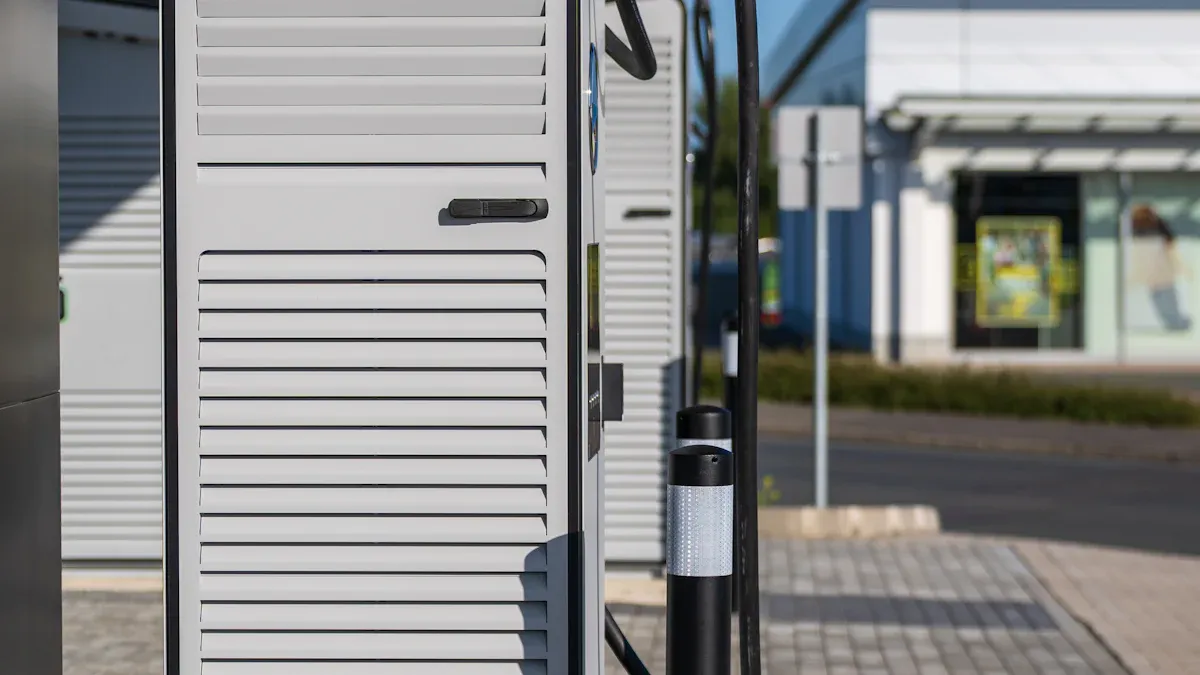
Your charger must also withstand the elements. Look for a high durability rating for outdoor units.
For the best weather protection, you should choose a charger with a Type 4X enclosure. This rating protects against rain, dust, and corrosion, making it ideal for nearly any environment.
Why Choose a B6 OCPP 1.6 Commercial Dual Guns AC Charger
A B6 OCPP 1.6 Commercial Dual Guns AC Charger offers advanced features for station owners. The Open Charge Point Protocol (OCPP) 1.6 allows your charger to communicate with any open network. This gives you the freedom to choose the software provider that best fits your business. Key OCPP 1.6 features include:
- Smart Charging: Manage power usage to avoid high electricity costs.
- Remote Management: Monitor and diagnose your station from anywhere.
- Reservations: Allow drivers to book a charging spot in advance.
The B6 OCPP 1.6 Commercial Dual Guns AC Charger provides these essential management tools.
Evaluating Software and Network Providers
Your B6 OCPP 1.6 Commercial Dual Guns AC Charger needs a network to manage payments and access. You can connect it to major networks like ChargePoint, Flo, or Electrify America. When you evaluate providers, ask about their fee structure. Most charge monthly fees for network access and payment processing, often ranging from $50 to over $300. Choosing a flexible B6 OCPP 1.6 Commercial Dual Guns AC Charger ensures you are not locked into a single provider.
Step 3: The Professional Installation Process
With your site plan and charger selected, you are ready for the physical installation. This phase requires a skilled professional to ensure your station is safe, compliant, and functions correctly from day one.
How to Vet and Hire a Certified Electrician
You must hire an electrician with specific experience in EV charging. Look for professionals with industry-verified credentials, such as an SAE International EVSE Technician certification. Many manufacturers, including Tesla and ChargePoint, also offer their own certification programs. When interviewing candidates, ask key questions to confirm their expertise:
- What will it cost to install the EV charger?
- How much power do I have for an EV charger?
- What are my future electrical needs?
Their answers will reveal their understanding of load calculations, permitting, and project scope.
The Installation Day Checklist
Your installation partner will manage the construction process. The installation day involves several key steps. First, contractors will prepare the site and manage equipment delivery. Next, they will handle all trenching, conduit runs, and utility connections. Finally, they will mount the charger and complete the wiring.
Tip: Maintain clear communication with your solutions provider. They will coordinate the entire process, from hiring contractors to managing the project timeline. 🚧
Final Inspection and Electrical Sign-Off
Your project is not complete until it passes a final inspection. Your electrician must submit all required documentation to the local authority. This paperwork typically includes:
- Detailed electrical plans and schematics.
- Engineering calculations for the new electrical load.
- A completed Certificate of Compliance.
An inspector will review the work to ensure it meets all safety codes. Once approved, you will receive the official electrical sign-off needed to operate your station.
Step 4: Commissioning and System Activation
After the physical installation, you will bring your charging station to life. Commissioning is the process of connecting your hardware to its management software and preparing it for public use. This final setup ensures your station operates smoothly from day one.
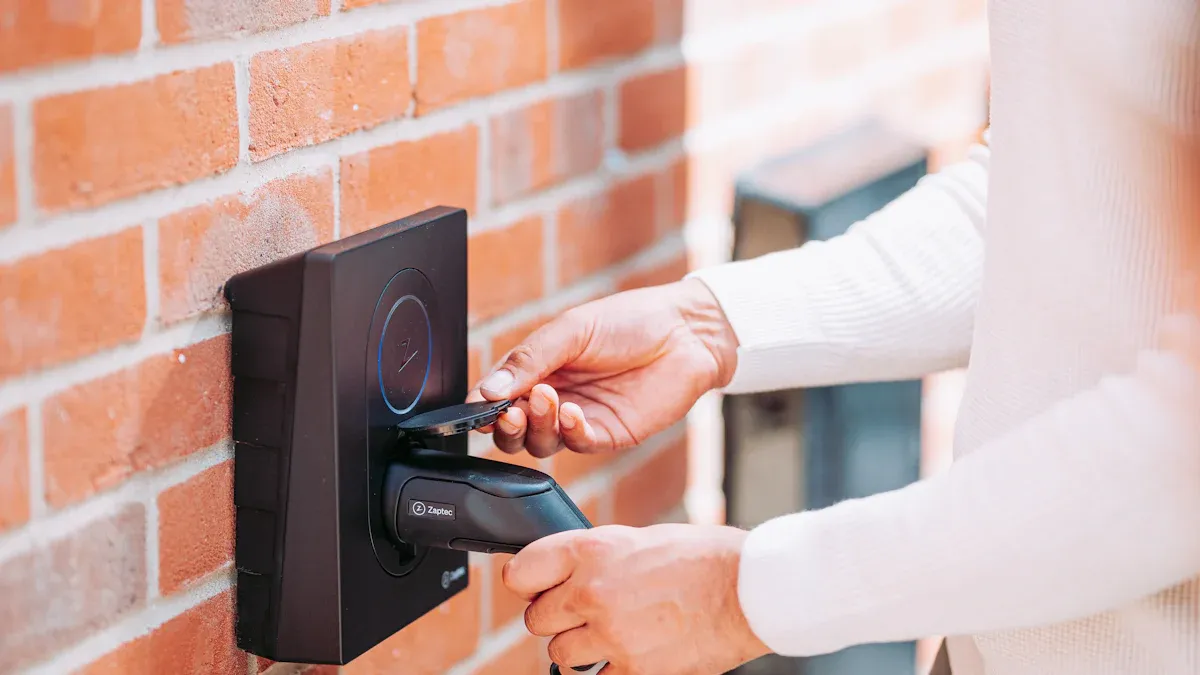
Connecting Your Charger to the Network
Your first task is to connect your B6 OCPP 1.6 charger to your chosen software network. 🌐 Your installer will establish a stable internet connection, usually through a cellular modem or Ethernet cable. This link allows the charger to communicate with the central management system. You can then monitor the station's status, track usage, and perform remote diagnostics. This step officially puts your charger "on the grid" and makes it visible to your network provider.
Configuring Payment and Access Rules
Next, you will set up rules for who can use your charger and how they will pay. You can control access using mobile apps or RFID cards, which are great for offering special rates to employees or members. 💳 You also need to choose a pricing model. Common options include:
- Kilowatt-hour (kWh) Rates: You charge drivers for the exact amount of energy they use. This is a fair and transparent method.
- Flat Fee Models: You charge a fixed price for each session, which offers simplicity for users.
- Per-Minute Pricing: You charge based on the time connected, which is common in some states.
Final System Testing Before Go-Live
Before you welcome your first customer, your installer must perform a complete system test. ✅ This is more than just plugging in a car. A thorough test includes a visual inspection of the hardware, a full electrical safety check, and simulating potential failures. This process confirms that the charger communicates correctly with the network and that all safety features are working. A successful test ensures a reliable and safe experience for every driver.
Step 5: Managing Costs and Maximizing ROI
You can turn your new charging station into a profitable asset with smart financial planning. Understanding your total investment and ongoing expenses helps you set the right pricing and achieve a strong return.
Breaking Down Installation Costs
Your total project cost goes beyond the price of the charger itself. You should budget for several key expenses to get a complete financial picture. These costs typically include:
- The charging hardware and software
- Professional labor for installation
- Permit and inspection fees
- Potential electrical panel or transformer upgrades
- Site work like trenching and concrete pouring
Finding and Applying for Incentives
You can lower your initial investment with government incentives. The federal Alternative Fuel Vehicle Refueling Property Credit is a great place to start. 💰
Your business may receive a tax credit for 6% of the equipment cost, up to $100,000 per charger. You can increase this credit to 30% if your project meets certain wage and apprenticeship requirements.
This credit covers the charger, parts, and installation labor.
Planning for Ongoing Maintenance
Your station requires regular care to ensure it operates reliably. You should plan for routine maintenance tasks and their associated costs. Annual maintenance for a Level 2 charger typically costs between $200 and $500. Common tasks include:
- Keeping the equipment clean
- Inspecting cables for wear and tear
- Performing software updates
- Managing network fees, which often range from $10 to $50 per month
A good maintenance plan protects your investment and keeps drivers happy. ✅
You can successfully install a charger by following these five steps. You ensure a smooth project with careful site planning and a certified installer. Your new B6 OCPP 1.6 Commercial Dual Guns AC Charger becomes a valuable amenity and a new source of revenue for your business. ✅
FAQ
How long does a dual-gun charger installation take?
A standard installation takes one to two days. Complex projects with trenching or major electrical work may require more time to complete safely and correctly.
Can I manage multiple chargers from one account?
Yes. Your network software lets you manage all your stations. You can set prices, track usage, and monitor status from a single dashboard. 🖥️
Do I need special parking spaces for EV chargers?
Yes, you need accessible spaces. Your spots must meet ADA guidelines for width. You must also provide a clear access aisle for all users.
See Also
Comparing the Best AR-15 End Plates: A Comprehensive Rifle Accessory Guide
Leading Ampoule Filling Line Manufacturers: A Production Equipment Comparison
Custom Cargo Lifts: Business Advantages and Disadvantages You Should Know
Auto Reinforcement: A Beginner's Guide to Frame Plate Kit Installation
Essential Pressure Plate Knowledge: Smart Facts to Save Your Money