Fix All High Tack Super Strong Bonding Sealant Never Lets You Down
You want a sealant that really sticks and never lets you down. Fix All High Tack Super Strong Bonding Sealant works in so many places. You can use it for bonding in building or metal projects. It even handles elastic structural bonding in buses, trains, and ships.
Many people trust it for heavy-duty jobs like decorative elements, façade panels, and kitchen joints. It meets tough BRL 3107 construction adhesive standards, so you get a strong bond every time.
Materials and Tools for Fix All High Tack Super Strong Bonding Sealant
Essential Materials
Before you start your project, you need to know which materials work best with this sealant. You can use it on many surfaces, but not all. Check out this table to see what works and what does not:
| Material Type | Compatibility |
|---|---|
| Porous Materials | Compatible |
| Non-Porous Materials | Compatible |
| PE, PP, PTFE | Not Compatible |
You can bond wood, metal, glass, stone, and even ceramics. Just avoid using it on PE, PP, or PTFE plastics. These plastics do not bond well with most adhesives.
When you pick your materials, keep these factors in mind:
| Factor | Description |
|---|---|
| Compatibility | Make sure the adhesive matches the base material. |
| Softening Point | Check if the adhesive can handle the heat your project might face. |
| Glass Transition Temperature (Tg) | Think about the temperature range for your application. |
- You should also ask yourself:
- Do you need a permanent bond or something you can remove later?
- Will your project face hot or cold temperatures during use or storage?
Tip: Always test a small area first if you are unsure about the material.
Recommended Tools
You do not need fancy tools to get great results. Here is a list of what you should have ready:
- Caulking gun (for cartridge application)
- Utility knife or scissors (to open the cartridge)
- Clean cloths or paper towels (for wiping up excess)
- Masking tape (for neat edges)
- Gloves (to keep your hands clean)
- Smoothing tool or spatula (for shaping the sealant)
With these tools and the right materials, you set yourself up for a strong, lasting bond every time you use Fix All High Tack Super Strong Bonding Sealant.
Surface Preparation for Fix All High Tack Super Strong Bonding Sealant
Getting your surfaces ready is the secret to a strong, lasting bond. If you skip this step, your project might not hold up as well as you want. Let’s walk through the best way to prepare your surfaces before you grab your Fix All High Tack Super Strong Bonding Sealant.
Cleaning the Surface
You want your surface as clean as possible. Dirt, dust, and grease can stop the sealant from sticking. Here’s what you should do:
- Wipe away any dust with a dry cloth.
- Use a mild cleaner or rubbing alcohol to remove grease or oily spots.
- Scrub off any old paint, loose material, or flaky bits.
- Let the surface air out for a few minutes after cleaning.
Pro Tip: Surfaces must be clean and free of dust and grease. This helps the sealant stick better and last longer.
Drying and Inspecting
After cleaning, make sure the surface is dry. Water or moisture can weaken the bond. You can use a towel to speed up drying, or just let it sit for a while. Once dry, check the area closely. Look for cracks, holes, or rough spots. If you see any, fix them before you move on. A smooth, dry surface gives you the best results.
Masking for Neat Edges
If you want your project to look sharp, masking tape is your friend. Place strips of tape along the edges where you plan to apply the sealant. This keeps the lines straight and stops the sealant from spreading where you don’t want it. When you finish applying the sealant, peel the tape off right away for a clean edge.
Masking helps you get a professional look, even if you’re new to using sealants.
Now you’re ready for the next step. With a clean, dry, and masked surface, you set yourself up for a strong bond that lasts.
Application Steps for Fix All High Tack Super Strong Bonding Sealant
Opening and Loading the Cartridge
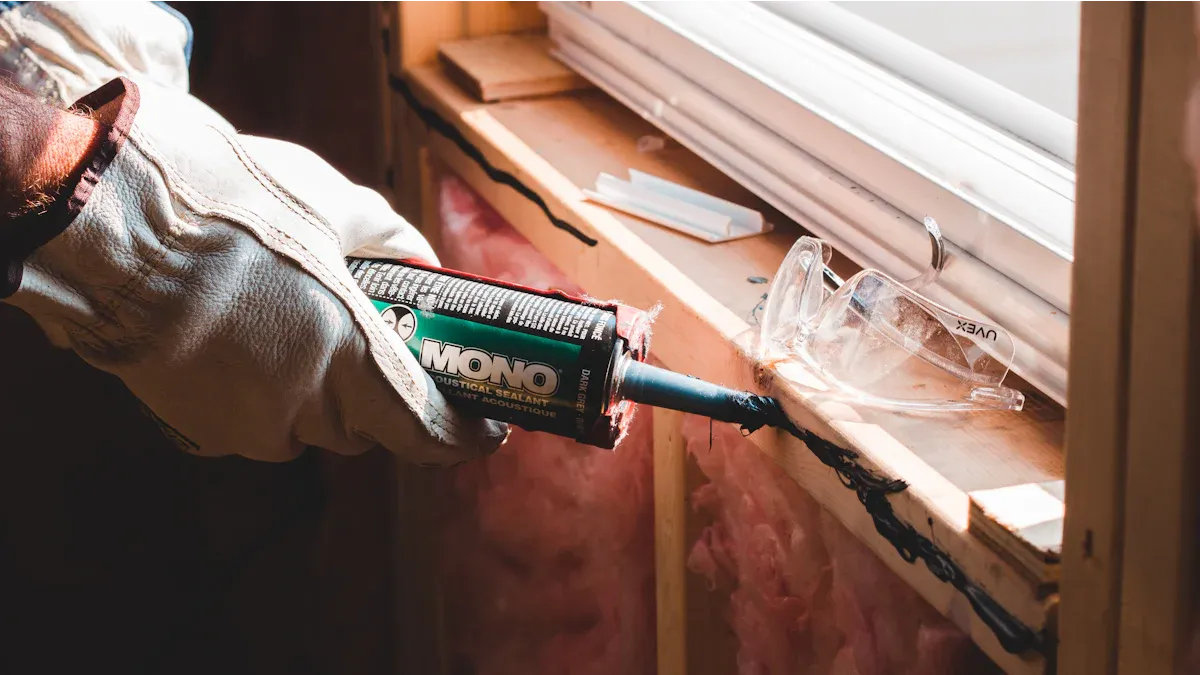
You want to start strong, so get your cartridge ready before you do anything else. First, grab your Fix All High Tack Super Strong Bonding Sealant cartridge and cut off the tip with a utility knife or scissors. Make sure you cut at a 45-degree angle. This gives you better control over the bead size. Next, screw on the nozzle and cut it to the width you need for your project. If you want a thin line, cut near the tip. For a thicker bead, cut lower down.
Now, load the cartridge into your caulking gun. Pull back the plunger, place the cartridge inside, and push the plunger forward until it touches the bottom. Squeeze the trigger a few times to get the sealant moving. You should see a little bit of sealant come out of the nozzle. That means you are ready to go.
Tip: Always keep a cloth nearby. You can wipe away any extra sealant that comes out while you set up.
Applying the Sealant
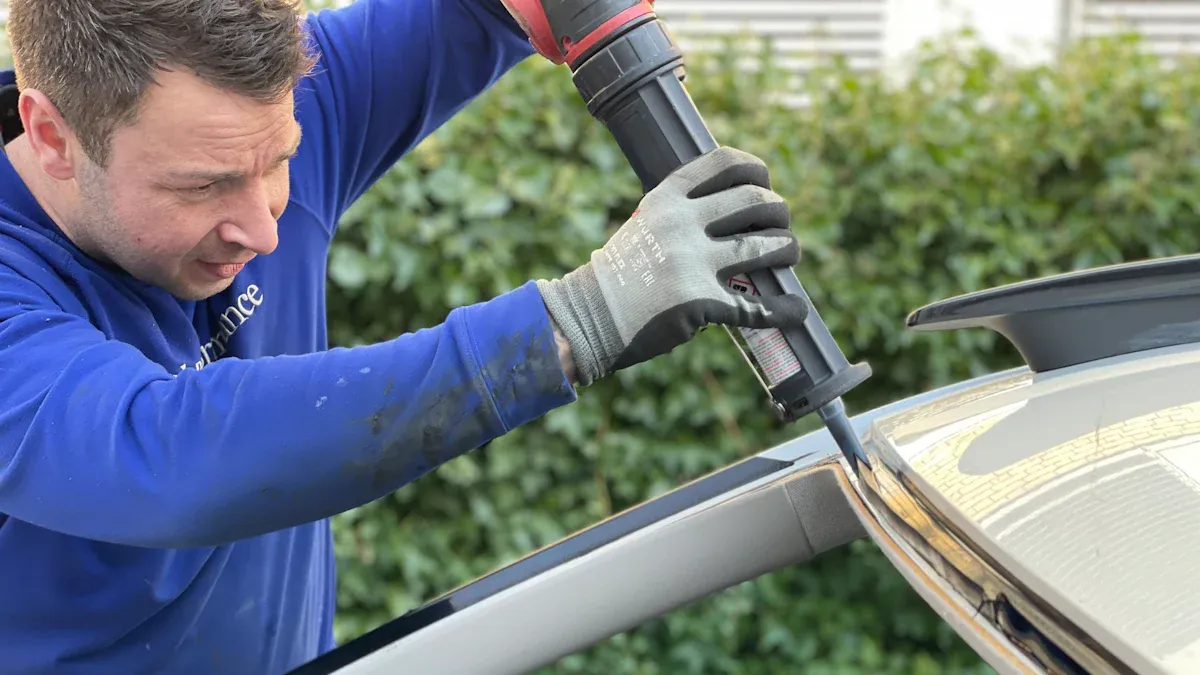
You want a neat, even bead for the best results. Hold the caulking gun at a 45-degree angle to the surface. Start at one end of your joint or seam. Squeeze the trigger gently and move the gun slowly along the line. Try to keep the bead the same size all the way. If you go too fast, you might get gaps. If you go too slow, you could end up with too much sealant.
Environmental conditions can change how the sealant works. Take a look at this table to see what can affect your application:
| Factor | Description |
|---|---|
| Viscosity | Lower viscosity helps the sealant spread and stick better. |
| Surface Energy | Metals and other high-energy surfaces give you a stronger bond. |
| Temperature | Warm temperatures make the sealant tackier and easier to work with. |
| Humidity | Sometimes humidity helps, but too much or too little can change how the sealant sets. |
If you work in a warm room, you might notice the sealant flows more smoothly. On metal or glass, you get a stronger grip. Always check your workspace before you start.
Note: Don’t overapply. A thick bead can get messy and take longer to cure.
Smoothing and Shaping
You want your project to look clean and professional. Smoothing the bead is the secret. Here’s a step-by-step way to get it right:
- Apply a steady bead of sealant where you need it. Keep it neat and don’t use too much.
- Pick the right edge on your Sealant Smoothing Tool. Some tools have different shapes for different jobs.
- Place the tool at the start of the bead. Make sure the angled side faces the way you plan to move.
- Press down gently and slide the tool along the bead in one smooth motion. Try not to stop and start.
- Wipe off any extra sealant from your tool right away with a dry cloth. This keeps your tool clean and ready for the next pass.
Pro Tip: If you want super straight lines, remove the masking tape right after you smooth the bead. This gives you crisp, clean edges every time.
With these steps, you can use Fix All High Tack Super Strong Bonding Sealant like a pro. You get a strong bond and a neat finish, whether you work on wood, metal, or glass.
Cleaning Up Excess
You just finished applying your bead of sealant. Now you see a little extra here and there. Don’t worry! Cleaning up excess sealant is easy if you act quickly. You want your project to look neat and professional, so let’s walk through the best way to tidy up.
Why Clean Up Right Away?
Sealant starts to skin over fast. If you wait too long, it gets sticky and hard to remove. You get the best results when you clean up before it cures.
Steps to Clean Up Excess Sealant
-
Grab a Clean Cloth or Paper Towel
Wipe away any extra sealant right after you smooth the bead. Use a gentle touch. You don’t want to mess up your nice, straight line. -
Use a Damp Cloth for Fresh Sealant
If the sealant is still wet, a damp cloth works great. Gently dab or wipe the area. Don’t rub too hard or you might spread the sealant. -
Try a Plastic Scraper for Dried Bits
Sometimes you miss a spot and it starts to dry. Use a plastic scraper or your fingernail to lift off the edge. Avoid metal tools. They can scratch your surface. -
Check the Edges
Look along the masked lines. If you see any sealant on the tape, peel the tape off slowly while the sealant is still soft. This gives you a crisp, clean edge. -
Clean Your Tools
Wipe your smoothing tool or spatula right away. If you let sealant dry on your tool, it gets tough to remove later.
Tip: If you get sealant on your hands, use soap and water right away. Fix All High Tack Super Strong Bonding Sealant cleans up best before it dries.
What If the Sealant Has Cured?
Sometimes you don’t spot the extra sealant until it’s dry. Don’t panic! You can still fix it.
- Use a utility knife to carefully trim away the dried sealant.
- For stubborn spots, try a little rubbing alcohol on a cloth. Test a small area first to make sure it won’t damage your surface.
- Always work slowly and check your progress as you go.
Quick Reference Table: Cleaning Up Excess
| Situation | What To Do | Tools Needed |
|---|---|---|
| Wet Sealant | Wipe gently, use damp cloth | Cloth, paper towel |
| Partially Dried Sealant | Scrape gently, peel tape | Plastic scraper, tape |
| Fully Cured Sealant | Trim or rub with alcohol | Utility knife, cloth |
You want your finished project to look sharp and last a long time. Cleaning up excess sealant is the final touch that makes your work stand out. Take your time and check your work from different angles. You’ll be glad you did!
Curing and Finishing with Fix All High Tack Super Strong Bonding Sealant
Drying and Curing Times
You want your project to last, so you need to let the sealant cure fully. Drying and curing times can change depending on your workspace. Here’s what you should know:
- Thicker beads take longer to cure.
- Humidity and temperature play a big role.
- The type of surface matters too.
If you work in a room that’s about 68°F (20°C) with 60% humidity, a bead that’s 2-3mm thick will cure in about 24 hours. Cooler rooms or thicker lines need more time. If you rush this step, the bond might not be as strong as you want.
Tip: Don’t touch or move your project until the sealant has cured all the way. Patience pays off!
Checking for Proper Bonding
After the sealant cures, you want to make sure everything stuck together just right. Gently press along the sealed area. The bead should feel firm and not sticky. If you see any gaps or loose spots, you may need to add a little more sealant and let it cure again.
Here’s a quick checklist for checking your work:
- Look for smooth, even lines.
- Press gently to test for firmness.
- Check for any missed spots or gaps.
If you spot a problem, fix it now. It’s much easier to repair before you finish the project.
Final Touches
Now it’s time to give your project that professional look. Peel away any masking tape if you haven’t already. Wipe away any dust or smudges with a clean cloth. If you want, you can paint over the sealant once it’s fully cured. Just make sure the paint is compatible.
🎉 Stand back and admire your work! You used Fix All High Tack Super Strong Bonding Sealant to create a strong, lasting bond that looks great.
Troubleshooting and Tips for Fix All High Tack Super Strong Bonding Sealant
Common Mistakes
Everyone makes mistakes, especially when trying something new. You might use too much sealant or forget to clean the surface. Sometimes, you rush and do not let the sealant cure long enough. Here are some common mistakes you should watch out for:
- Applying sealant to a dirty or greasy surface
- Using the product in very hot or cold weather
- Squeezing out too much or too little sealant
- Not smoothing the bead right away
- Skipping the drying and curing time
Tip: Always read the instructions on the packaging before you start. This helps you avoid most problems.
Fixing Application Errors
If you spot a problem after applying the sealant, you can fix it. Follow these steps to correct the most common errors:
- Clean the surface well before you try again. Use a suitable solvent if needed.
- Check if your project needs a primer. Some surfaces bond better with one.
- Apply the right amount of sealant. Too much or too little can cause weak spots.
- Use a proper tool to smooth the bead. This gives you a neat finish.
- Let the sealant dry and cure as the manufacturer recommends.
If you see gaps or bubbles, remove the faulty section and reapply. Always inspect the area for damage before sealing again.
Expert Advice for Best Results
You want your project to look great and last a long time. Here are some expert tips:
- Work in a clean, dry space with good airflow.
- Plan your work so you do not rush the curing process.
- Test a small area first if you are unsure about the surface.
- Store your Fix All High Tack Super Strong Bonding Sealant in a cool, dry place.
- Keep your tools clean for the next job.
Remember: Taking your time and following each step helps you get a strong, lasting bond every time.
Safety Precautions for Fix All High Tack Super Strong Bonding Sealant
Personal Protection
You want to stay safe while working with Fix All High Tack Super Strong Bonding Sealant. This product is easy to use, but you should always protect yourself. Start by wearing gloves. The sealant can get sticky, and you do not want it on your skin. If you get some on your hands, wash it off with soap and water right away.
Work in a space with good airflow. Open a window or turn on a fan. This helps you avoid breathing in any fumes. If you have sensitive skin or allergies, you might want to wear safety glasses. This keeps your eyes safe from splashes.
Tip: Keep food and drinks away from your work area. You do not want to eat or drink anything that might have touched the sealant.
Safe Handling and Storage
You want your sealant to last and work well every time. Handle the cartridge with care. Always close the nozzle tightly after use. Store the cartridge upright to prevent leaks.
Keep Fix All High Tack Super Strong Bonding Sealant in a cool, dry place. Do not leave it in direct sunlight or near heat. The best storage temperature is between +5 °C and +25 °C. Check out this table for a quick guide:
| Recommended Storage Temperature | Description |
|---|---|
| +5 °C to +25 °C | Cool, dry storage keeps quality high |
If you store the sealant right, it will last longer. The manufacturer says the shelf life is 15 months if you keep the cartridge unopened, dry, and cool. Always store it upright. Here is a handy table:
| Shelf Life | Storage Conditions |
|---|---|
| 15 months | Unopened, dry and cool (5–25 °C), upright storage recommended |
Keep the sealant out of reach of children and pets. If you spill any, clean it up right away. You want your workspace safe and tidy every time you use Fix All High Tack Super Strong Bonding Sealant.
You learned how to use Fix All High Tack Super Strong Bonding Sealant step by step. You cleaned your surface, applied the sealant, and let it cure. This product gives you a strong bond every time. Take a look at these features:
| Feature | Description |
|---|---|
| Initial Grab | Holds materials in place right away. |
| Final Bond Strength | 320 kg/10 cm², much stronger than most adhesives. |
| Durability | Stands up to water, weather, and chemicals. |
| Certification | Meets tough construction standards. |
- You can trust this sealant for quick, lasting results.
- It works in all weather and does not need extra support.
Try these steps and see how easy it is to get a professional finish. Your projects will look great and stay strong.
FAQ
How long does Fix All High Tack take to cure?
You usually see a full cure in about 24 hours for a 2-3mm bead at room temperature. Thicker beads or cooler rooms need more time. Always let it dry fully before you use or move your project.
Can I paint over Fix All High Tack Super Strong Bonding Sealant?
Yes, you can paint over it once it cures. Make sure the paint matches the sealant type. Test a small spot first to check for any issues.
What surfaces does this sealant work on?
You can use it on wood, metal, glass, stone, and ceramics. It does not stick well to PE, PP, or PTFE plastics. Always clean and dry your surface before you start.
Is Fix All High Tack waterproof?
Absolutely! This sealant stands up to water, weather, and even chemicals. You can use it indoors or outdoors without worry.
How do I remove cured sealant if I make a mistake?
Use a utility knife to trim away the dried sealant. For small spots, try rubbing alcohol on a cloth. Always work slowly and check your progress as you go.
See Also
Silicone Sealant: The Essential Adhesive for Contemporary Living
Tips for Correctly Installing Tie Bolts in Concrete
Fortifying Doors and Hinges Against Fires and Floods
Key Benefits of WT20 Thoriated Tungsten Electrodes for TIG Welding