Essential Daily Water Dispenser Maintenance Tips
Tip: Start your day with fresh, clean water. 💧
You can achieve this with two simple habits: wiping the exterior and cleaning the drip tray. These quick tasks are your first defense against germs. They keep your unit in top condition, reducing the need for professional servicing of water dispenser.
Key Takeaways
- Wipe the outside of your water dispenser every day. This removes germs and keeps it looking clean.
- Clean the drip tray daily. This stops mold and bad smells from growing.
- These two simple steps take only two minutes. They keep your water fresh and your dispenser working well.
Your 2-Minute Daily Maintenance Checklist
You can keep your water dispenser sparkling clean in just two minutes each day. This simple checklist is your secret weapon against germs and grime. Follow these two steps to ensure every glass of water is a fresh one.
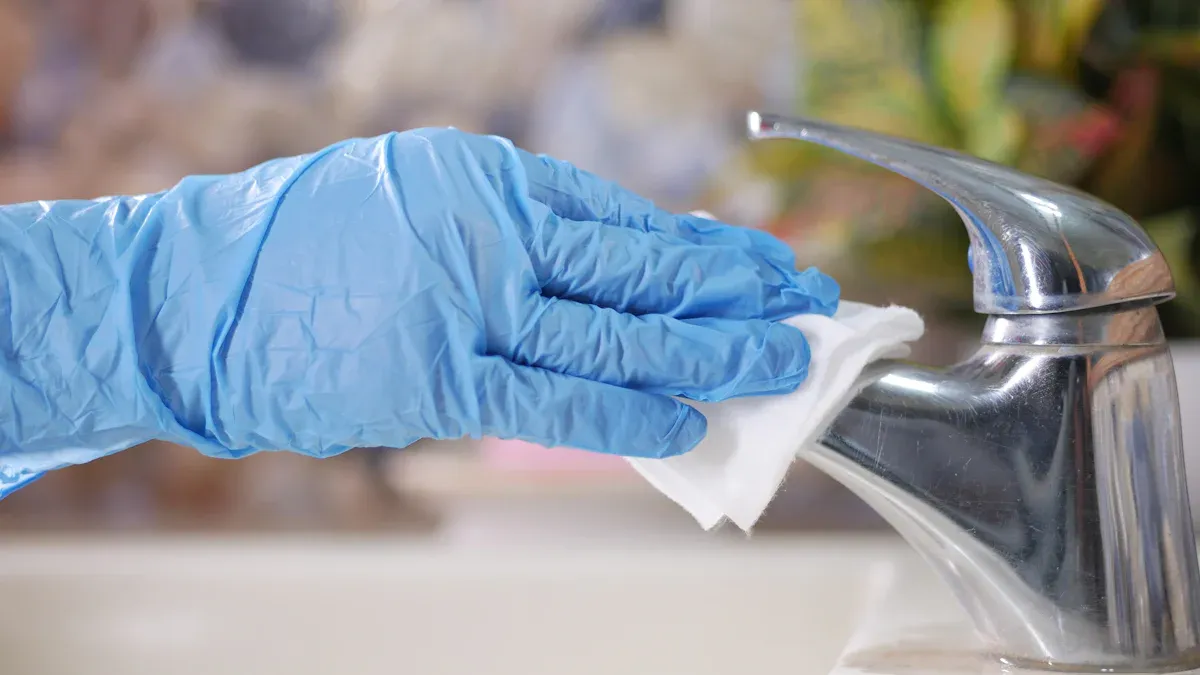
1. Wipe Down All Exterior Surfaces
Your water dispenser gets a lot of traffic. Hands touch the buttons and levers all day long. Dust and kitchen splatters can also settle on its surfaces. A quick daily wipe prevents this buildup.
- Grab a clean cloth. A microfiber cloth works best because it traps dust and germs effectively.
- Dampen the cloth slightly. You only need a little water. Avoid using harsh chemical cleaners for this daily task.
- Wipe everything down. Pay special attention to the dispensing buttons, levers, and the area around the nozzles. Don't forget the sides and top of the unit.
Pro Tip: 💡 Make this part of your morning routine. Wipe the dispenser right after you make your coffee. This simple habit keeps your appliance looking new and hygienic.
This action removes fingerprints, smudges, and invisible bacteria. You maintain a clean look for your kitchen and a safe surface for everyone to use.
2. Empty and Clean the Drip Tray
The drip tray catches spills and overflows. It is a small puddle of standing water. This environment is a perfect breeding ground for mold, mildew, and bacteria if you neglect it.
Follow these simple steps to clean it:
- Remove the tray. Most drip trays slide or lift out easily.
- Empty the water. Pour any collected water into the sink.
- Wash it thoroughly. Use warm water and a little dish soap. A sponge or soft brush can help you scrub away any slimy film.
- Rinse and dry. Rinse all the soap off. Dry the tray completely with a clean towel before putting it back. A dry tray prevents mold from growing back quickly.
Why is this so important? 🤔 A dirty drip tray can create unpleasant odors. It can also become a source of contamination. Cleaning it daily stops these problems before they even start. It is one of the most effective ways to maintain a healthy water station.
Why These Daily Steps Are Non-Negotiable
That two-minute routine does more than just make your dispenser look good. You are actively protecting your health and your appliance with these simple actions. Understanding the "why" makes it easier to build the habit.
Preventing Germ and Bacteria Buildup
Every time someone uses the water dispenser, their hands can transfer germs to the surface. Scientific studies show that without regular cleaning, water dispensers can harbor various microbes.
Did You Know? 🤔 Dirty fingers can touch the water dispenser, contributing to bacterial growth. Your daily wipe removes these germs before they multiply.
Common contaminants found on unclean dispensers include:
- Fecal Coliform Bacteria, which indicates unsanitary conditions.
- Pseudomonas aeruginosa and Stenotrophomonas maltophilia.
- General microbial contamination that can affect water quality.
Your quick daily wipe is a powerful tool that removes these invisible threats from the surfaces everyone touches.
Stopping Mold and Odors Before They Start
The drip tray is a perfect environment for mold. Mold is a type of fungus that grows quickly in damp places. The small amount of standing water in the tray is all it needs to thrive, creating a slimy film and unpleasant smells.
By emptying and washing the drip tray each day, you eliminate the moisture that mold and bacteria need to grow. This simple step stops odors before they begin and prevents the spread of mold spores in your kitchen.
Maintaining Your Appliance's Appearance
Water splashes can leave behind mineral deposits, especially if you have hard water. Over time, these minerals build up and create tough, ugly stains on the plastic or stainless steel. This buildup can make your dispenser look old and dirty.
Regular cleaning removes these mineral deposits before they can accumulate. A daily wipe-down prevents this discoloration, keeping your dispenser’s surfaces smooth and shiny. You preserve the clean look of your appliance for years to come.
Tools and Supplies for Easy Cleaning
Having the right tools makes any job easier. You only need a few simple items to keep your water dispenser clean and safe. You can gather these supplies to prepare for both daily and monthly cleaning tasks.
For Daily Wipes
Your daily cleaning routine requires just a few basic supplies. Keeping them handy will help you build a consistent habit.
- Microfiber Cloths: You should use a high-quality microfiber cloth. These cloths are super-soft and non-abrasive, so they will not scratch your dispenser's surfaces. They effectively trap dust and germs. You can use them wet or dry.
- Warm Water: A little warm water is all you need to dampen your cloth for the daily wipe-down.
- Mild Dish Soap: You can use a small amount of gentle dish soap to wash the drip tray each day.
A Smart Investment 💡 Quality microfiber cloths are a great value. They are highly absorbent and durable. You can wash and reuse them hundreds of time, making them an eco-friendly choice for your kitchen.
For Deeper Cleans
For your monthly sanitizing, you will need a food-safe disinfectant to clean the internal parts of the dispenser.
- Food-Safe Sanitizer: You must choose a sanitizer labeled for use on food-contact surfaces. Quaternary Ammonium Compounds, or "Quats," are an excellent choice. They are effective against a wide range of germs and are typically odorless and non-corrosive. Some products come in a ready-to-use, no-rinse formula that is ideal for water-sensitive equipment.
- Protective Gear: You should always protect yourself when handling sanitizing chemicals. Wear gloves and safety goggles to keep your hands and eyes safe.
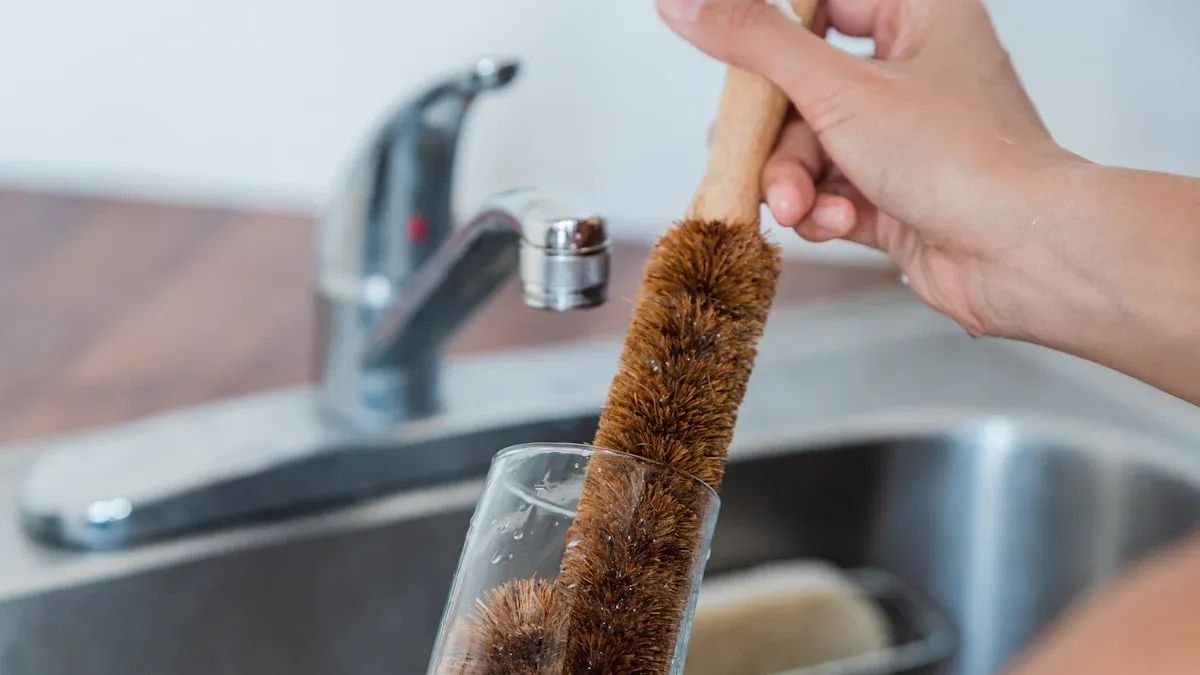
- Soft Bottle Brush: A long, flexible brush helps you scrub inside the reservoir and other hard-to-reach areas.
Always read and follow the sanitizer's label instructions carefully. Proper dilution is key to removing germs safely.
Beyond the Daily Wipe: Your Weekly Check-In
Your daily habits are fantastic for surface-level cleanliness. Once a week, you should spend an extra five minutes on a quick inspection. This weekly check-in helps you spot small issues before they become big problems.
Inspect for Leaks
Water damage can be costly and create a mess. A weekly leak inspection is your best defense. You can protect your floors and your appliance with a quick look.
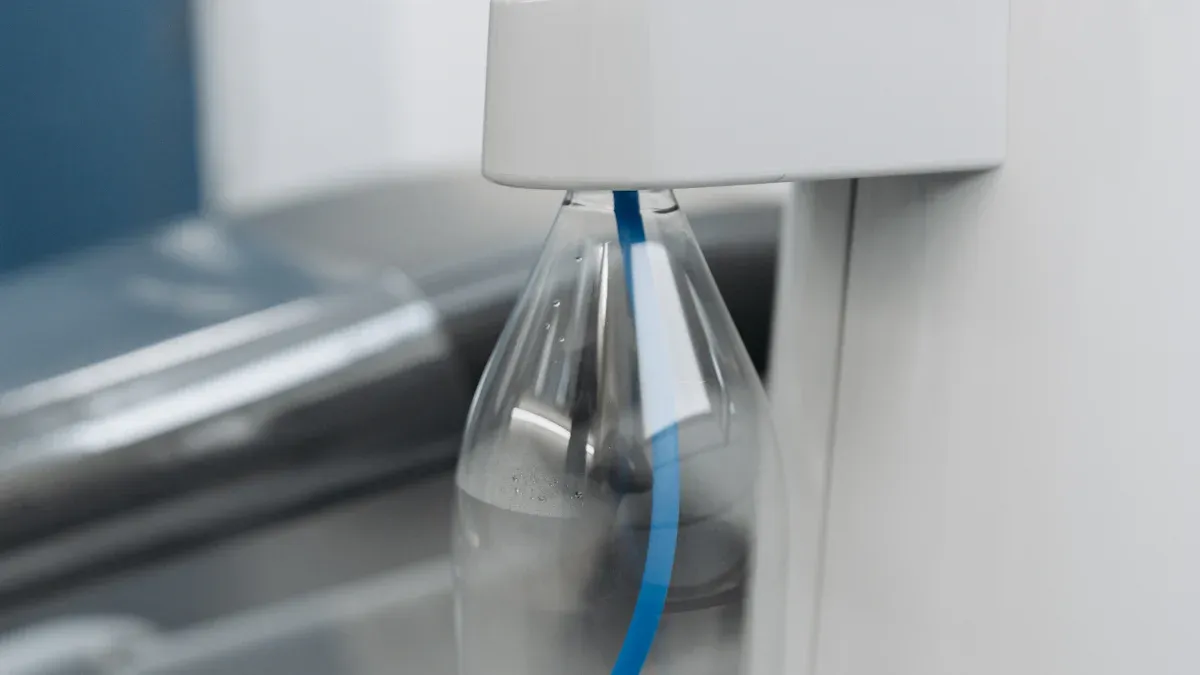
First, check the area around the base of the dispenser for any puddles or dampness. Next, examine the connection point where the water bottle meets the dispenser. A poor seal here is a common source of drips. Also, look at the back of the unit near any water lines or connections. Finding a small drip early allows you to fix it quickly, preventing a larger flood later.
Quick Tip 🕵️ Place a paper towel under your unit for an hour. If it comes back damp, you have a slow leak that needs attention.
Clean the Dispensing Nozzles
Do you notice a slow water flow? Mineral deposits from your water can clog the dispensing nozzles over time. Cleaning them weekly keeps the water flowing freely.
You can easily dissolve these mineral deposits with a simple, natural solution. Follow these steps for a clear flow:
- Mix a solution of equal parts white vinegar and water.
- Use a cloth dipped in this solution to wipe the outside of the nozzles.
- For a deeper clean inside, you can pour the vinegar solution into the dispenser's reservoir.
- Let the solution sit for about 10 minutes to dissolve any internal buildup.
- Finally, drain the solution and flush the system with fresh water to remove any vinegar taste.
This simple process ensures your dispenser works efficiently and delivers a perfect pour every time.
The Monthly Deep Clean: A Guide to Sanitizing
Once a month, you need to perform a deep clean to sanitize the inside of your dispenser. This process removes biofilm and mineral buildup that you cannot see. It ensures your water stays pure and safe.
Preparing Your Cleaning Solution
You can choose between a natural or chemical cleaning solution. For a simple, natural option, you can use white vinegar. Mix it according to the general cleaning ratio.
| Appliance/Use | Vinegar Ratio | Water Ratio |
|---|---|---|
| General Cleaning | 1 part | 1 part |
For a stronger disinfectant, you can use unscented household bleach. Always handle bleach with care.
Safety First! ⚠️
- Protect yourself by wearing gloves and eye protection.
- Work in a room with good airflow by opening a window.
- Never mix bleach with other cleaners, especially ammonia. This can create dangerous gas.
Use about one teaspoon of bleach for every gallon of water to create a safe sanitizing solution.
Sanitizing the Internal Reservoir
First, you must unplug the water dispenser from the wall. Remove the water bottle. Pour your chosen cleaning solution into the internal reservoir until it is full. Let the solution sit for about 5 to 15 minutes. This gives it time to kill germs and dissolve mineral deposits. Next, drain some of the solution through both the hot and cold spigots. This cleans the dispenser's internal lines.
Rinsing Thoroughly to Remove Residue
After sanitizing, you must rinse the system completely. Drain all the remaining cleaning solution from the reservoir. Fill the reservoir with fresh, clean water. Drain this fresh water through both spigots to flush out any leftover solution. You should repeat this rinsing process two or three times. This step is very important. It removes any lingering taste or smell of vinegar or bleach, ensuring your water tastes fresh and clean.
Professional Servicing of Water Dispenser vs. DIY
You can handle most daily and monthly maintenance yourself. However, some problems require an expert. Knowing the difference saves you time and protects your appliance. Proper servicing of water dispenser ensures it runs safely and efficiently.
When to Call a Professional
Some issues point to complex internal problems. You should call for professional servicing of water dispenser if you notice these signs. A certified technician has the right tools and knowledge for these repairs.
- Strange Noises: Do you hear new buzzing, grinding, or loud gurgling sounds? These noises can signal a failing compressor or a struggling water pump. A professional should diagnose these mechanical issues.
- Water Leaks: Puddles forming around your unit suggest a serious problem. You might have a cracked internal tank or a loose tube. A technician can find the source and replace the broken parts.
- Temperature Troubles: If your water is not getting hot or cold, you may have a refrigerant leak or a faulty thermostat. These repairs are not safe for DIY. You need professional servicing of water dispenser for these tasks.
- Persistent Bad Taste: If a deep clean does not remove an unpleasant taste or smell, you need help. A professional can perform a full disassembly and sanitization. This is the best way to ensure your water is safe. Calling for servicing of water dispenser is the right choice here.
What You Can Handle Yourself
You can easily perform many routine tasks. These actions keep your dispenser in great shape. Regular cleaning is the most important DIY job for peak performance.
Safety First! 💡 Always unplug your dispenser before you clean its internal parts.
You can handle all the cleaning tasks mentioned in this guide. This includes wiping the exterior, cleaning the drip tray, and performing the monthly sanitization. You can use mild soap and water or a simple vinegar solution for these jobs. You can also inspect the unit for visible wear and tighten any loose connections you can see. These simple steps are your contribution to the ongoing servicing of water dispenser.
Quick Fixes for Common Dispenser Problems
Even with great care, you might run into a few issues. Many common problems have simple solutions you can try yourself. Here are some quick fixes for your water dispenser.
Slow Water Flow?
A slow trickle of water can be frustrating. This issue often has an easy fix. A clogged water filter is the most common cause.
- Check the Water Filter. Over time, filters collect contaminants and get blocked. You should replace your water filter about every six months to keep water flowing freely.
- Look for Kinks. Make sure the water line behind your unit is not bent or pinched. Straighten any kinks you find.
- Release Trapped Air. Sometimes an airlock can block the flow. You can try removing and reinstalling the water bottle or filter to release the trapped air.
Unpleasant Taste or Odor?
Your water should always taste fresh and clean. If you notice a plastic or metallic taste, you can take action. This problem often points back to cleanliness or the water source itself.
Did you know? 🤔 An old plastic water bottle can leach chemicals into the water, causing a bad taste. Always use fresh, properly stored water bottles.
A dirty dispenser is another major cause of bad taste. Mineral deposits and bacteria can build up inside, creating a metallic or musty flavor. Your monthly deep clean is the best way to solve this. Always rinse the system thoroughly after cleaning to remove any leftover vinegar or bleach taste.
Water Not Cooling or Heating?
If your water temperature is wrong, start with the basics. First, check that the dispenser is plugged in securely. Also, make sure the hot and cold switches are turned on.
- Give It Time: After plugging it in, a dispenser needs time to work. You should wait about 20 minutes for the water to reach the right temperature.
- Know When to Call for Help: If you have checked the power and waited, the problem might be internal. A broken compressor or a faulty heating element requires a professional. You should not attempt these electrical repairs yourself.
Your daily two-minute routine is the best way to keep your dispenser working well. This consistent care helps your appliance last for years, often 5 to 10. You will save money on future repairs and enjoy the peace of mind that comes with every glass of fresh, clean water. 💧
FAQ
How often should I clean my water dispenser?
You should perform different cleaning tasks on a schedule.
- Daily: Wipe the outside and clean the drip tray.
- Monthly: Sanitize the internal reservoir for deep cleaning.
Can I use soap to clean the inside?
No, you should not use soap inside the reservoir. It leaves a residue and affects the water's taste.
Use a vinegar solution or a food-safe sanitizer instead.
Is it okay to leave the dispenser on all the time?
Yes, you can leave your dispenser on continuously. It is designed for constant use. You can turn off the heating/cooling switches to save energy when you are away. 💡